
Testing the Waters
For this tutorial you will need the materials in the zip file below.

For an Italian, French, Dutch, Danish, German and Spanish translation click on the flags.


Unzip the materials into a working folder you have created on your desktop named Testing the Waters. Duplicate and close original tubes using the copies for your work so you will not lose the originals. Place the PspSelection file in your PSP Files/Selections folder. For this tutorial I have used Plugins Flaming Pear/Flood, Filters Unlimited/Background Designers IV/@Random Smelter, Alien Skin Xenofex 2/Shatter, Distort/Polar Coordinates and effects found in PSP. I have also used Animation Shop. To work this tutorial, it is assumed you have some working knowledge of Paint Shop Pro. I have used PSP2019 to create this tutorial.
Thanks go to Nikita for her lovely lady tube and Guismo for her water bubbles tube.
Use the sunflower below to mark your place along the way.
1. New/New Image 467px by 700px. Flood fill with #000000.
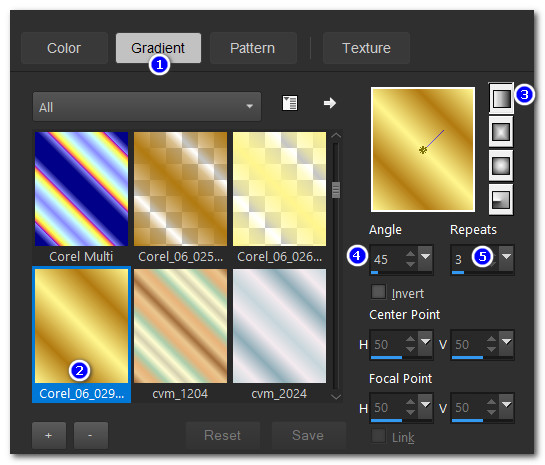
2. In Materials Palette, set Foreground to #fff585, Background to #aa7005. Create a Gradient using Linear set to Angle 45/Repeats 3. Select Corel_06_029. Invert and Center and Focal Points all at Null.
3. Layers/New Raster Layer. Selections/Select All.
4. Open ArasimagesSunflower.png. Copy/Paste into Selection. Deselect.
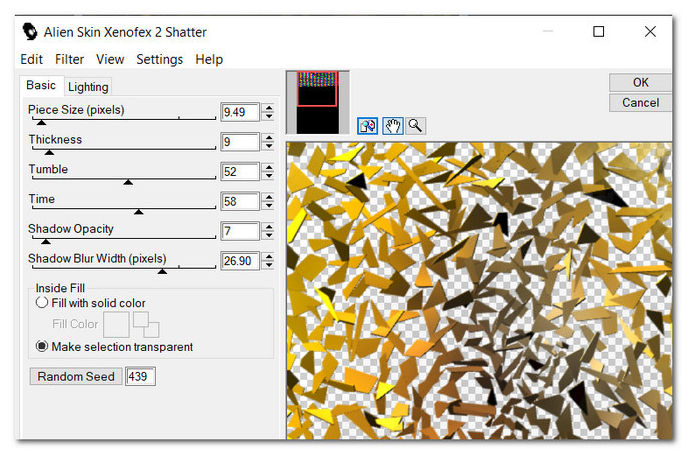
5. Effects/Alien Skin Xenofex 2/Shatter. Under Settings select Almost Gone. Under Basic use settings as seen below.
6. Repeat Alien Skin Xenofex 2/Shatter.
7. Drop Opacity down to 56%.
8. Open ArasimagesSunflower.png. Copy/Paste as New Layer.
9. Adjust/Blur/Gaussian Blur. Radius 20.
10. Effects/I.C.Net Software/Filters Unlimited. Highlight &Background Designers IV/@Random Smelter. Notice you do not have any number settings on the right. We are going to create numbers for your use. Click on Editor.
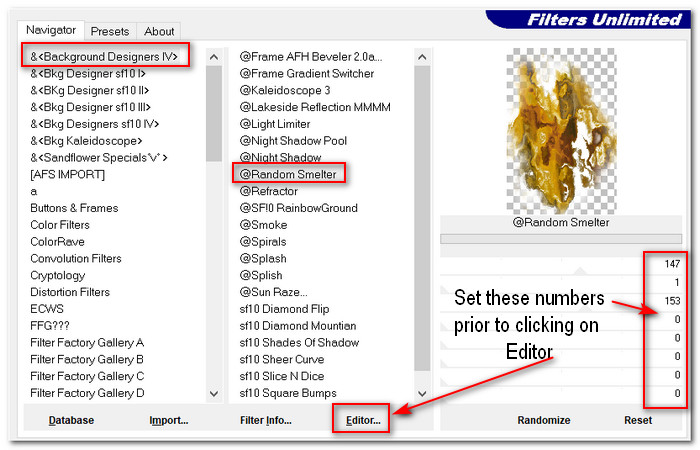
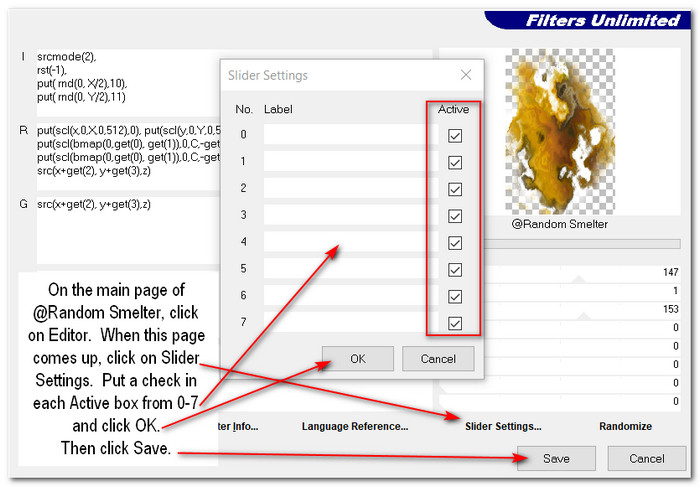
11. When the Filters Unlimited box appears, click on Slider Settings. Another smaller box will appear. Check all of the boxes. Click OK. Set the first line to 147, second line to 1, third line to 153, all the rest set to 0. Click Save. You will be taken back to the beginning page. Click on Apply.
12. Set Opacity down to 80%.
13. Open ArasimagesSunflower.png. Copy/Paste as New Layer.
14. Image/Resize/Resize by 70%/Resize all layers unchecked.
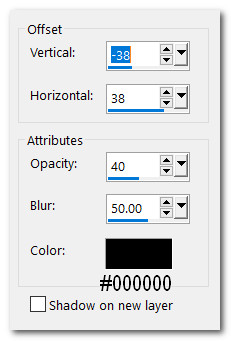
15. Effects/3D Effects/Drop Shadow. Vertical -38, Horizontal 38, Opacity 40, Blur 50, color #000000.
16. Adjust/Sharpness/Sharpen.
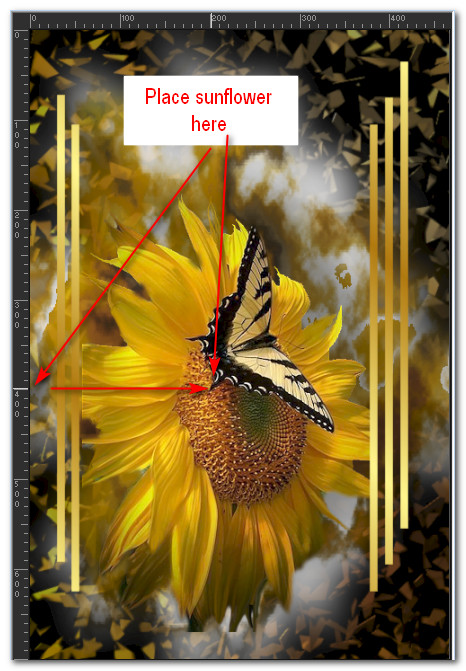
17. Pull sunflower downward as in example below.
18. Layers/New Raster Layer.
19. Selections/Load Save Selection/Load Selection from Disk. From drop down arrow, select ArasimagesSideBars. Load.
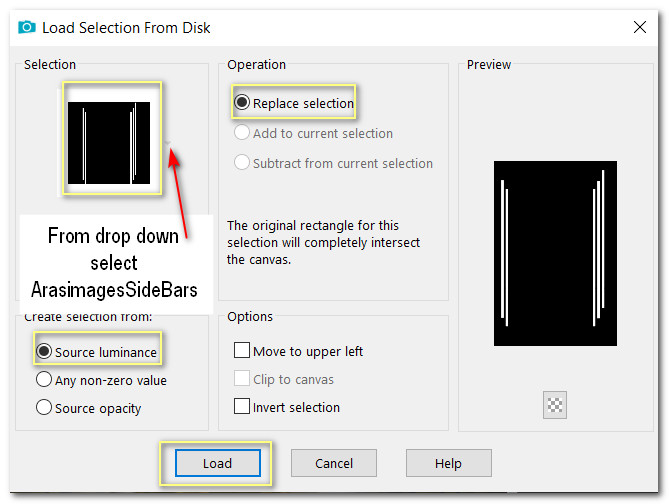
20. Having settings at Match mode: None, Blend mode: Normal and Opacity: 100, flood fill the bars with Foreground Gradient. Deselect.
21. Effects/3D Effects/Drop Shadow. Vertical -38, Horizontal 38, Opacity 40, Blur 50, color #000000.
22. Adjust sunflower and bars if necessary. Save your work at this point as .pspimage.
23. Merge/Merge Visible.
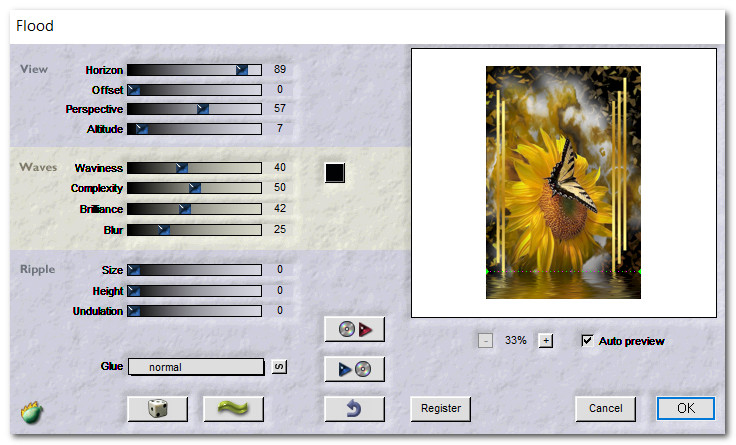
24. Effects/Flaming Pear/Flood.
25. Using Selection Tool/Rectangle/Add (Shift). Feather 0. Anti-alias checked. Selection style: Normal, select around the flood water.
26. Effects/Edge Effects/Enhance. Deselect.
27. Open 13458166875_femmes.pspimage. Copy/Paste as New Layer.
28. Place lady over top of sunflower and on edge of butterfly and her hand touching the water.
29. Duplicate/Merge/Merge Down. Duplicate/Merge/Merge Down again.
30. Using Eraser tool, highlight the bottom layer. Erase the petals from lady's shirt and upper arm. Go back to top layer.
31. Effects/3D Effects/Drop Shadow. Vertical -38, Horizontal 38, Opacity 40, Blur 50, color #000000.
32. Adjust/Sharpness/Sharpen. Merge/Merge Down. COPY/Paste as New Image to workspace. Back to working on your main image.
33. Image/Add Borders/Add 3px border, Symmetric checked, color #000000.
34. Image/Add Borders/Add 75px border, Symmetric checked, color #fff585.
35. Use Magic Wand to activate 75px border. Layers/New Raster Layer. Paste into Selection.

36. Adjust/Blur/Gaussian Blur. Radial 20.
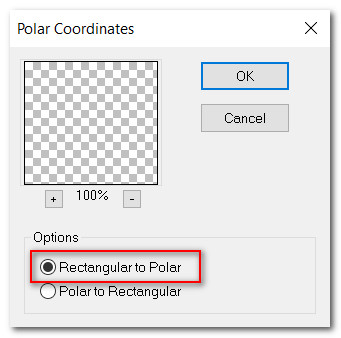
37. Effects/Distort/Polar Coordinates. Repeat Polar Coordinates. Deselect.
38. Image/Add Borders/Add 15px border, Symmetric checked, color #fff585.
39. Activate with Magic Wand. Flood fill by Paste into Selection.
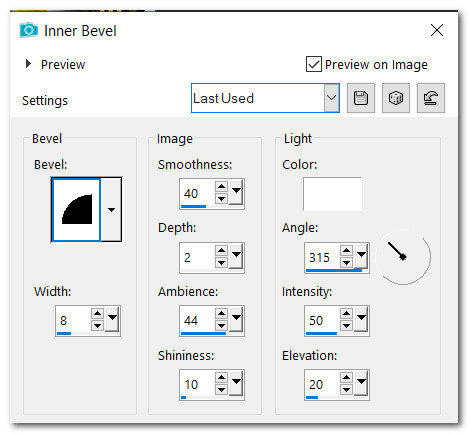
40. Effects/3D Effects/Inner Bevel. Deselect.
41. Image/Add Borders/Add 15px border, Symmetric checked, color #fff585.
42. Activate with Magic Wand. Flood fill with Gradient.
43. Repeat Step #40 Inner Bevel. Deselect.
44. Image/Add Borders/Add 15px border, Symmetric checked, color #000000.
45. Activate with Magic Wand. Paste into Selection. (If not in memory, then go to the copied image on desktop and copy.)
46. Repeat Step #40 Inner Bevel. Deselect.
47. Image/Add Borders/Add 2px border, Symmetric checked, color #fff585.
48. Open calguismistgouttesdepluiedanae22012012.pspimage.
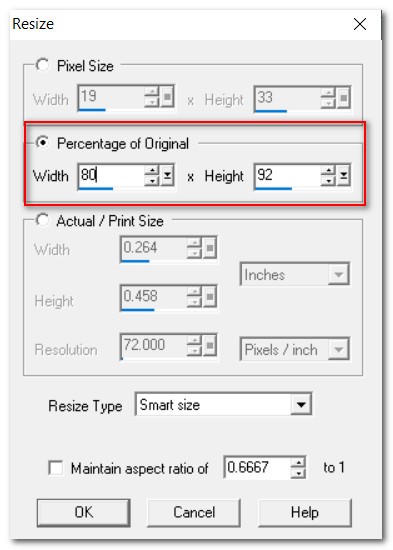
49. Image/Resize/Resize by 44%/Resize all layers unchecked.
50. Copy/Paste as New Layer. Set Blend Mode to Luminance (Legacy). Place at bottom of image.
51. Adjust/Sharpness/Sharpen.
52. Sign your name or leave watermark if you wish and save as .jpg file.
53. Merge/Merge Visible. Copy.
54. We are now starting the animation part of the tutorial.
55. Open Animation Shop. Paste as New Animation in its workspace.
56. Duplicate so you end up with 16 frames total. Go to the first frame, highlight it. Edit/Select All.
57. File/Open/Bubbles.gif. Highlight first frame. Edit/Select All. Copy.
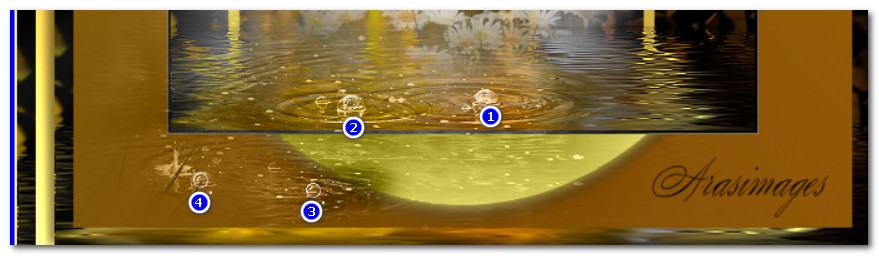
58. Go back to the main working image. Right click inside the first frame/Paste/Into Selected Frame. Place the bubble where you want it and left click to set in place. Below I have shown you where I placed mine.
59. Go back to the bubbles.gif. In the top tool bar, click on Animation/Mirror. Animation/Resize Animation.
60. On the top of the bubbles.gif frames, right click/Copy.
61. Go back to the main working image. Right click inside the first frame/Paste/Into Selected Frame. See below where I placed mine.

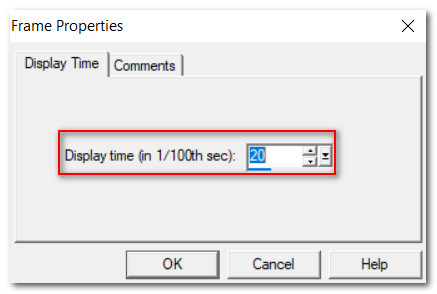
62. Animation/Frame Properties. Set the frame rate at 20. The higher the number, the slower the bubbles will move. You may change it to a lower number if you wish.
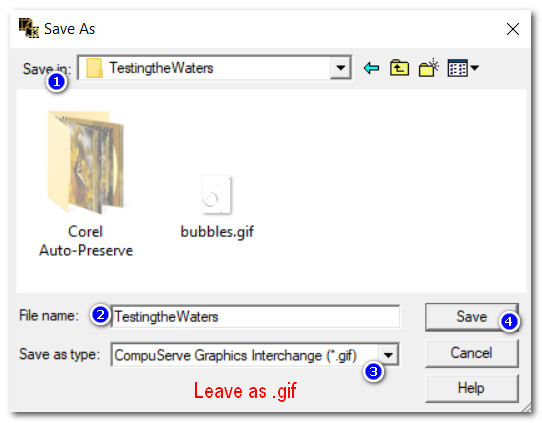
63. File/Save As. When the Save As box appears, give your work a name, state where you will save it and leave the work to save as .gif file. Click Save.
64. As the boxes change, continue clicking on Next, Next, Next and finally, Finish.
65. You are now finished!
Thank you PamelaD and Evatexas for your faithful checking of my tutorials. August 26, 2020.
If you are going to use this tutorial for stationery, cards or place the tutorial/tag on another site, I would appreciate you contacting me for permission, giving Arasimages credit for the original tutorial and if possible, a link back to my site. Thank you.
Copyright © Arasimages All Rights Reserved