
Frost is Coming
For this tutorial you will need the materials in the zip file below.

For an Italian, French, German, Dutch and Spanish translation, click on the flags.


For this tutorial you will need to place the Pattern in your PSP/Patterns folder, the Masks in your PSP/Masks folder and the PresetShapes in your PSP/Preset Shapes folder. Create a working folder on your desktop called Frost is Coming. Unzip all of the materials in this folder. Open the tubes in PSP and make a copy, closing out the originals so you won't lose them. This tutorial was written using the plugin Pic to Painting which can be downloaded free from Corel. The YouTube video shows how to get it free from Corel. Here is the link. https://youtu.be/V6KdVOBbj2U to the video. I am not certain if it will work with old versions of PSP or older versions than Windows 10. With PSP open, click on the "house" or home icon at the top. A Welcome page will appear. Click on Get More and scroll down until you find Pic-to-Painting. Click on the icon. Then click on the blue DOWNLOAD button. Then click on the green INSTALL button. The plugin will begin to install; simply follow the instructions and it shows up under your Effects with all the other plugins. If you cannot get it to install for this effect, choose something similar with texture or simply use the layer which I have applied this effect to. It is with the materials. I have also used effects of PSP itself and Animation Shop. To work this tutorial, it is assumed you have some working knowledge of Paint Shop Pro.
Thanks go to Nikita; to Maryse and to the unknown author of the background
Use the leaf below to mark your place along the way.

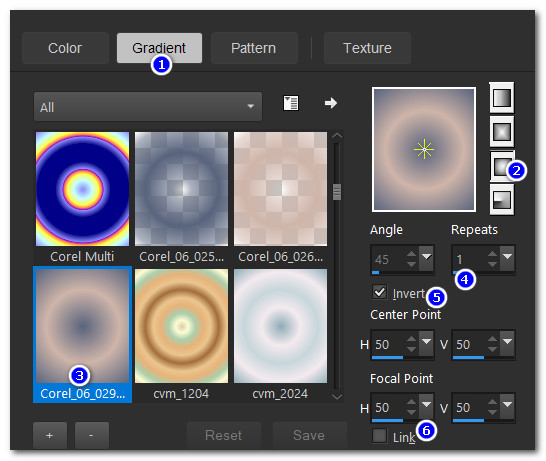
1. In Materials Palette, set to the following: Foreground color to #caaea2, Background color to 4d5973, Gradient, Sunburst, Angle Null/Repeats 1, Invert checked, Center Point/Focal Point H/V all set to 50, Corel_06_029 Foreground/Background.
2. New/New Image size 850px by 900px. Flood fill with Background color #4d5973.
3. Layers/New Raster Layer. Flood fill with Gradient.
4. Adjust/Blur/Gaussian Blur. Radius set to 20.
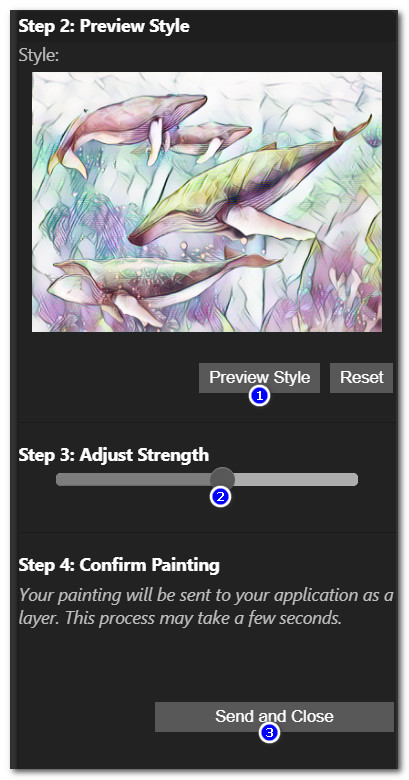
5. Effects/PicToPainting/PicToPainting. Select Watercolor style. Click on Preview Style/Adjust Strength/Confirm Painting by clicking on Send and Close. If you do not have PicToPainting installed, you may use the Layer.pspimage supplied for you.
6. Set to Luminance (L).
7. Layers/New Raster Layer. Selections/Select All.
8. Open 2020-09-30_135933.jpg of little Elf girl.
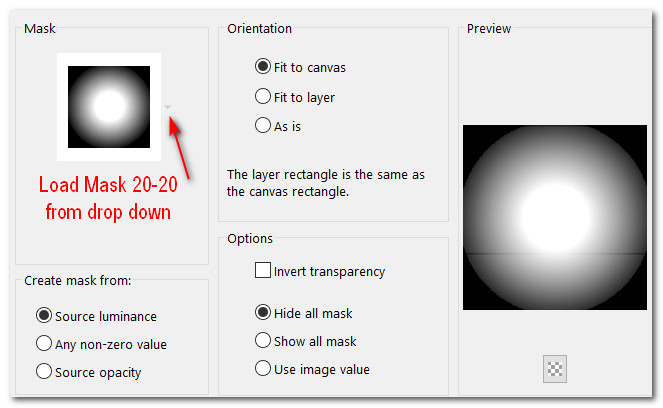
9. Layers/Load/Save Mask/Load Mask from Disk. Select Mask 20-20 from drop down arrow. Load.
10. Merge/Merge Group. Duplicate 4 times. Merge/Visible. Copy.
11. Paste into Selection on new raster layer in Step 7.
12. Selections/Float. Selections/Defloat. Apply PicToPainting as in Step 5. Deselect. (Use image supplied for you for Step 12 and Step 13 if needed).
13. Adjust/Blur/Gaussian Blur. Radius set to 10.
14. Layers/New Raster Layer. Selections/Select All. (Image should be in memory from Step 10). Paste into Selection. Deselect.
15. Drop Opacity down to 45.
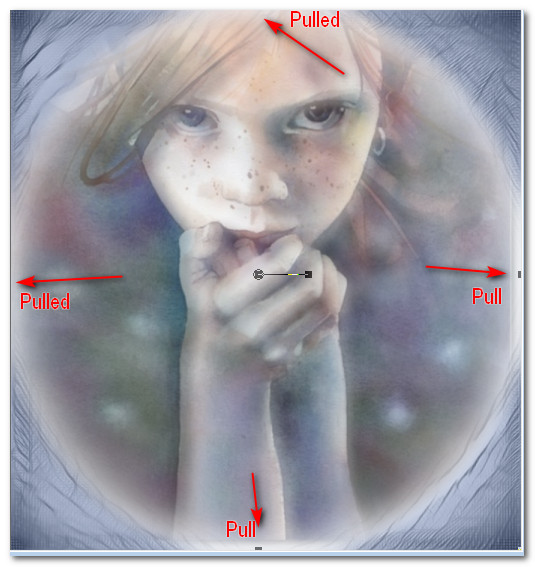
16. Use Pick tool set to Scale (leave all other settings to default) to pull outer 4 edges to get rid of flat sides.
17. With Freehand Selection tool set to Point to point/Add (Shift)/Feather 0/Anti-Alias checked, carefully select each of little Elf's eyes.
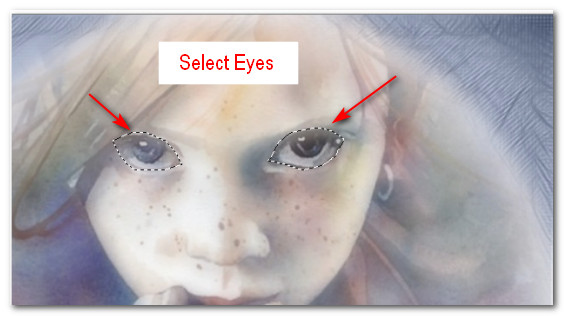
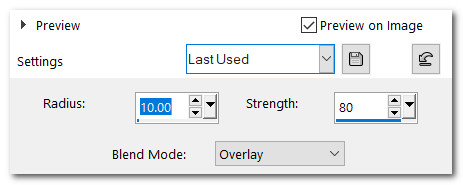
18. Adjust/Sharpness/Sharpen. Repeat. Adjust/Sharpness/High Pass Sharpen. Deselect.
19. Merge/Merge Visible. Copy. Paste as New Layer on main image.
20. Image/Resize/Resize by 70%/Resize all layers unchecked.
21. Selections/Select All. Selections/Float. Selections/Defloat.
22. Adjust/Sharpness/Sharpen More. Change Foreground from Gradient to color #caaea2.
23. Layers/New Raster Layer. Flood fill with #4d5973. Selections/Modify/Contract by 3px. Delete.
24. Flood fill with #caaca2. Selections/Modify/Contract by 7px. Delete.
25. Flood fill with #4d5973. Selections/Modify/Contract by 3px. Delete.
26. Selections/Modify/Expand by 13px.
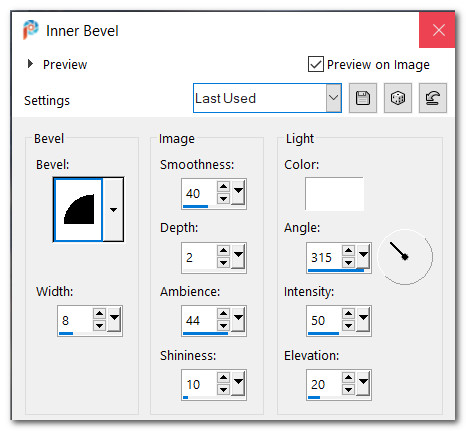
27. Effects/3D Effects/Inner Bevel.
28. Effects/3D Effects/Drop Shadow. Vertical 20, Horizontal 20, Opacity 45, Blur 35, color #000000.
29. Selections/Select None.
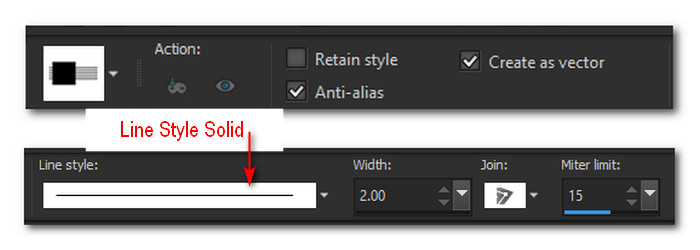
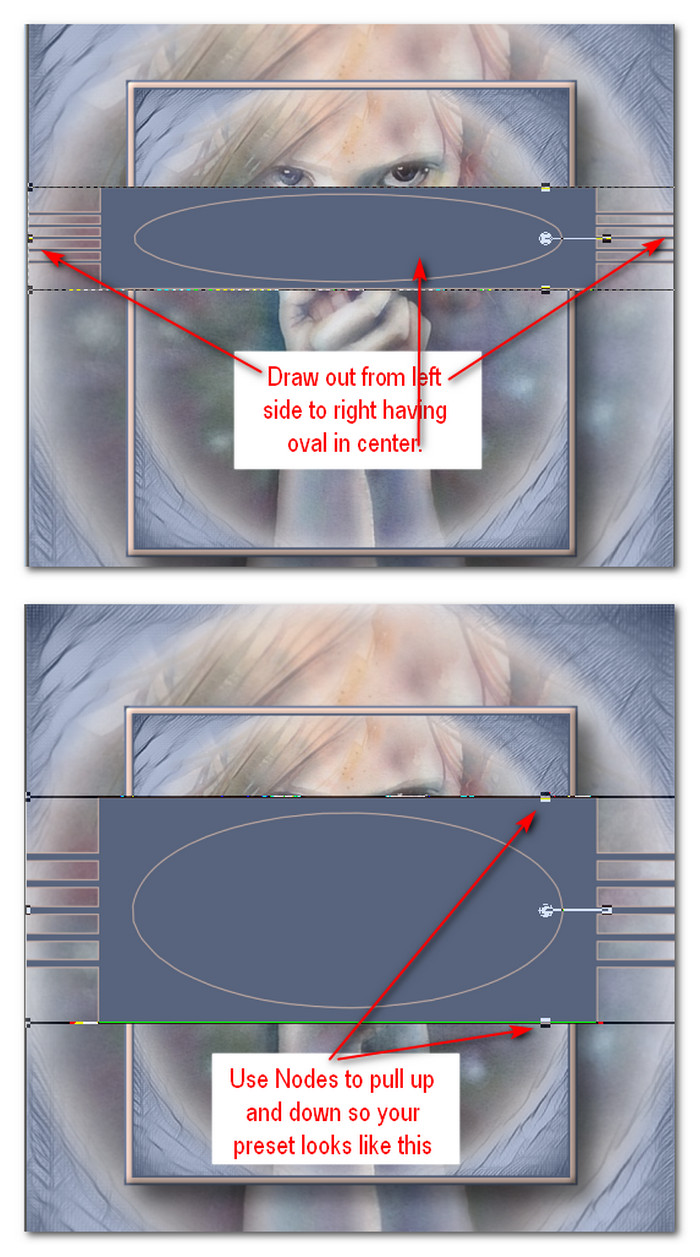
30. From tool bar select the Preset Shapes. Choose Shape-7. Use Foreground color #caaea2/Background #4d5973, Solid Line and settings below draw from left to right, side to side. Pull oval all the way across the center square.
31. Use Nodes to pull up and down to size the preset, center it. Convert to Raster Layer.
32. Selections/Select All. Selections/Float. Selections Defloat to activate it.
33. Open 5395e2711a7274215a36c255d1cfcdaf.pspimage of Background. Copy.
34. Paste into Selection. Selections/Select None.
35. Effects/3D Effects/Inner Bevel.
36. Effects/3D Effects/Drop Shadow. Vertical 20, Horizontal 20, Opacity 45, Blur 35, color #000000.
37. Pull this layer between Merged layer and Raster 1 Layer. Go back to top layer to continue.
38. Layers/New Raster Layer. Flood fill with Foreground color #caaea2.
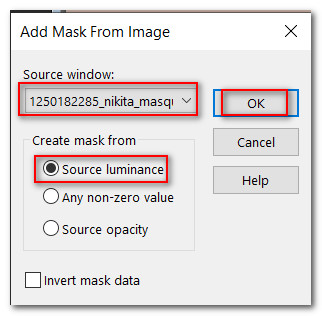
39. Open 1250182285_nikita_masque.pspimage. Leave open on workspace.
40. Working on main image, go to Layers/New Mask Layer/From Image. When the Add Mask From Image box appears, from the drop down select the nikita mask you have open on the workspace. Click OK. Merge/Merge Group.
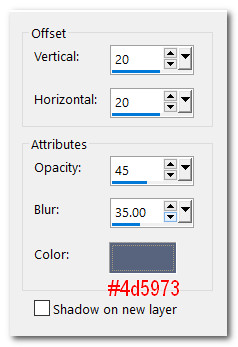
41. Effects/3D Effects/Drop Shadow. Vertical 20, Horizontal 20, Opacity 45, Blur 35, color #4d5973.
42. Open 15703529052_fleurs_nikita.pspimage of leaves. Use Selection Rectangle to delete or Eraser to erase Nikita's watermark. Copy. Paste as New Layer.
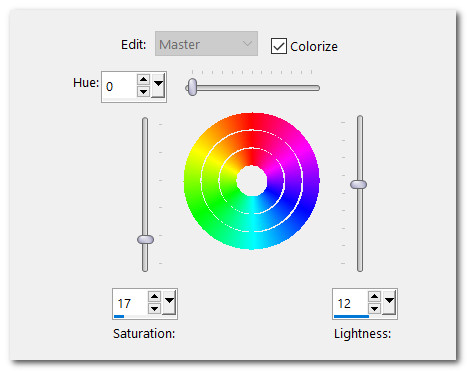
43. Adjust/Hue and Saturation/Hue/Saturation/Lightness. Use settings below.
44. Image/Resize/Resize by 67%/Resize all layers unchecked.
45. Move to upper left of inner box.
46. Adjust/Sharpness/Sharpen.
47. Effects/3D Effects/Drop Shadow. Vertical 20, Horizontal 20, Opacity 45, Blur 35, color #000000.
48. Duplicate. Image/Mirror. Mirror Horizontal. Place leaves in bottom right corner.
49. Open MR_A little frost.png. Remove Maryse watermark. Copy/Paste as New Layer.
50. In Materials Palette, change Foreground to Pattern/CMV_ROSE_SATIN.jpg.

51. Using color changer, click on leaf and berries with Foreground Pattern.
52. Adjust/Sharpness/Sharpen. Move to left side.
53. Effects/3D Effects/Drop Shadow. Vertical 20, Horizontal 20, Opacity 45, Blur 35, color #000000.
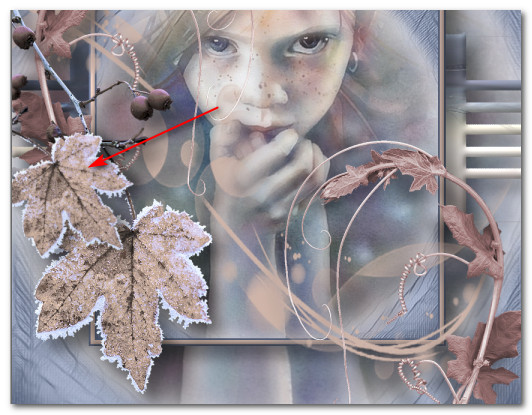
54. Duplicate. Resize by 67%/Resize all layers unchecked.
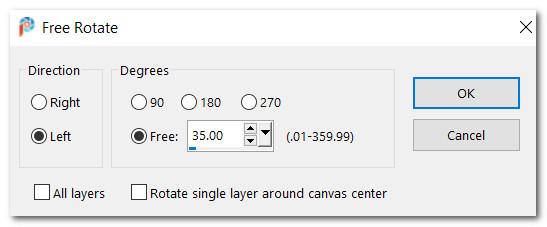
55. Image/Free Rotate. Rotate to Left by 35 degrees. Move above larger leaf on left side.
56. Image/Add Borders/Add 3px border, Symmetric checked, color #4d5973.
57. Image/Add Borders/Add 7px border, Symmetric checked, color #caaea2.
58. Activate with Magic Wand. Effects/3D Effects/InnerBevel. Deselect.
59. Apply your name or watermark if you wish and save as .jpg file named Frost is Coming.
60. For Animation: Open Animation Shop. File/Open Frost is Coming file.
61. Duplicate Frost is Coming file 17 times, having 18 frames in all.
62. Click on first frame. Edit/Select All.
63. Open SimoneAni514_MNG.mng file. Click on first frame. Edit/Select All. Copy.
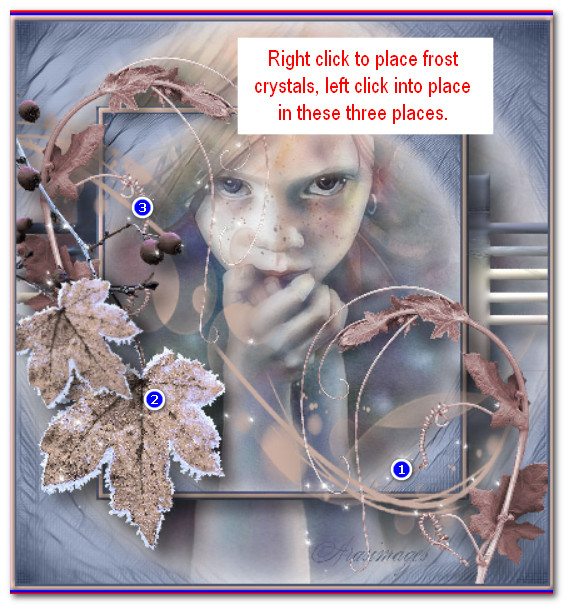
64. Go back to Frost is Coming file. Right click in first frame. Paste/Into Selected Frame. Hover the frost crystals where you want them, left click in place. Do this three times where I have indicated.
65. Click on View Animation in top tool bar to check your frost crystals. If you are satisfied with their placement, we will now save.
66. File/Save As. When the box appears, name where it will be saved, give your work the name Frost is Coming and leave .gif as is. Save.
67. As the boxes change click on Next, Next, Next and Finish. You are done!
Thank you to PamelaD and to Evatexas for your checking my tutorials. October 2020.
If you are going to use this tutorial for stationery, cards or place the tutorial/tag on another site, I would appreciate you contacting me for permission, giving Arasimages credit for the original tutorial and if possible, a link back to my site. Thank you.
Copyright © Arasimages All Rights Reserved