I Wonder.....
For this tutorial you will need the materials in the zip file below.

For an Italian, Dutch, German, French and Spanish translation click on the flags.


This tutorial was written using PSP2019. Create a folder on your desktop named I Wonder. Open the materials in the zip file into the folder. Duplicate the tubes and close the originals, using the duplicates so you won't lose the originals. For this tutorial I have used Plugins AAA Frames/Texture Frame, Alf's Border FX/Mirror Bevel and effects of PSP. I have also used Animation Shop for the animation. Place the Narah Mask in your PSP Files/Masks folder. To work this tutorial, it is assumed you have some working knowledge of Paint Shop Pro.
Thanks go to Maryse and to Silvie at silvie.l2356@gmail.com [tda_tubes] for their tubes used in this tutorial.
Use the pumpkin hat below to mark your place along the way.
1. In Materials Palette set Foreground color to #000000, Background color to #a12011.
2. New/New Image size 800px by 800px. Flood fill with Background color.
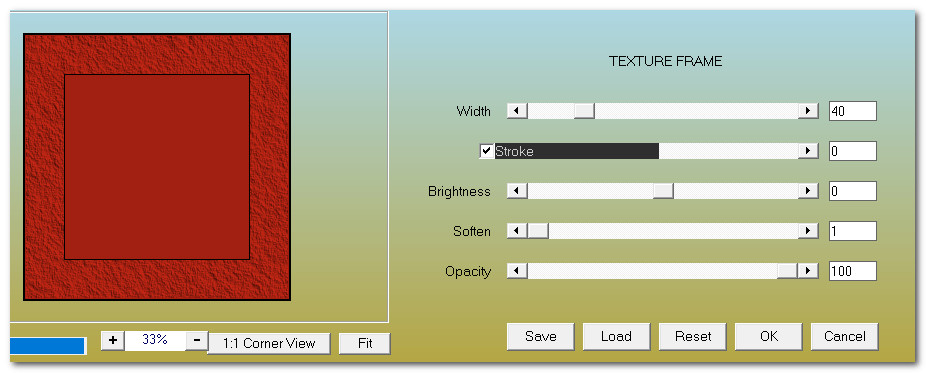
3. Effects/AAA Frames/Texture Frame. Repeat step.
4. Effects/Edge Effects/Enhance.
5. Selections/Select All. Selections/Modify/Contract by 40px.
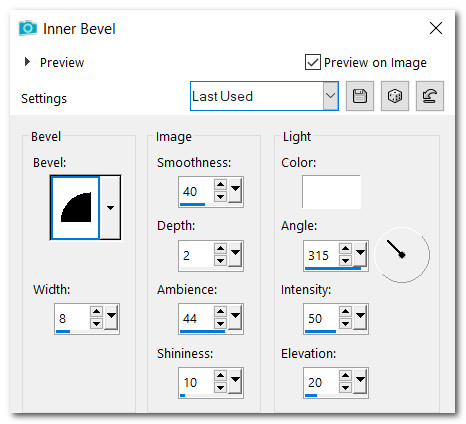
6. Selections/Invert. Effects/3D Effects/Inner Bevel.
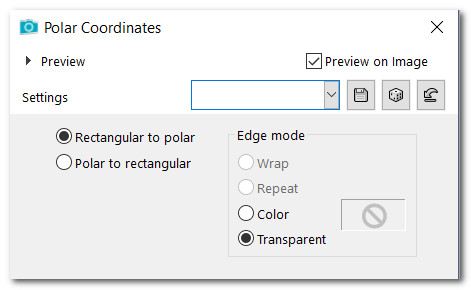
7. Effects/Distortion Effects/Polar Coordinates.
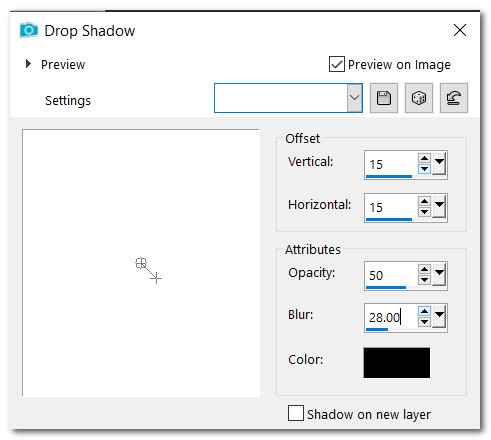
8. Effects/3D Effects/Drop Shadow. Vertical 15, Horizontal 15, Opacity 50, Blur 28, color #000000.
9. Promote Selection to Layer. Deselect.
10. Close off Promoted Selection layer. Drop down to Raster 1.
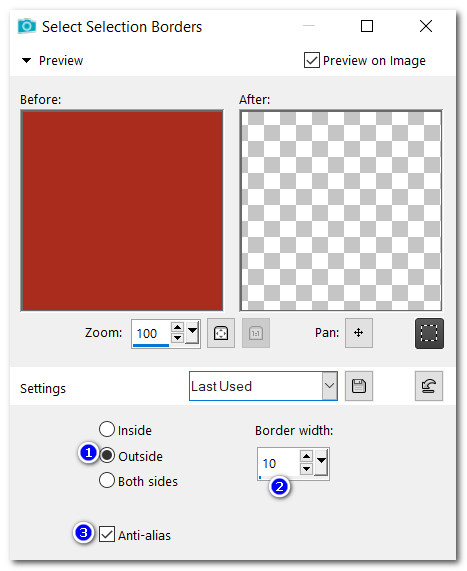
11. Selections/Select All. Selections/Modify/Contract by 40. Selections/Modify/Select Selection Borders by 10.
12. Flood fill selection with Foreground color #000000. Deselect.
13. Using Magic Wand, click in the center to activate center square.
14. Layers/New Raster Layer. Flood fill with Foreground color #000000.
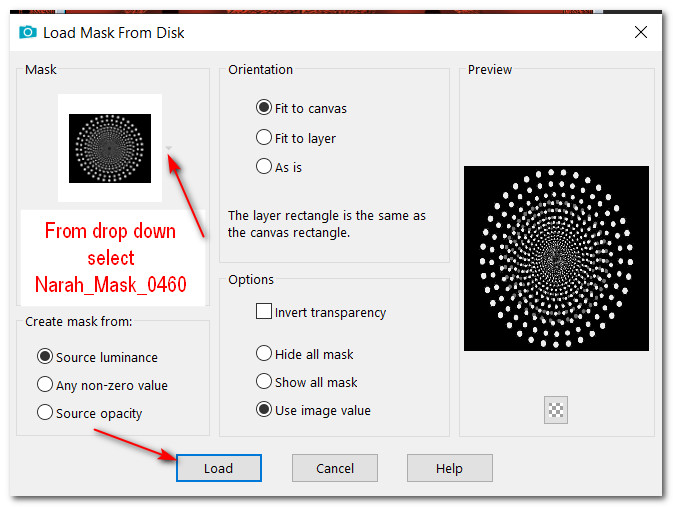
15. Layers/Load/Save Mask/Load Mask from Disk. From Drop Down select Narah_Mask_0460. Load.
16. Merge/Merge Group. Deselect.
17. Open Dark_Castle3_30.12.2017.pspimage.
18. Copy middle layer/Paste as New Layer on main image.
19. Move to the right a little. Adjust/Sharpness/Sharpen.
20. Go to top layer and open it. Duplicate.
21. Image/Flip. Flip/Vertical. Pull duplicated layer beneath the Dark Castle layer. Go back to top layer to continue.
22. Image/Add Borders/Add 10px border, Symmetric checked, color #000000.
23. Image/Add Borders/Add 10px border, Symmetric checked, color #a12011.
24. Selections/Select All. Selections/Modify/Contract by 50. Selections/Invert.
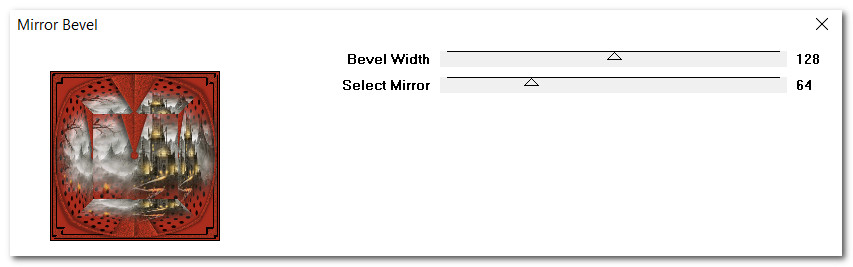
25. Effects/Alf's Border FX/Mirror Bevel. Deselect.
26. Open MR_Halloween Fashion Model.png.
27. Using Selections tool set to rectangle/Feather 0, select around Maryse watermark and Delete. Deselect.
28. Image/Resize/Resize by 125%/Resize all layers unchecked.
29. Copy/Paste as New Layer.
30. Effects/3D Effects/Drop Shadow. Vertical 15, Vertical 32, Opacity 50, Blur 43, color #000000.
31. Effects/3D Effects/Drop Shadow. Vertical -27, Vertical -23, Opacity 50, Blur 43, color #000000.
32. Move lady to left and bottom of image to fit.
33. Adjust/Sharpness/Sharpen.
34. Add your watermark or name and save as I Wonder.jpg file.
35. Merge/Merge Visible.
36. Open Animation Shop. File/Open I Wonder.jpg.
37. Duplicate I Wonder.jpg until you have 21 frames in all. Click in first frame/Edit/Select All.
38. Open SimoneAni-277.mng file. Click in first frame/Edit/Select All. Copy.
39. Go to the main image. Right click in first frame/Hover the smoke over the areas where you wish to have it.
40. Paste/Into Selected Frame. Left click to set into place.
41. Repeat with this 277 smoke in three more areas around the city.
42. Open SimoneAni-276.mng file. Click in first frame/Edit/Select All. Copy.
43. Paste/Into Selected Frames four times. Left click to set into place (like you did with 277 smoke).
44. At the top tool bar click on View Animation to check your smoke. If it is not as you would like (I changed mine a few times), click on the back arrow to undo the smoke and start over. Check again. When you are ready to save your work we will do the following.
45. File/Save As. When the Save As box appears place your I Wonder name in Save in: Under File name: type in I Wonder. Save as type leave set to .gif. click Save.
46. As new boxes appear, simply click on Next, Next, Next then Finish. Your image is now saved as an animated file in your folder.
Thanks go to Evatexas and to PamelaD for their faithful checking of my tutorials. October 2020.
If you are going to use this tutorial for stationery, cards or place the tutorial/tag on another site, I would appreciate you contacting me for permission, giving Arasimages credit for the original tutorial and if possible, a link back to my site. Thank you.
Copyright © Arasimages All Rights Reserved