
The Christmas Gift
For this tutorial you will need the materials in the zip file below.

For a German, Italian, Spanish, Dutch and French translation click on the flags.


Place the material zip file in a new folder you have made on your desktop named The Christmas Gift. Unzip it there. Open the PSP program you are going to use, open and duplicate each tube. Close the original so as not to lose it. Click on ArasClearFavorite.f1s file and it will automatically install into your Eye Candy 5: Impact/Glass. Place the Selection ArasChristmasGift.Psp in your PSP Files/Selections folder. Place the DC Texture into your PSP Files/Textures file. Effects of PSP2019 and Alien Skin Eye Candy:5/Impact/Glass have been used to create this tutorial. To work this tutorial, it is assumed you have some working knowledge of Paint Shop Pro.
Thanks go to Silvie, to JHanna and to Margit for the lovely tubes I have used.
Use the Snowflake below to mark your place along the way.

1. In Materials Palette, set Foreground to #a12011, Background to #edefea.
2. New/New Image 850px/800px. Flood fill with Background #edefea.
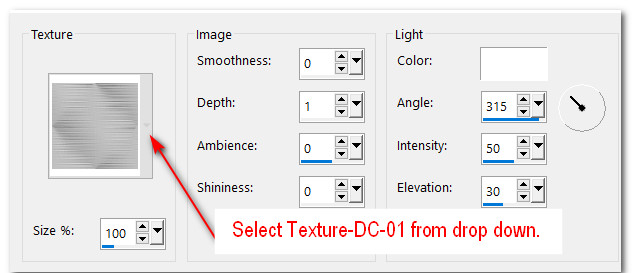
3. Effects/Texture Effects/Texture. Select Texture-DC-01
4. Effects/Edge Effects/Enhance.
5. Open JHanna_725-Background.jpg. Copy/Paste as New Layer.
6. Using Color Changer/default settings, left click with red Foreground color on scroll to change the image color. Click a few times if some default color shows through.
7. Effects/Edge Effects/Enhance.
8. Open Winter_misted264_Silvie_15.09.2020.pspimage. Copy/Paste as New Layer.
9. Duplicate tree image. Merge/Merge Down.
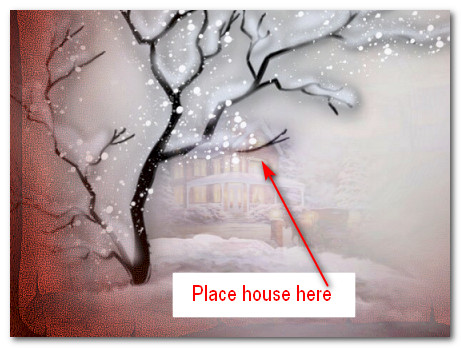
10. Open Tubes tinnad (29).psp. Copy/Paste as New Layer.
11. Image/Resize/Resize by 30%/Resize all layers unchecked.
12. Place the house downward a bit behind the tree limb. Set Blend Mode to Soft Light.
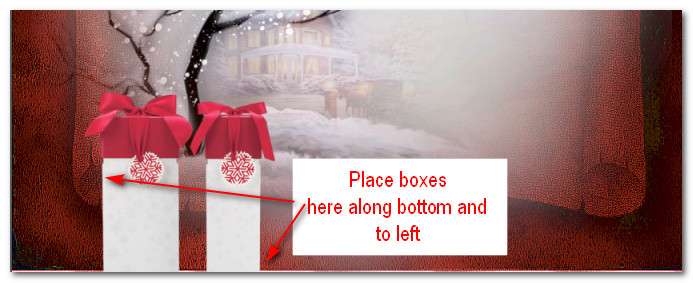
13. Open mh_christmasboxes.pspimage. Copy/Paste as New Layer.
14. Image/Resize/Resize by 70%/Resize all layers unchecked.
15. Place boxes along the bottom and to the left on the image.
16. Change Foreground color to #831100. Using Color changer, left click once on one of the bows/tops to change color.
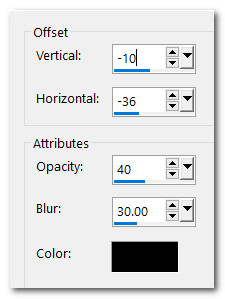
17. Effects/3D Effects/Drop Shadow. Vertical -10, Horizontal -36, Opacity 40, Blur 30, color #000000.
18. Image/Add Borders/Add 5px border, Symmetric checked, color #edefea.
19. Image/Add Borders/Add 30px border, Symmetric checked, color #000000.
20. Activate 30px border with Magic Wand. Flood fill with Background color changed to #65040b .
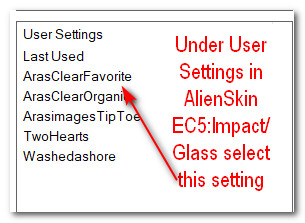
21. Effects/Alien Skin Eye Candy:5/Impact/Glass. Select ArasClearFavorite under User Settings. Click OK. Deselect.
22. Repeat Step #19. Repeat Step #20 and Repeat #21.
23. Image/Add Borders/Add 5px border, Symmetric checked, color #edefea.
24. Open Christmas_Lady6m9_Silvie_15.11.2020.pspimage. Copy/Paste as New Layer.
25. Image/Mirror/Mirror Horizontal.
26. Effects/3D Effects/Drop Shadow. Vertical -10, Horizontal -36, Opacity 40, Blur 30, color #000000.
27. Place lady in right side of image, bottom touching first border.
28. Adjust/Sharpness/Sharpen.
29. Image/Add Borders/Add 3px border, Symmetric checked, color #edefea.
30. Layers/New Raster Layer.
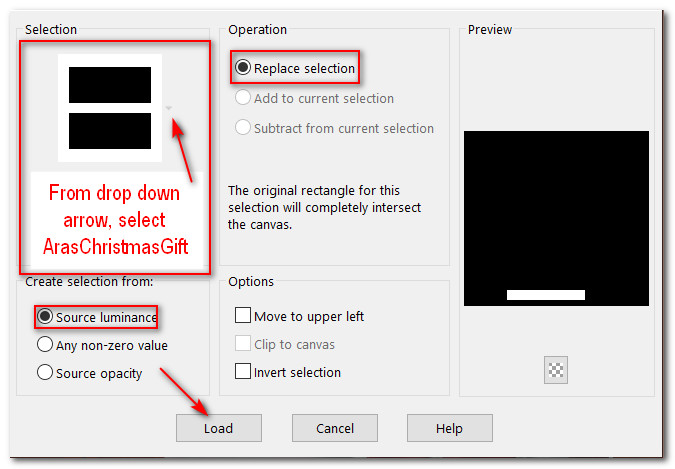
31. Selections/Load/Save Selection/Save Selection from Disk.
32. Flood fill selection with #650d01.
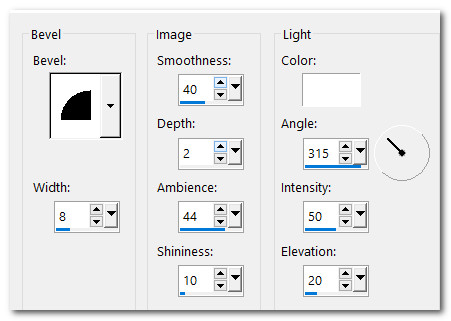
33. Effects/3D Effects/InnerBevel.
34. Selections/Select None. Center over bottom border.
35. Objects/Align/Horizontal Center.
36. From tool bar select Text Tool. Choose Font Kunstler Script, Size 60, color #edefea, Stroke 0.0. Type out the words The Christmas Gift.

37. Convert to Raster Layer. Objects/Align/Horizontal Center.
38. Add your name or watermark if you wish. Merge/Merge Visible. Save as The Christmas Gift.jpg. Copy.
39. Open Animation Shop program. Paste as New Animation.
40. Duplicate the image until you have 36 frames in all. Highlight first image/Edit/Select All.
41. File/Open Arassnowimage.gif. Click in first frame/Edit/Select All. At the top click Copy.
42. Go back to main image. Right click/Paste/Into Selected Frame. Hover the snowfall where you want it (in upper left corner within frame) and left click to paste.
43. Right click/Paste/Into Selected Frame and left click to set snow in place in upper right corner. Repeat in bottom left corner. Repeat in bottom right corner.
44. Click on View Animation at the top tool bar to see how your snow looks. If you are happy with it, then File/Save As.
45. When the Save As box appears, give your work a name, designate where to save it and leave Save as type as it is set for .gif. Click on Save.
46. As the boxes change, click on Next, Next, Next then Finish. You are done!
Thank you PamelaD for testing this tutorial. Thank you Eva for the years you have been my faithful tester.
If you are going to use this tutorial for stationery, cards or place the tutorial/tag on another site, I would appreciate you contacting me for permission, giving Arasimages credit for the original tutorial and if possible, a link back to my site. Thank you.
Copyright © Arasimages All Rights Reserved