
Hatchlings
For this tutorial you will need the materials in the zip file below.

For an Italian, Spanish, French, German and Dutch translation click on the flags.


Unzip the materials into a folder named Hatchlings which you will make on your desktop. Please duplicate and close original tubes using the copies for your work so you will not lose the originals. This tutorial was written using PSP2020. I have used Mask 20-20 and Mask_narah_dupla, plugins DBS flux/Radical Warp and Crescent Moon/Strip Tile. Place the masks, Selection and plugins in their perspective folders. To work this tutorial, it is assumed you have some working knowledge of Paint Shop Pro.
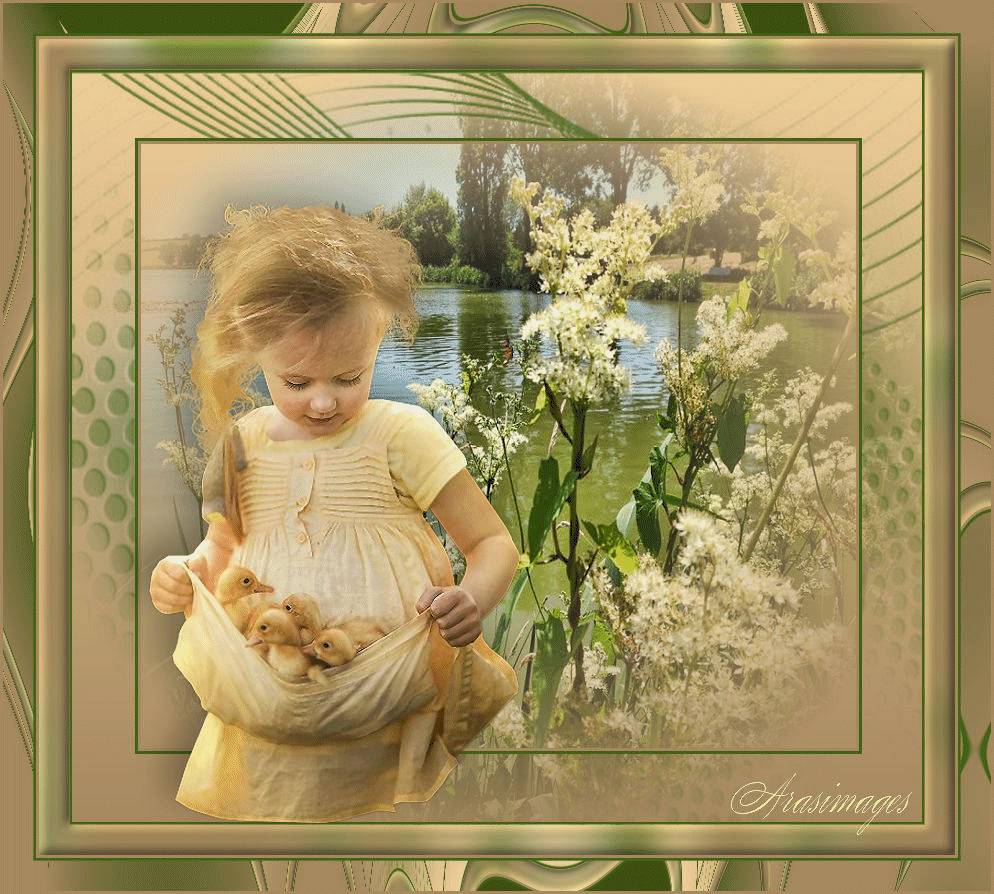
Thanks go to LisaT for her beautiful photograph and Wiesken for her lovely little girl tube.
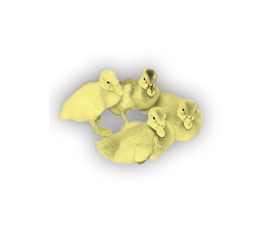
Use the Ducks below to mark your place along the way.
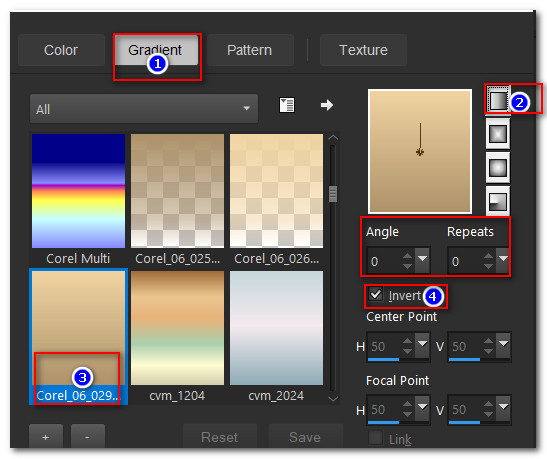
1. In Materials Palette, set color of Foreground to #f0d7a0/Background to #a6895f. Select Gradient/Linear/Corel_06_029 Foreground/Background/Invert checked. Angle and Repeats set to 0. Center Point/Focal Point both set to Null.
2. New/New Raster Layer. 850X750. Flood fill new layer with Gradient.
3. Open photo_ ©Copyright Lisat.pspimage. Highlight bottom layer.
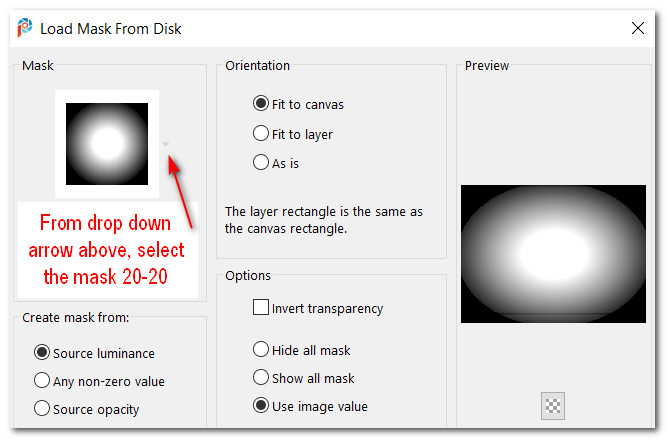
4. Layers/Load/Save Mask/Load Mask from Disk. From the drop down arrow, select Mask 20-20. Load. Merge/Merge Group. COPY.
5. Go back to Gradient layer. Layers/New Layer.
6. Selections/Select All. Paste into Selection. Deselect.
7. Adjust/Sharpness/Sharpen.
8. Layers/New Raster Layer. Flood fill with #426416.
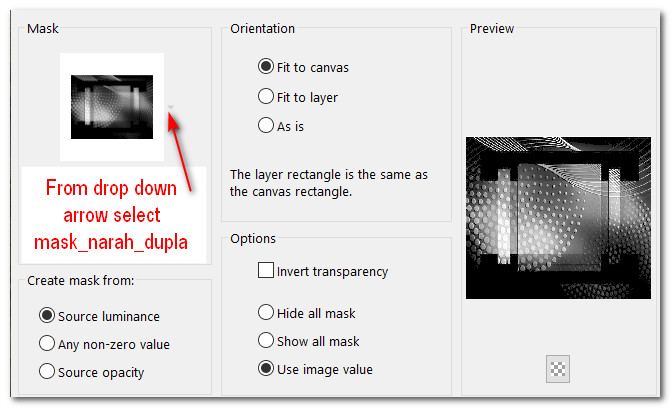
9. Layers/Load/Save Mask/Load Mask from Disk. From the drop down arrow, select mask_narah_dupla. Load. Merge/Merge Group.
10. Drop Opacity down to 80. Adjust/Sharpness/Sharpen.
11. Layers/New Raster Layer.
12. Selections/Load/Save Selection. Load Selection from Disk. From drop down arrow select Selection/ ArasimagesHatchlings. Load.

13. Drop down one layer and press Delete key. Go back to top layer.
14. Flood fill with #426416. Selections/Modify/Contract by 3px. Delete.
15. Layers/New Raster Layer. Flood fill with #a6895f. Selections/Modify/Contract by 3px. Delete. Deselect.
16. Image/Add Borders/Add Border 3px, color #426416, Symmetric checked.
17. Image/New Borders/Add Border 30px, color #a6895f, Symmetric checked.
18. Activate 30px border with Magic Wand.
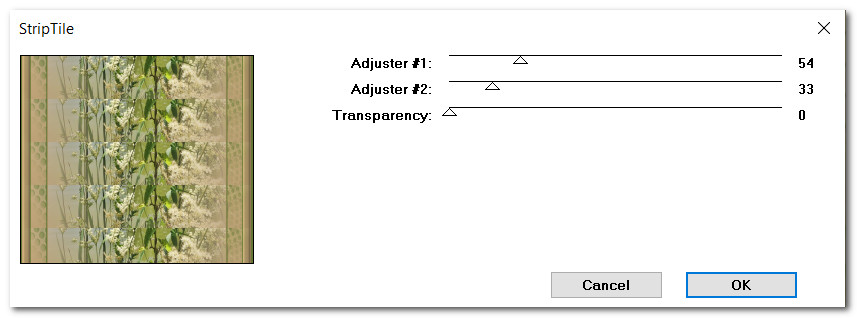
19. Effects/Crescent Moon/Strip Tile.
20. Adjust/Blur/Gaussian Blur by Radius 15.
21. DBS Flux/Radical Warp.

22. Adjust/Blur/Gaussian Blur by Radius 15.
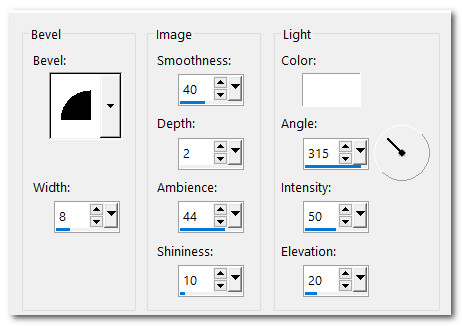
23. Effects/3D Effects/InnerBevel. Deselect.
24. Image/Add Borders/Add Border 3px, color #a6895f, Symmetric checked.
25. Image/Add Borders/Add Border 3px, color #426416, Symmetric checked.
26. Image/Add Borders/Add Border 30px, color #a6895f, Symmetric checked.
27. Activate 30 px border with Magic Wand. Set materials palette colors to Foreground #3c5011/Background #a6895f, set to Gradient using settings as in Step 1.
28. Flood fill 30px border with Gradient.
29. DBS Flux/Radical Warp. Deselect.
30. Image/Add Borders/Add Border 3px, color #a6895f, Symmetric checked.
31. Open wieskes tube 999.png of little girl. Erase wieskes watermark.
32. Image/Resize/Resize by 110%/Resize all layers unchecked. COPY.
33. Go to working image. Paste/Paste as New Layer. Place little girl to bottom left side of image.
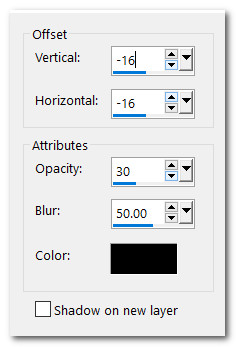
34. Effects/3D Effects/Drop Shadow. Vertical -16, Horizontal -16, Opacity 30, Blur 50, color #000000.
35. Repeat Drop Shadow.
36. Adjust/Sharpness/Sharpen.
37. Place your watermark or name in image. Merge/Merge Visible.
38. File/Save As/Hatchlings.jpg.
39. If you are going to use the Animation, follow directions below otherwise you are now finished.
40. Open Animation Shop. File/Open DuckiesAnimation.psp file. Delete empty frame.
41. Having curser in first frame, Edit/Select All. From top of frame click Copy.
42. Open Hatchlings.jpg file. Duplicate until you have 5 frames in all.
43. Having curser in first frame, Edit/Select All.
44. Right click in first frame, hover the animation ducks over those of the little girl. Paste/Into Selected Frame. Left click into place.
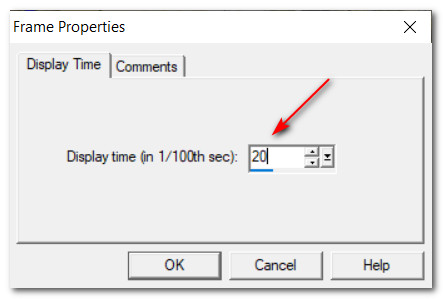
45. Animation/Frame Properties. Set Display time to 20. Click on View Animation in top tool bar to check your animation. If you need to redo it, use back arrow to undo your pasting and try again. Once it is as you like it, then we will save our work.
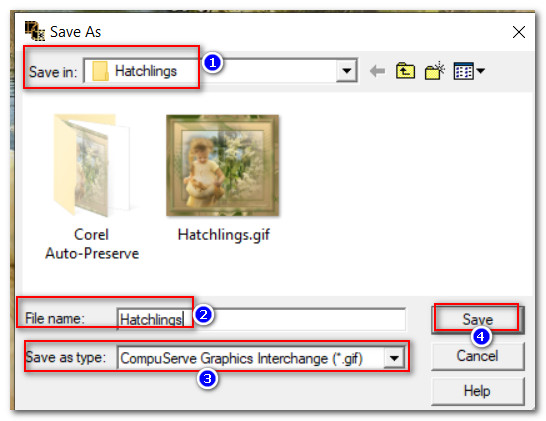
46. File/SaveAs. When the Save As box appears, name where you will save your file (folder you first made on your desktop named Hatchlings). Give the file a name and leave it set to save as a .gif file. Click Save.
47. When the box changes to another, click on Next. Again Next and again Next, finally Finish.
Thank you PamelaD for checking my tutorials. We miss our Evatexas who passed on Feb.9. Her help with PSP was invaluable and she was a good friend. March 2021
If you are going to use this tutorial for stationery, cards or place the tutorial/tag on another site, I would appreciate you contacting me for permission, giving Arasimages credit for the original tutorial and if possible, a link back to my site. Thank you.
Copyright © Arasimages All Rights Reserved