Mary and her Lambs
For this tutorial you will need the materials in the zip file below.

For a Dutch, Italian, French and Spanish translation click on the flags.


Unzip the materials into a folder named Mary and her Lambs which you will make on your desktop. Please duplicate and close original tube using the copy for your work so you will not lose the original. This tutorial was written using PSP2020. I have used brushes inksplat1, inksplat2 and swirl2, plugins MuraMeister/Copies, Simple/Top Left Mirror and Filter Forge6/Filter Forge, Pattern text17. Place the Pattern into your PSP Files/Pattern and Texture folders, export the brushes into your PSP Files/Brushes folder.
Thanks go to Nikita and to Silvie for their beautiful lady and lamb tubes.
Use the genericfollow.png below to mark your place along the way.

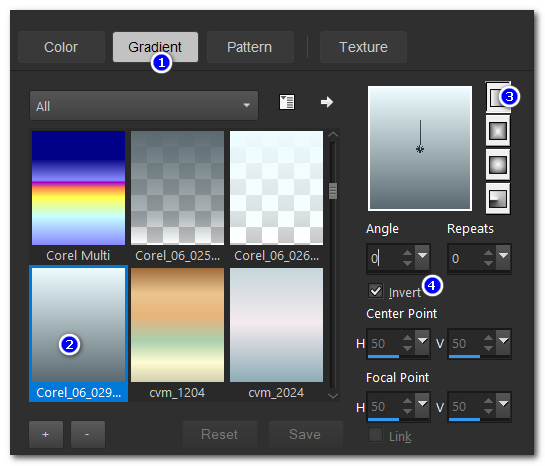
1. In Materials Palette, set color of Foreground to #ebfbff/Background to #4f5f65. Select Gradient/Linear/Corel_06_029 Foreground/Background/Invert checked. Angle and Repeats set to 0. Center Point/Focal Point both set to Null.
2. File/New/New Image 900x750. Flood fill new layer with Gradient.
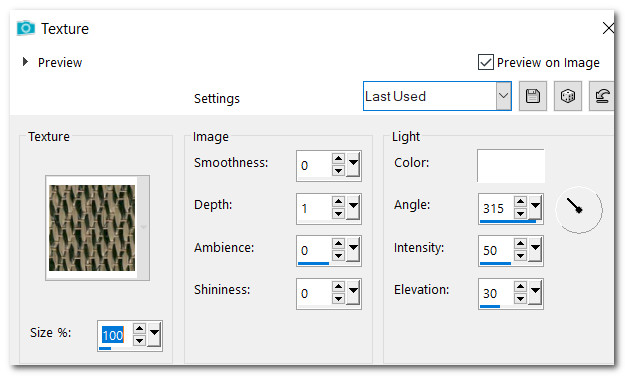
3. Effects/Texture Effects/Texture/text17, color #ffffff.
4. Effects/Edge Effects/Enhance.
5. Layers/New Raster Layer. Flood fill with Gradient.
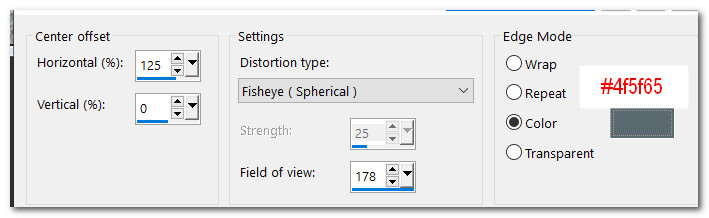
6. Effects/Distortion Effects/Distortion/Lens Distortion.
7. Duplicate. Image/Mirror. Mirror Horizontal. Close off Raster 2. Move Copy below Raster 2.
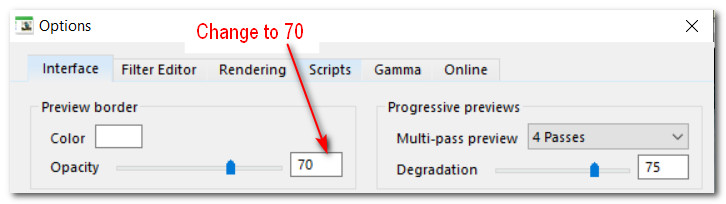
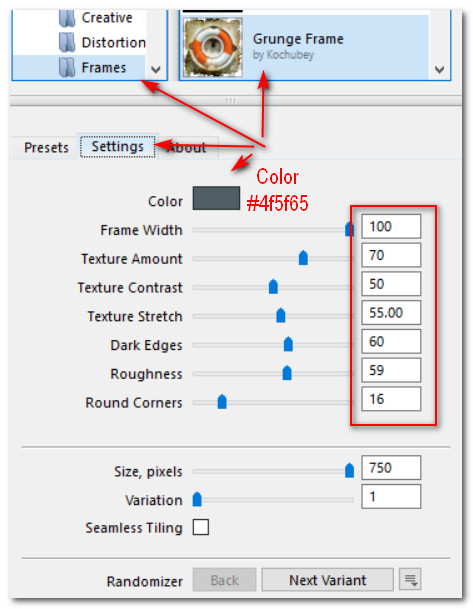
8. Effects/FilterForge6/Filter Forge. Under Tools/Options change Interface Opacity to 70, click OK. Select Presets/Frames/GrungFrame/Default under Settings. Under Settings change color to #4f5f65. Click Apply.
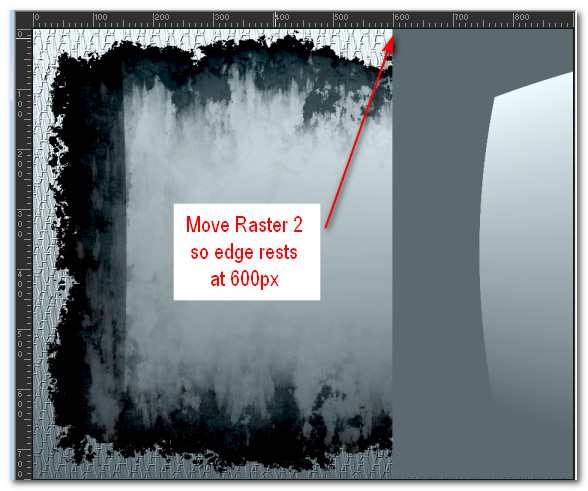
9. Go back to top layer (Raster 2), open and highlight. Move to right so edge rests on 600px.
10. Effects/MuraMeister/Copies on Raster 2.

11. On Raster 2/Image/Resize/Resize by 56%/Resize all layers unchecked.
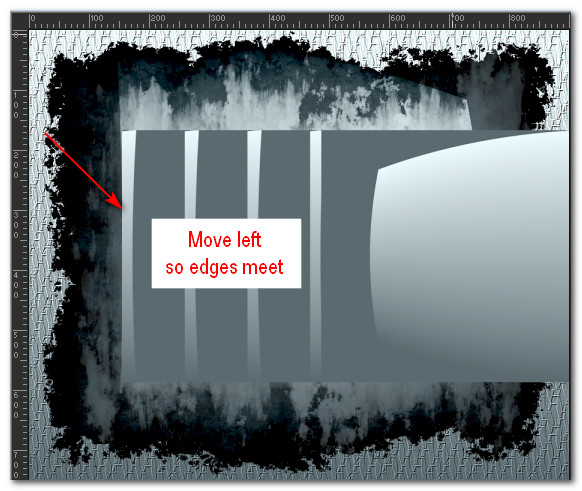
12. Move Raster 2 to left a little so edges meet.
13. Using Magic Wand Tolerance set to 15, Anti-alias ticked, Outside selected, click on the Lens Distortion on right side of image to activate it. You may have to click on it more than once to activate it all.
14. Layers/New Raster Layer. Flood fill with #000000.
15. Selections/Modify/Contract. Contract by 3px, Delete.
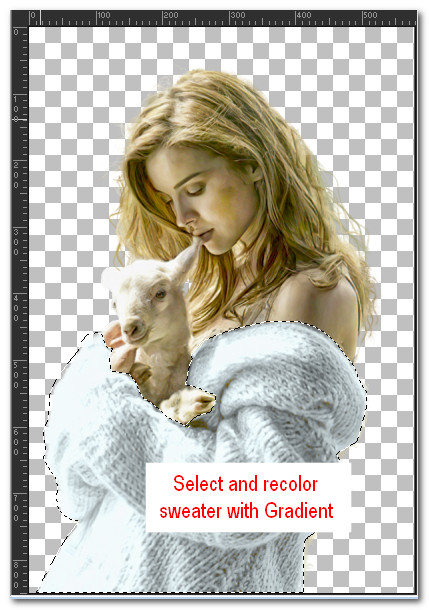
16. Open 156914730948_femmes_nikita.png of lady. Image/Mirror. Mirror Horizontal. Remove the watermark. Select around the sweater of lady. Change Background color back to #4f5f65. Using Color Changer set to Default, left click on sweater with Foreground Color.

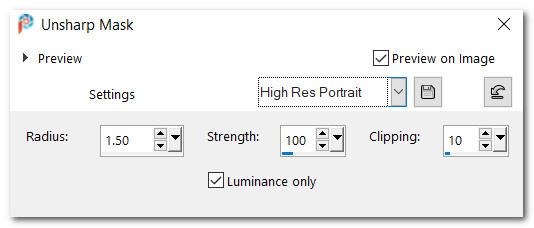
17. Adjust/Sharpness/UnSharp Mask. Deselect.
18. Effects/3D Effects/Drop Shadow. Vertical -20, Horizontal -20, Opacity 40, Blur 50, color #000000.
19. Effects/3D Effects/Drop Shadow. Vertical 20, Horizontal 20, Opacity 40, Blur 50, color #000000.
20. Edit/Copy lady. Leave open on your workspace.
21. Go back to your main image. Layers/New Raster Layer. Paste into Selection (still active from Step 13).
22. Drop Opacity down to 67. Selections/Invert.
23. Drop down to Raster 2. Effects/Texture Effects/Texture/text17, color #ffffff.
24. Effects/Edge Effects/Enhance. Deselect.
25. Use Magic Wand on transparent area of Raster 2. Selection/Invert.
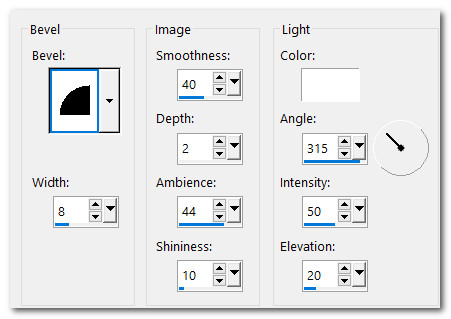
26. Effects/3D Effects/InnerBevel. Deselect.
27. Go to top layer to continue.
28. Open tube layer of BabyLamb_Silvie_25.10.2010.pspimage.
29. Image/Resize/Resize by 38%/Resize all layers unchecked.
30. Copy/Paste as New Layer on your working image. Use Clone tool or push tool and correct the dark spots on the lamb.

31. Place lamb to right side of lady. Drop Opacity down to 80.
32. Effects/3D Effects/Drop Shadow. Vertical -20, Horizontal -20, Opacity 40, Blur 50, color #000000.
33. Effects/3D Effects/Drop Shadow. Vertical 20, Horizontal 20, Opacity 40, Blur 50, color #000000.
34. Open Butterfly Author Unknown.png. Copy/Paste as New Layer. Place in front of lamb.
35. Adjust/Sharpness/Sharpen.
36. Open 156914730948_femmes_nikita.png of lady with the recolored sweater you did. Image/Mirror. Mirror Horizontal. Copy/Paste as New Layer on your working image.
37. Image/Resize/Resize by 85%/Resize all layers unchecked.
38. Place Resized lady between two stripes toward left side of image.
39. Adjust/Sharpness/Sharpen.
40. Image/Add Borders/Add 3px border, color #000000, Symmetric checked.
41. Image/Add Borders/Add 3px border, color #ebfbff, Symmetric checked.
42. Image/Add Borders/Add 3px border, color #000000, Symmetric checked.
43. Image/Add Borders/Add 50px border, color #ebfbff, Symmetric checked.
44. Select the 50px border to activate it with Magic Wand.
45. From tool bar select Paint Brush tool. See below for brush placement. Choose inksplat1. Set Size to 150, use color #4f5f65 in Materials Background, right click in top left corner once. View Step 47 for placement.

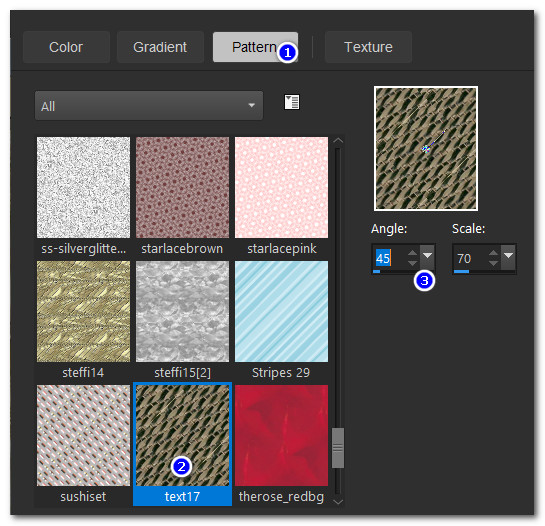
46. Change Materials Foreground to Pattern Text17/Angle45/Scale70, settings as seen below. Choose brush swirl2, set Size to 150 and left stamp once.

47. Change Foreground back to Foreground #ebfbff. Choose brush inksplat2. Set Size to 150/Rotation to 130. Left stamp once. Change Background to #000000 and right stamp inksplat2 again over the others.


48. Effects/Simple/Top Left Mirror.
49. Effects/Texture Effects/Mosaic-Glass (default settings). Deselect.
50. Image/Add Borders/Add 3px border, color #000000, Symmetric checked.
51. Image/Add Borders/Add 3px border, color #ebfbff, Symmetric checked.
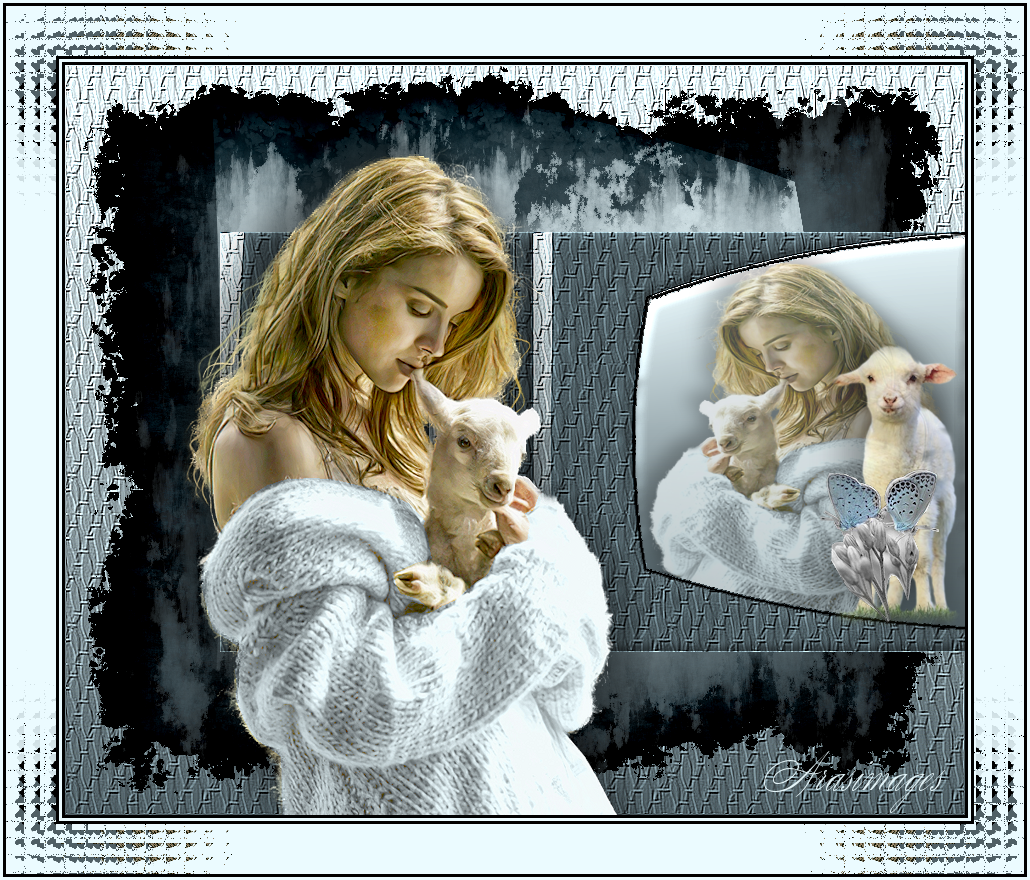
52. Add watermark or your name if you wish. Save as .jpg or .png file named Mary and her Lambs.
Thank you PamelaD for checking my tutorials. We miss our Evatexas who passed on Feb.9. Her help with PSP was invaluable and she was a good friend. April 7, 2021
If you are going to use this tutorial for stationery, cards or place the tutorial/tag on another site, I would appreciate you contacting me for permission, giving Arasimages credit for the original tutorial and if possible, a link back to my site. Thank you.
Copyright © Arasimages All Rights Reserved