
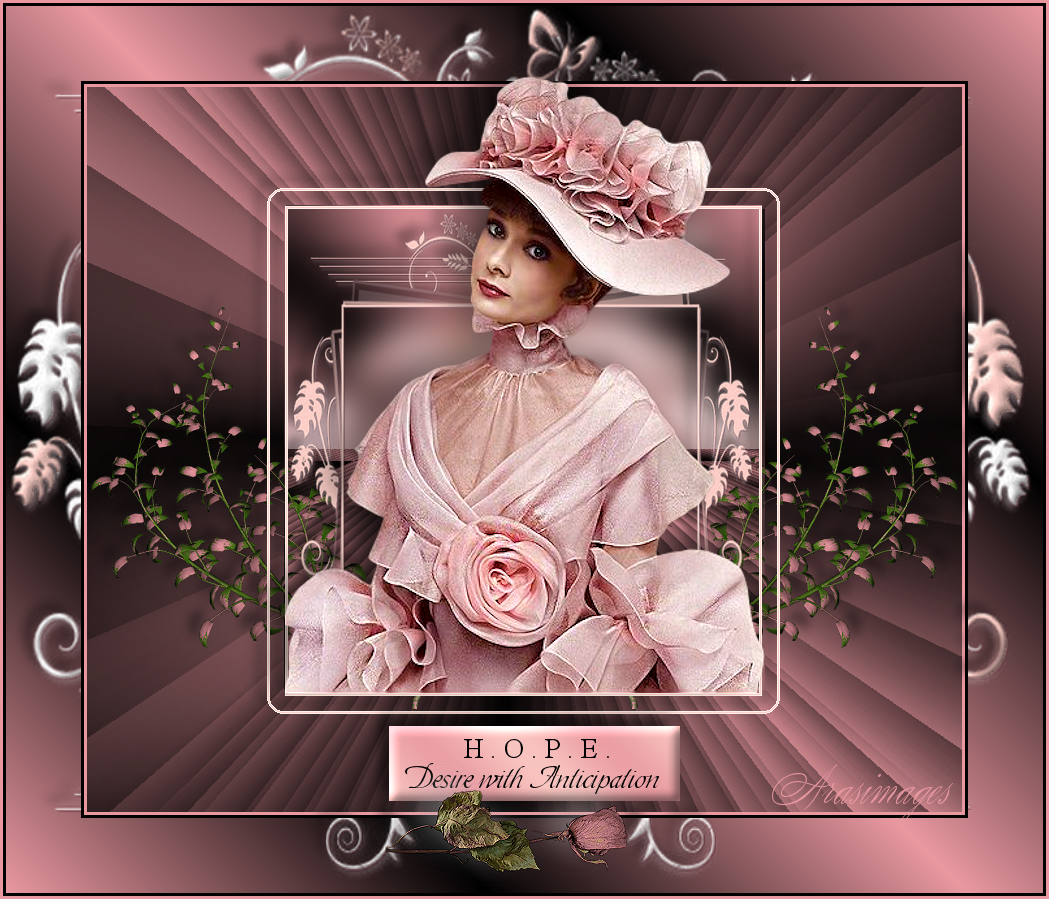
Hope
For this tutorial you will need the materials in the zip file below.

For a German, Dutch, Italian, French and Spanish translation click on the flags.


Unzip the materials into a folder named Hope which you will make on your desktop. Please duplicate and close original tubes using the copies for your work so you will not lose the original. This tutorial was written using PSP2020. I have used plugins MuraMeister/Perspective and Filter Factory B/Button Deluxe and effects of PSP. Install the font Toots Extended in your PSP. Place the Selection in your PSP Files/Selections folder.
Thanks go to JHanna and to FranieMargot for their beautiful tubes, and to those unknown owners of the scraps used.
Use the Rose below to mark your place along the way.
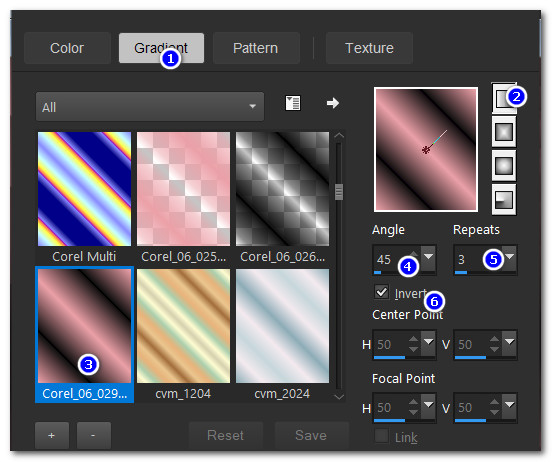
1. In Materials Palette, set color of Foreground to #000000/Background to #e998a0. Select Gradient/Linear/Corel_06_029 Foreground/Background/Invert checked. Angle 45 and Repeats set to 3. Center Point/Focal Point both set to Null.
2. File/New/New Image 875x725. Flood fill new layer with Gradient.
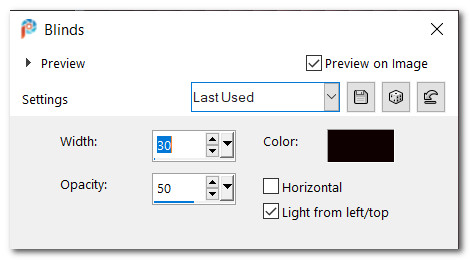
3. Effects/Texture Effects/Blinds. Color #000000.
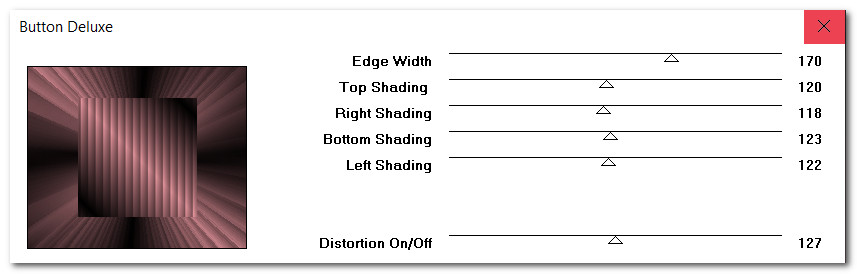
4. Effects/Filter Factory Gallery B/Button Deluxe.
5. Using Selections tool set to Rectangle/Add(Shift)/Feather 0, select the center square.
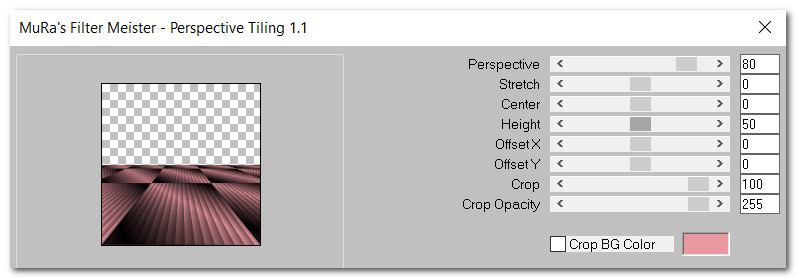
6. Effects/MuraMeister/Perspective.
7. Deselect. Using Magic Wand activate the top transparent area.
8. Flood fill with Gradient. Open woman_607_franiemargot.pspimage. Copy/Paste into Selection.
9. Adjust/Blur/Gaussian Blur. Radius 18. Deselect.
10. Layers/New Raster Layer. Using Selections tool set as Step 5, select the center square.
11. Selections/Modify/Expand by 18px. Change Background color to #ffd0c9. Flood fill square with Background.
12. Selections/Modify/Contract by 3px. Delete.
13. Selections/Modify/Contract by 15px.
14. Flood fill with #ffd0c9. Selections/Modify/Contract by 3px. Delete.
15. Open masque_tut_precious_day.pspimage. Copy/Paste into Selection. Deselect.
16. Using Color Changer tool tolerance set to 20, right click on masque to change color.
17. Effects/3D Effects/Drop Shadow. Vertical -10, Horizontal -10, Opacity 50, Blur 16, color #000000.
18. Adjust/Sharpness/Sharpen.
19. Open Juliette_Rom'Antique_UIUments (14).png of leaves. Copy/Paste as New Layer.
20. Change Background color to #e998a0. Using Color Changer tool right click color on a leaf and the color will change on just some of them.
21. Image/Resize/Resize by 80%/Resize all layers unchecked.
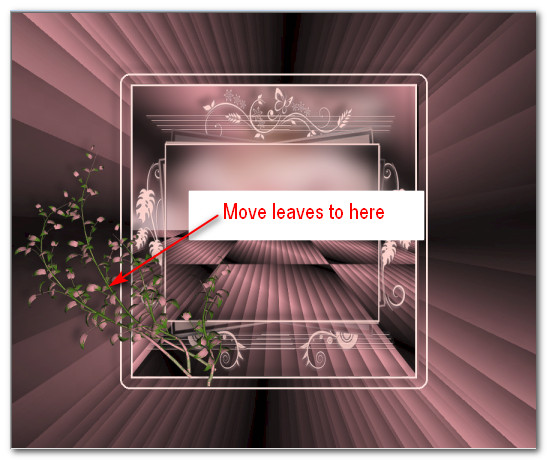
22. Move leaves to left side. Effects/3D Effects/Drop Shadow. Vertical -10, Horizontal -10, Opacity 50, Blur 16, color #000000.
23. Adjust/Sharpness/Sharpen.
24. Duplicate. Image/Mirror. Mirror-Horizontal.
25. Merge Down on leaves layers. Pull beneath Raster 2. Go to top layer and highlight to continue.
26. Image/Add Borders/Add 3px border, Symmetric checked, color #e998a0.
27. Image/Add Borders/Add 3px border, Symmetric checked, color #000000.
28. Image/Add Borders/Add 75px border, Symmetric checked, color #ffffff.
29. Using Magic Wand, activate the 75px border. Flood fill with Gradient.
30. Layers/New Raster Layer.
31. Open masque_tut_precious_day.pspimage. Copy/Paste into Selection. Deselect.
32. Change Background color to #ffd0c9. Using Magic Wand, select a few of the leaves, butterfly and flowers at top. Right click on the activated items to recolor them.

33. Using Magic Wand, click on remaining items of mask until they all are selected.
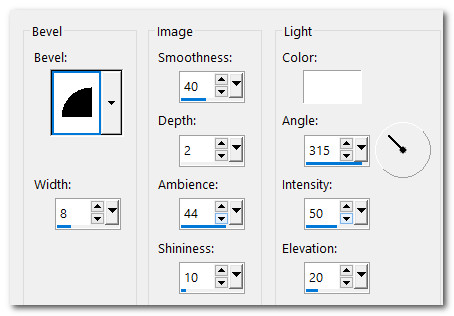
34. Effects/3D Effects/Inner Bevel.
35. Selections/Select None.
36. Effects/3D Effects/Drop Shadow. Vertical -10, Horizontal -10, Opacity 50, Blur 16, color #000000.
37. Image/Add Borders/Add 3px border, Symmetric checked, color #000000.
38. Image/Add Borders/Add 3px border, Symmetric checked, color #e998a0.
39. Layers/New Raster Layer. In Materials palette set Foreground to #e998a0/Background to #ffd0c9. Set to Gradient as settings in Step #1.
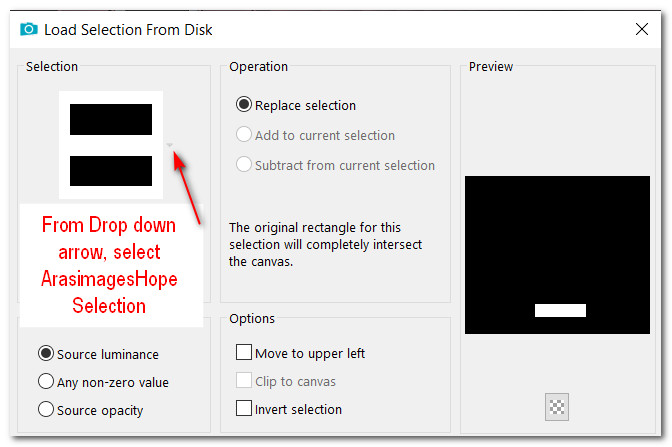
40. Selections/Load/Save Selection. Load Selection from Disk. From drop down arrow choose ArasimagesHope Selection. Load.
41. Flood fill selection with Gradient. Adjust/Blur/Gaussian Blur. Radius set to 15.
42. Effects/3D Effects/Inner Bevel. Same settings as Step 34.
43. Effects/3D Effects/Drop Shadow. Vertical -10, Horizontal -10, Opacity 50, Blur 16, color #000000.
44. Selections/Select None.
45. Change Background color to #000000. From the tool bar select the Text Tool/set Font to Times New Roman, Size 28, Stroke width: 0.0./Kerning to 25/Styled line Solid/Color #000000.

46. Type out the word H . O . P . E . (notice the spaces). Center. Convert to Raster Layer.
47. Change the Font to Toots Extended/Size 28, color #000000, Styled line Solid, Kerning 25, Stroke width 0.0. Type out the words "Desire with Anticipation". Convert to Raster Layer. Center under the word H . O . P . E .

48. Open woman_607_franiemargot.psp. Copy/Paste as New Layer.
49. Image/Resize/Resize by 130%/Resize all layers unchecked.
50. Place woman inside center square.
51. Effects/3D Effects/Drop Shadow. Vertical -10, Horizontal -20, Opacity 40, Blur 40, color #000000.
52. Adjust/Sharpness/Sharpen.
53. Open JHanna_540 tube.pspimage. Copy/Paste as New Layer.
54. Image/Resize/Resize by 40%/Resize all layers unchecked.
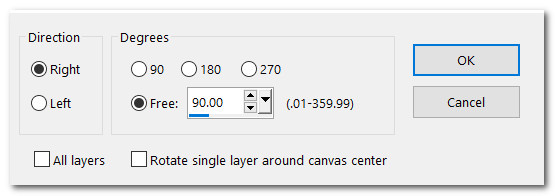
55. Image/Free Rotate/Right 90 Degrees.
56. Use Color Changer tool and color #e998a0, change color of rose. Place rose below sign of H.O.P.E and centered.
57. Effects/3D Effects/Drop Shadow. Vertical -10, Horizontal -20, Opacity 40, Blur 40, color #c0c0c0.
58. Adjust/Sharpness/Sharpen.
59. Merge/Merge Visible. Sign your name if you wish and save.
Thank you PamelaD for checking my tutorials. We miss our Evatexas who passed on Feb.9. Her help with PSP was invaluable and she was a good friend. 2021
If you are going to use this tutorial for stationery, cards or place the tutorial/tag on another site, I would appreciate you contacting me for permission, giving Arasimages credit for the original tutorial and if possible, a link back to my site. Thank you.
Copyright © Arasimages All Rights Reserved