
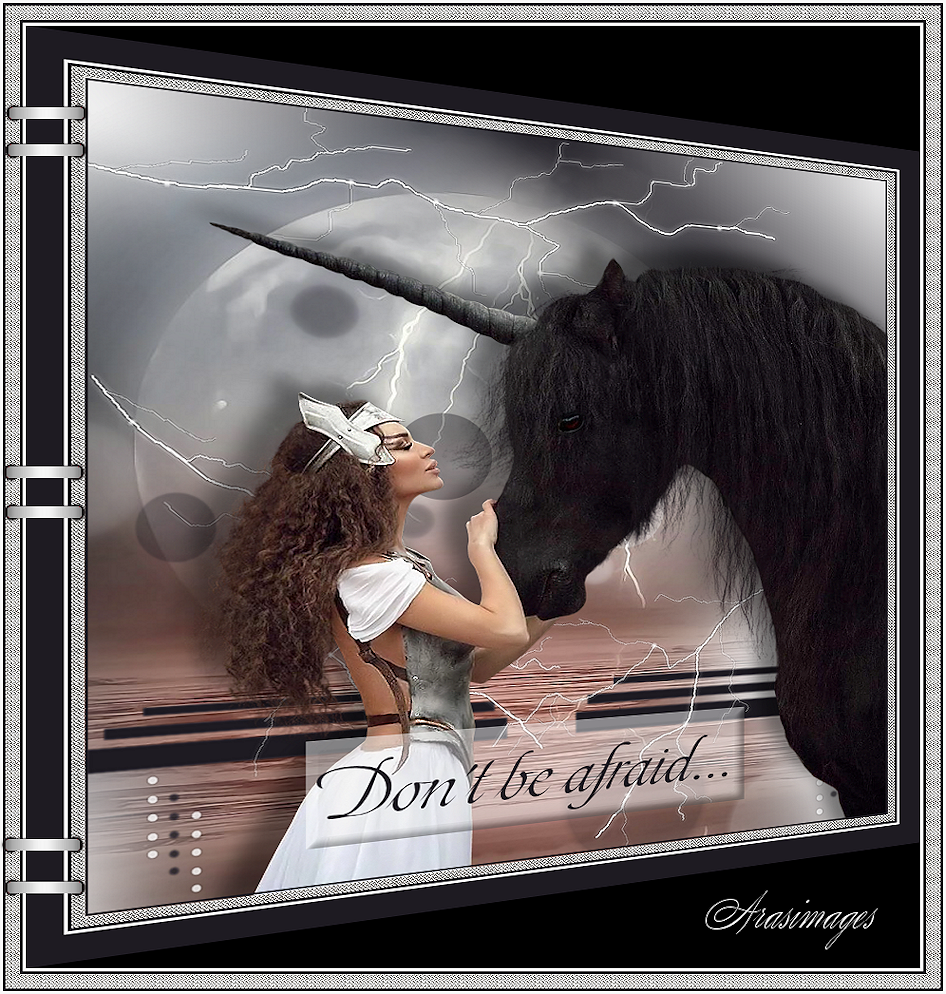
Don't be afraid...
For this tutorial you will need the materials in the zip file below.

For an Italian, Dutch, German, Spanish and French translation click on the flag.


Unzip the materials into a folder named Don't be afraid which you will make on your desktop. Please duplicate and close original tubes using the copies for your work so you will not lose the original. This tutorial was written using PSP2019. I have used no plugins but did use effects of PSP. Install the font Toots Extended in your PSP. Place the Selections in your PSP Files/Selections folder, the pattern in your PSP Files/Patterns and the brushes in your PSP Files/Brushes folder.
Thanks go to Maryse and to Silvie for their tubes used in this tutorial.
Use the genericfollow.png below to mark your place along the way.

1. In Materials Palette, set color of Foreground to #f8f8f8/Background to #1e1b22. Select Gradient/Linear/Corel_06_029 Foreground/Background/Invert unchecked. Angle 45 and Repeats set to 3.

2. File/New/New Image 850x900. Flood fill new image with Gradient.
3. Adjust/Blur/Gaussian blur. Radius set to 26.
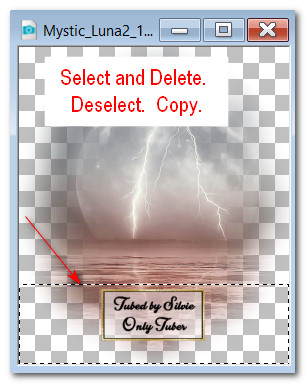
4. Open Mystic_Luna2_13.08.2017.png. Using Selection tool set to Rectangle, draw around Silvie's watermark. Delete. Deselect. Copy.
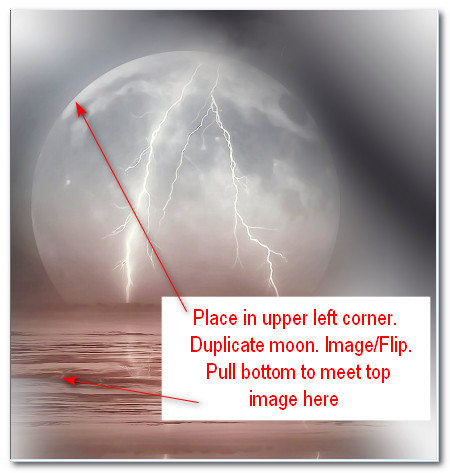
5. Paste Luna moon as New Raster Layer. Place in upper left corner.
6. Duplicate. Image/Flip. Flip/Vertical. Pull bottom upward to meet water.
7. Layers/New Raster Layer.
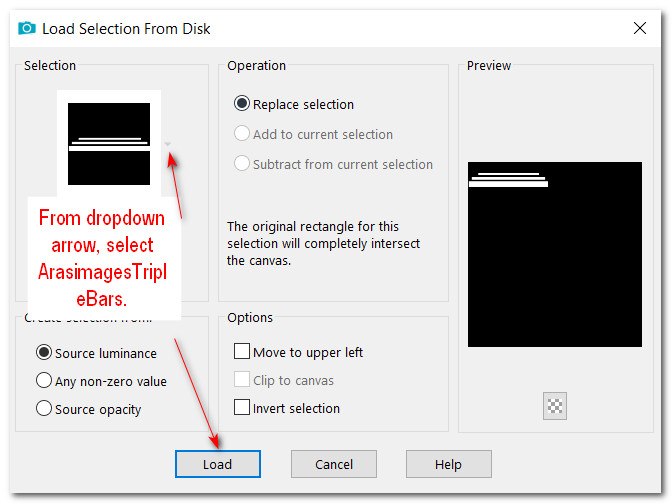
8. Selections/Load/Save Selection/Load Selection From Disk. From dropdown arrow, select Selection ArasimagesTripleBars. Load. Flood fill with background color. Deselect.
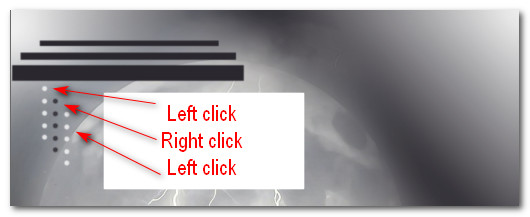
9. From tool bar choose Paint Brush. Select 5 dots.PspBrush. Use settings as seen below. Change Gradient in Foreground to color #f8f8f8. Left click, drop down one dot and to the right, right click, then drop down to next dot and left click as shown in example below.

10. Duplicate. Image/Mirror. Mirror/Horizontal.
11. Merge/Merge Down. Pull down so dots are almost to bottom edge.
12. Effects/Edge Effects/Enhance.
13. Layers/New Raster Layer.
14. From tool bar choose Paint Brush. Select Bokeh_37.PspBrush. Using background color right click then again with foreground color, left click using settings as seen below.


15. Using Selections tool set to Rectangle, surround the two large dots in bottom right corner. Delete. Deselect. Drop Opacity down to 46.
16. Layers/New Raster Layer.
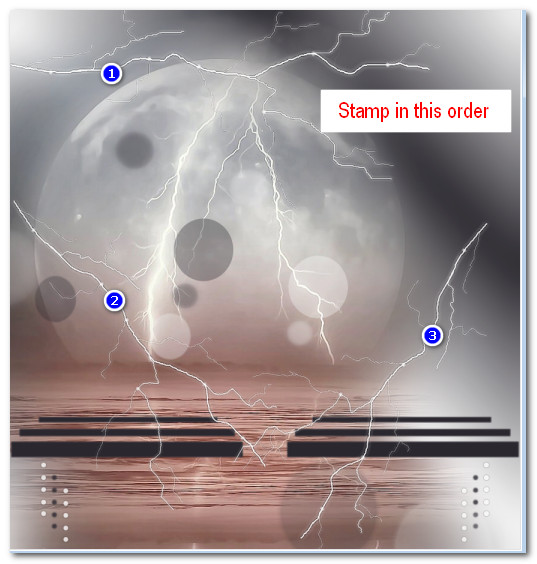
17. From tool bar choose Paint Brush. Select Lightening.PspBrush. Using Foreground color set to Size 800, Rotation to 0, Step at 40, left stamp in order as seen below in Step 19.

18. Set Size to 700, Rotation to 46, left stamp as seen below in Step 19.
19. Set Rotation to 120, left stamp as seen below.
20. Effects/Edge Effects/Enhance.
21. Open MR_Olga with her Black Unicorn.png. Erase or use Selections tool set to Rectangle, surround the Maryse watermark and Delete. Deselect.
22. Copy/Paste as New Layer.
23. Move to right side and bottom.
24. Effects/3D Effects/Drop Shadow. Vertical -20, Horizontal -25, Opacity 45, Blur 30, color #000000.
25. Adjust/Sharpness/Sharpen.
26. Layers/New Raster Layer.
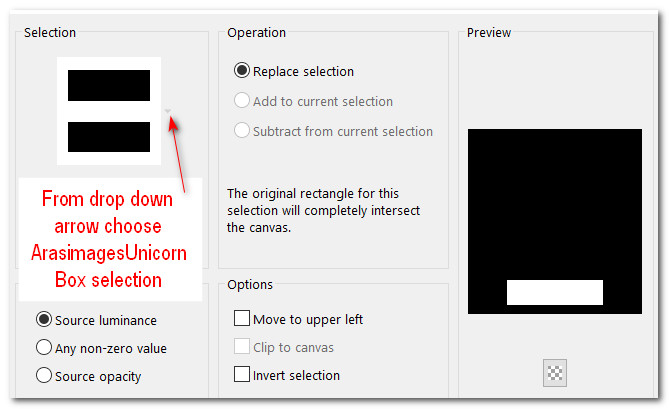
27. Selections/Load/Save Selection. Load Selection from Disk. Choose from drop down arrow ArasimagesUnicornBox selection. Load.
28. Flood fill box with Foreground color #f8f8f8. Drop Opacity down to 48.
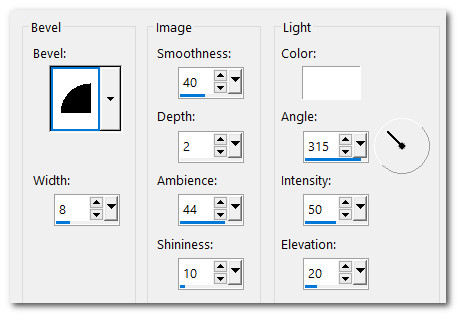
29. Effects/3D Effects/Inner Bevel. Repeat. Deselect.
30. From tool bar select the Text Tool. Choose Toots Extended Font, Size 72, Stroke width: 0.0, type out "Don't be afraid...".

31. Objects/Align/Horizontal Center. Convert to Raster Layer.
32. Move text down a little so it is centered.
33. Save your work as a working file before you start the borders in case you need to make changes before you finish.
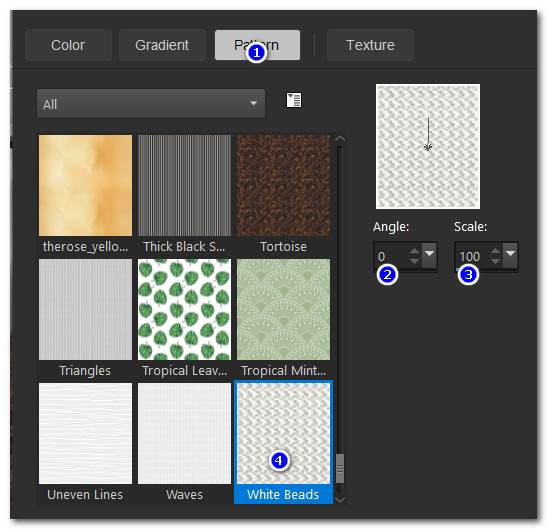
34. In Materials Palette change to Pattern. Select White Beads, Angle: 0, Scale: 100.
35. Image/Add Borders/Add 10px border, Symmetric checked, color #ffff00.
36. Using Magic Wand activate the 10px border.
37. Layers/New Raster Layer. Flood fill with White Beads Pattern.
38. Effects/Edge Effects/Enhance.
39. Selections/Invert. Flood fill with Background color #1e1b22.
40. Selections/Modify/Contract by 3px. Delete. Deselect.
41. Image/Add Borders/Add 3px border, Color #1e1b22, Symmetric checked.
42. Image/Add Borders/Add 3px border, Color #f8f8f8, Symmetric checked.
43. Image/Add Borders/Add 30px border, Color #1e1b22, Symmetric checked.
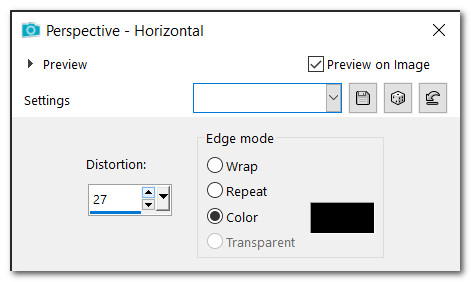
44. Effects/Geometric Effects/Perspective-Horizontal, color #000000.
45. Image/Add Borders/Add 3px border, Color #f8f8f8, Symmetric checked.
46. Image/Add Borders/Add 3px border, Color #1e1b22, Symmetric checked.
47. Image/Add Borders/Add 15px border, Color #f8f8f8, Symmetric checked.
48. Using Magic Wand activate 15px border. Flood fill with White Beads Pattern.
49. Effects/Edge Effects/Enhance. Deselect.
50. Image/Add Borders/Add 3px border, Color #1e1b22, Symmetric checked.
51. Image/Add Borders/Add 3px border, Color #f8f8f8, Symmetric checked.
52. Open Fasteners.png. Copy/Paste as New Layer.
53. Move Fasteners to left side over border, centering it.
54. Merge/Merge Visible. Sign your name if you wish and save.
55. Resize if the image is too large for your use.
Thank you PamelaD for checking my tutorials. July 2021.
If you are going to use this tutorial for stationery, cards or place the tutorial/tag on another site, I would appreciate you contacting me for permission, giving Arasimages credit for the original tutorial and if possible, a link back to my site. Thank you.
Copyright © Arasimages All Rights Reserved