
The Long Flight Home
For this tutorial you will need the materials in the zip file below.

For a French, Italian, Spanish, German and Dutch translation click on the flags.


This tutorial was written using PSP2019. To work this tutorial, it is assumed you have some working knowledge of Paint Shop Pro. Create a folder on your desktop named The Long Flight Home and unzip the materials in it. When using tubes, make a duplicate and use it closing out the original so you will not lose it by mistake. Install the Font in your PSP you are using. The plugins I have used are Penta/color dot, AlienSkin Xenofex2/Burnt Edges, FilterFactory 2/Paper Textures/Wall Paper Fine and effects of PSP.
The butterfly and sunflower I have tubed and I have created the animations as well as took the picture of the sunset at Lake Michigan. The hanging leaves author is unknown.
Use the butterfly below to mark your place along the way.
1. In Materials Palette, set the Foreground color to #efc300, Background color to #000000.
2. New/New Image 800px by 800px. Flood fill with Foreground color #efc300.
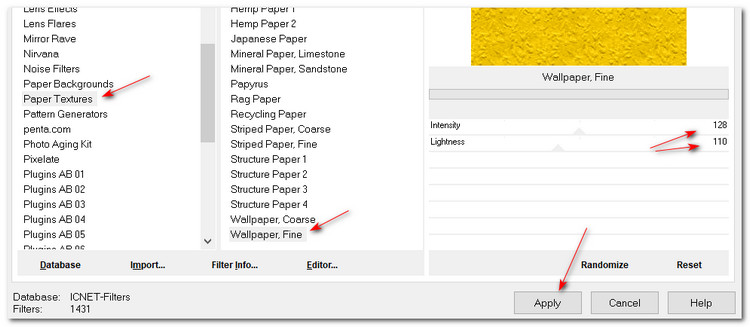
3. Effects/Filters Unlimited 2.0/Paper Textures/Wallpaper, Fine.
4. Effects/Edge Effects/Enhance.
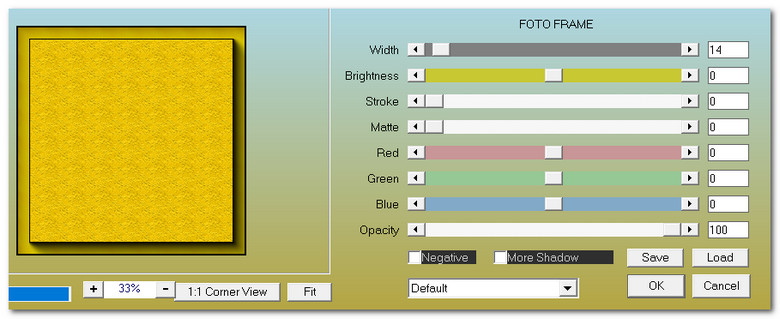
5. Effects/AAA Frames/FotoFrame.
6. Layers/New Raster Layer. Flood fill with Background color #000000.
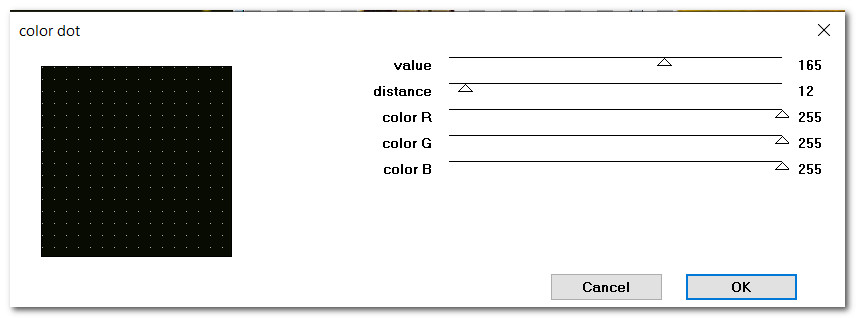
7. Effects/Penta/colordot.
8. Effects/Edge Effect Enhance.
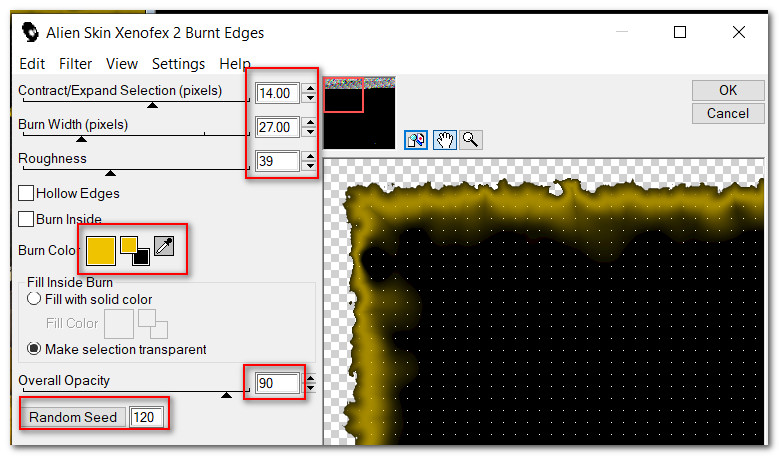
9. Effects/AlienSkin Xenofex 2/Burnt Edges.
10. Open LakeMichigan_8_27_21_ArasimagesPhoto.png.
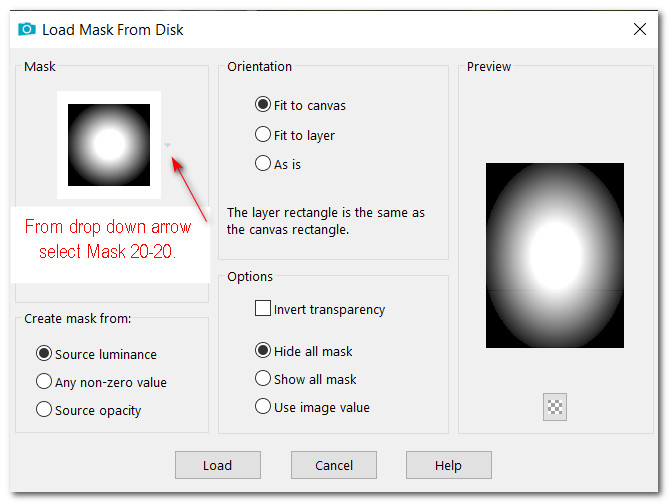
11. Layers/Load/Save Mask/Load Mask from Disk. Select Mask 20-20. From Drop down arrow choose 20-20 Mask. Load.
12. Merge/Merge Group. Copy/Paste on working image.
13. Image/Resize/Resize by 80%/Resize all layers unchecked. Repeat.
14. Open HangingLeaves.png. Change Foreground color to #798038. Using Color Changer from tool bar, left click on the leaves to change color to green.
15. Copy/Paste as New Layer.
16. Image/Resize/Resize by 75%, Resize all layers unchecked.
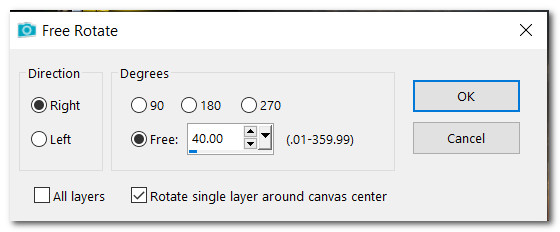
17. Image/Free Rotate/Rotate by 40 degrees Right.
18. Effects/3D Effects/Drop Shadow. Vertical -11, Horizontal -11, Opacity 75, Blur 25, color #000000.
19. Adjust/Sharpness/Sharpen.
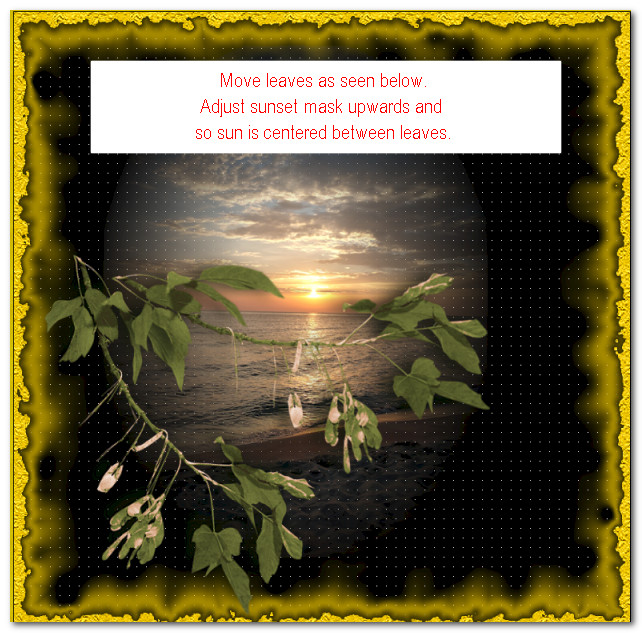
20. Move leaves down into left bottom corner. Duplicate.
21. Image/Free Rotate/Rotate 45 degrees Left.
22. Move second set of leaves so they set just below the horizon. Adjust sunset mask so sun is between leaves. See snapshot for placement.
23. Open BigSunflower.pspimage. Copy/Paste as New Layer.
24. Image/Resize/Resize by 70%/Resize all layers unchecked.
25. Image/Mirror. Mirror Horizontal.
26. Effects/3D Effects/Drop Shadow. Vertical -11, Horizontal -11, Opacity 75, Blur 25, color #000000.
27. Place in bottom right corner.
28. Adjust/Sharpness/Sharpen.
29. Open BigSunflower.png again. Copy/Paste as New Layer.
30. Effects/3D Effects/Drop Shadow. Vertical 11, Horizontal 11, Opacity 75, Blur 25, color #000000.
31. Adjust/Sharpness/Sharpen.
32. Resize by 70% as in Step #24. Place in top left corner.
33. Layers/New Raster Layer.
34. Selections/Load/Save Selection/Load Selection from Disk. Select ArasFourBars.PspSelection from drop down arrow. Load.
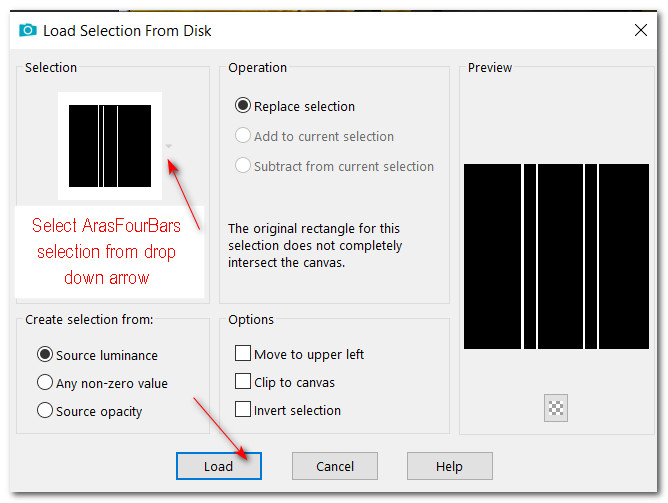
35. Flood fill bars with Background color #000000. Selections/Select None.
36. (Adjust sunflowers behind bars if needed).
37. Open ArasimagesButterfly.png. Copy/Paste as New Layer.
38. Image/Resize/Resize by 80%/Resize all layers unchecked.
39. Image/Free Rotate/Rotate Right by 15 Degrees.
40. Effects/3D Effects/Drop Shadow. Vertical -11, Horizontal -11, Opacity 75, Blur 25, color #000000.
41. Adjust/Sharpness/Sharpen.
42. Place butterfly on right side at the top of the sunflower.
43. In Materials palette, change the background color to #efc300.
44. From tool bar select Text tool. Select the font Amaze, Size 96, Stroke width 0.0, color #efc300, type out the letter "T". Change the Size to 56 and type out "he long flight home". Convert to Raster Layer. Move to top right side so it fits nicely over black space.

45. Image/Add Borders/Add 2px border, color #000000.
46. Image/Add Borders/Add 2px border, color #efc300.
47. Add your name or watermark if you wish and Save as .png or .jpg file.
48. For Animation, follow the instructions below.
49. On your finished image, copy. Open Animation Shop.
50. In the open workspace of Animation Shop, Paste as New Animation.
51. Duplicate the image until you have 18 frames in all. Highlight the first frame.
52. Edit/Select All. (All 18 frames are now activated).
53. Open StationeryButterfly.Psp. Highlight first frame. Edit/Select All. Animation/Resize Animation by 80%. Copy.
54. Go to your finished image. In first frame, right click, Paste/Into Selected Frame. Hover the butterfly to where you want it to stay and left click in place. (All frames should now show your butterfly).
55. Open the FlyingButterfly.psp file in Animation Shop. Highlight the first frame.
56. Edit/Select All. (All 18 frames are now activated).
57. Animation/Reverse Frames. Animation/Resize Animation by 80%. COPY.

58. Go to the finished image. In the first frame, right click, Paste/Into Selected Frame. Hover the butterfly to the bottom left corner, then left click into place. (All frames should now show your butterfly).
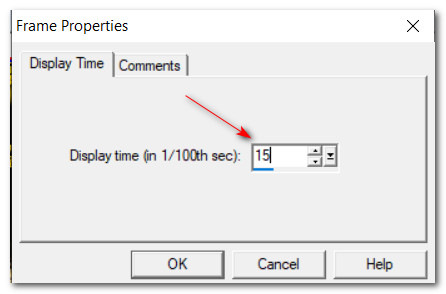
59. To test to see if your butterflies are where you want them, click on the tool bar at the top of AS on View Animation. If they are where you want them, good job! If you want them to flap their wings slower, set Animation/Frame Properties to 15.
60. Test your animation by clicking on View Animation and if all is okay, we will now save our work.
61. File/Save As. When the Save As box appears, give your work a file name, The long flight home. Name where it will be saved in Save in: box, leave Save as type: set to (*.gif). Click on Save.
62. As the boxes continue to pop up, simply click Next, Next, Next and Finish. You are now done!
Thank you PamelaD for your testing of my tutorials and helping me along the way. September 2021.
If you are going to use this tutorial for stationery, cards or place the tutorial/tag on another site, I would appreciate you contacting me for permission, giving Arasimages credit for the original tutorial and if possible, a link back to my site. Thank you.
Copyright © Arasimages All Rights Reserved