
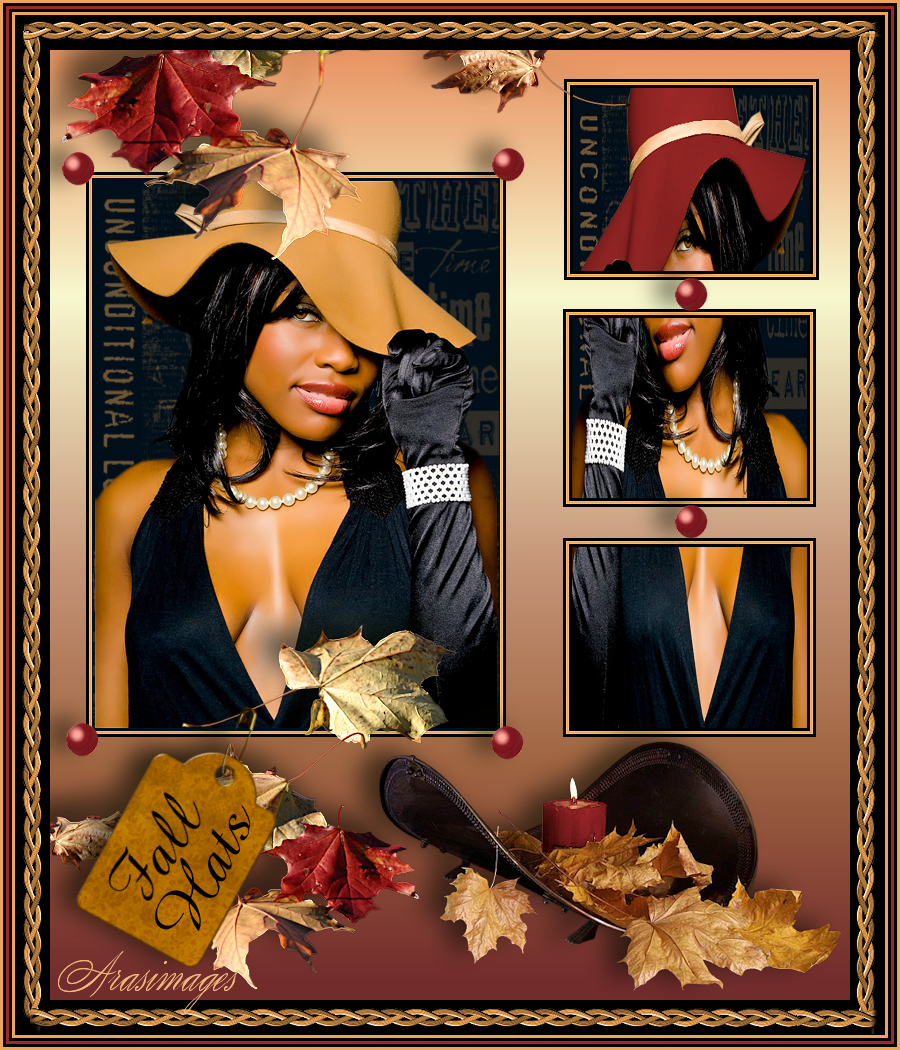
Fall Hats
For this tutorial you will need the materials in the zip file below.

For an Italian, Dutch, Spanish, German and French translation click on the flags.


This tutorial was written using PaintShop Pro2019 Ultimate. To work this tutorial, it is assumed you have some working knowledge of Paint Shop Pro. No plugins were used and no gradients. Install the font Amaze Normal.ttf in your PSP program. Place the two Selections in your PSP Files/Selections folder. Create a folder on your desktop to keep your materials and work in. Happy PSPing!
Thanks go to Miss Silly to Soleil to Devils Tubes and to Margit whose link I do not find.
Use the bookmark below to mark your place along the way.

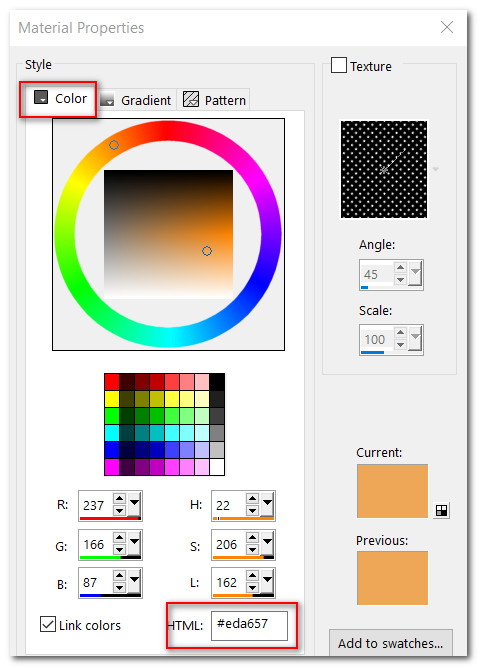
1. In Materials Palette, set Foreground to #eda657, Background to #000000.
2. New/New Image 800px by 950px. Ctrl+A.
3. Open Background.png. Copy/Paste into selection. Ctrl+D.
4. Layers/New Raster Layer.
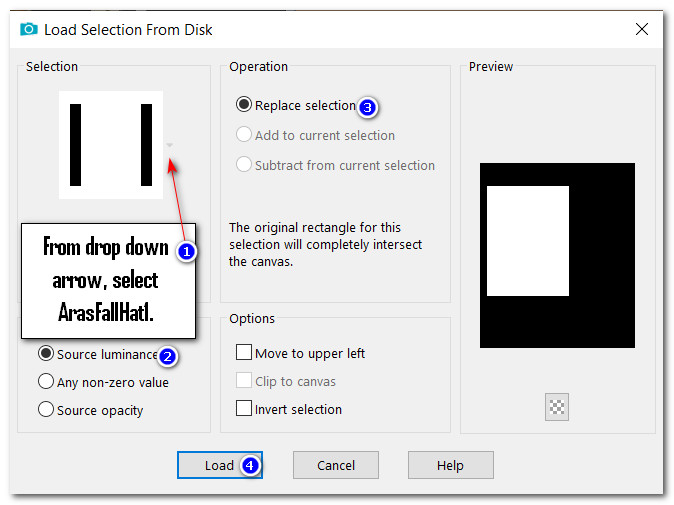
5. Selections/Load/Save Selection/Load Selection from Disk. Select ArasFallHat selection. Load.
6. Open Devilsinside_529-2009.pspimage. Copy Raster 2. Paste into Selection.
7. Layers/New Raster Layer. Flood fill with Background color #000000.
8. Selections/Modify/Contract/Contract by 3px. Delete.
9. Flood fill with Foreground #eda657. Selections/Modify/Contract/Contract by 3px. Delete.
10. Flood fill with Background color #000000.
11. Selections/Modify/Contract. Contract by 3px. Delete.
12. Go back to Devilsinside lady image. Copy middle layer/Paste into Selection. Ctrl+D.
13. Adjust/Sharpness/Sharpen. Merge/Merge Down.
14. Go back to Devilsinside lady image again where we will make some changes. Image/Mirror/Mirror Horizontal.
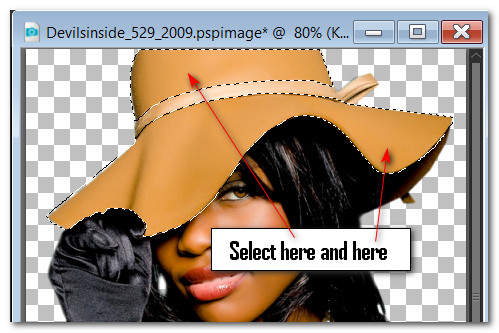
15. Using the selections tool set to Freehand Selection/Point to point/Add (Shift), Feather 0, carefully draw around the lady's hat omitting the ribbon on it.

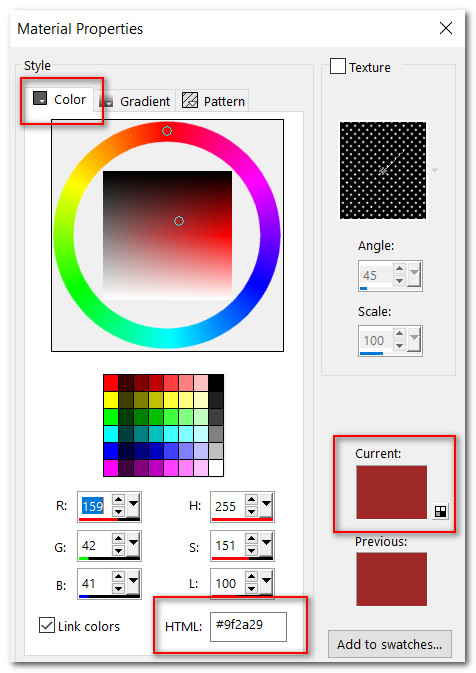
16. Change the Foreground color to #9f2829. Using Color Changer left click on both selected sections of hat to change to red. Ctrl+D. Keep lady image open on workspace.
17. Go to main image. Layers/New Raster Layer.
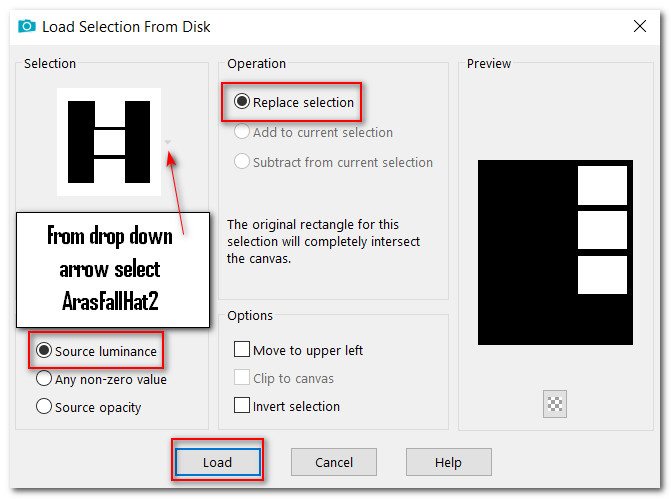
18. Selections/Load/Save Selection/Load Selection from Disk. From Drop down arrow select ArasFallHat2. Load.
19. Flood Fill tool Match mode: set to None/Flood fill selections with background color #000000.
20. Selections/Modify/Contract. Contract by 3px. Delete.
21. In Materials Palette change Foreground back to #eda657.
22. Flood fill each selection with Foreground color.
23. Selections/Modify/Contract. Contract by 3px. Delete.
24. Flood fill each selection with background color #000000.
25. Selections/Modify/Contract. Contract by 3px. Delete.
26. Go to lady image on workspace. Copy bottom layer. Go back to main image and Paste into Selection(s).
27. Go to lady image and Copy middle layer of lady. Go back to main image and Paste into Selection(s). Ctrl+D.
28. Adjust/Sharpness/Sharpen.
29. Open margit_Autumn_leaves2_AO_1.pspimage. Copy/Paste as New Layer.
30. Image/Resize/Resize by 77%/Resize all layers unchecked.
31. Pull into bottom left corner.
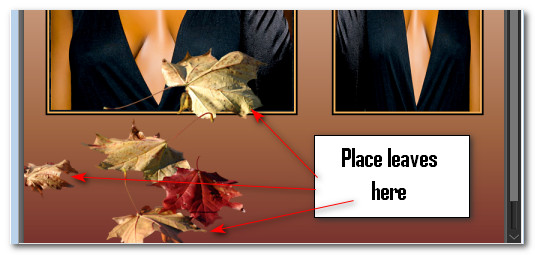
32. Edit/Paste as New Layer again.
33. Image/Mirror. Mirror-Horizontal. Place in upper left corner.

34. Merge/Merge Down. Effects/3D Effects/Drop Shadow. Vertical -20, Horizontal -20, Opacity 60, Blur 35, color #000000.
35. Adjust/Sharpness/Sharpen.
36. Open RedElement.png. Copy/Paste as New Layer.
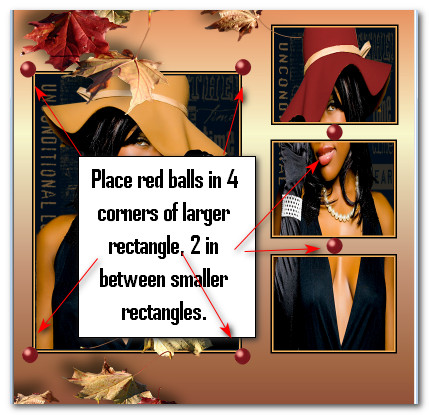
37. Right click in Layers Palette on the RedElement and drag to main image. Repeat until you have 6 layers of red balls. Place one on each corner of larger lady rectangle and one between each of the three smaller ones.
38. Hold down Shift key, select the bottom Red Element Ball layer to select all 6 layers. Merge/MergeSelected.
39. Effects/3D Effects/Drop Shadow. Vertical -6, Horizontal -19, Opacity 60, Blur 35, color #000000.
40. Open Tag.png. Copy/Paste as New Layer.
41. Place in bottom left corner below lady. Apply drop shadow as in Step #39.
42. Use Eraser tool set to Size 5 and erase the left side of the safety pin that is over the borders.
43. From tool bar select the Text tool. Set to Font: Amaze, Size 72, Font color #000000, Stroke width: 0.0. Type out the word "Fall".

44. Using the pick tool, use the turn Node to turn the word Fall so it is even with left tag border. Convert to Raster Layer.
45. Again using text tool set to above settings in Step #43, type out the word "Hats".
46. Use the pick tool to turn the word Hats so it is even with right border of tag. Convert to Raster Layer.
47. Adjust word placement if necessary.
48. Open Misssilly-AutumnDeco-Jan2008.pspimage. Close off watermark. Using Selections tool/Point to Point as in Step #15 as you did for the first hat recoloring, select around the candle.
49. Use the Foreground color to #9f2829. Using Color Changer set to Tolerance 20/Edge Softness 20, left click on candle to change to red. Ctrl+D.
50. Image/Mirror. Mirror Horizontal. Copy/Paste as New Layer on main image.
51. Image/Resize/Resize by 77%/Resize all layers unchecked.
52. Place hat with candle in bottom right corner. Apply drop shadow as in Step #39.
53. Adjust/Sharpness/Sharpen.
54. Image/Add Borders/Add 35px border, symmetric checked, color #000000.
55. Open BraidedBorder.png. Copy/Paste as New Layer.
56. Image/Add Borders/Add 3px border, symmetric checked, color #eda657.
57. Image/Add Borders/Add 3px border, symmetric checked, color #000000.
58. Image/Add Borders/Add 3px border, symmetric checked, color #9f2829.
59. Image/Add Borders/Add 3px border, symmetric checked, color #000000.
60. Image/Add Borders/Add 3px border, symmetric checked, color #eda657.
61. Sign your name or leave your watermark if you wish.
Thanks to PamelaD for testing my tutorial for me. October 2021.
If you are going to use this tutorial for stationery, cards or place the tutorial/tag on another site, I would appreciate you contacting me for permission, giving Arasimages credit for the original tutorial and if possible, a link back to my site. Thank you.
Copyright © Arasimages All Rights Reserved