
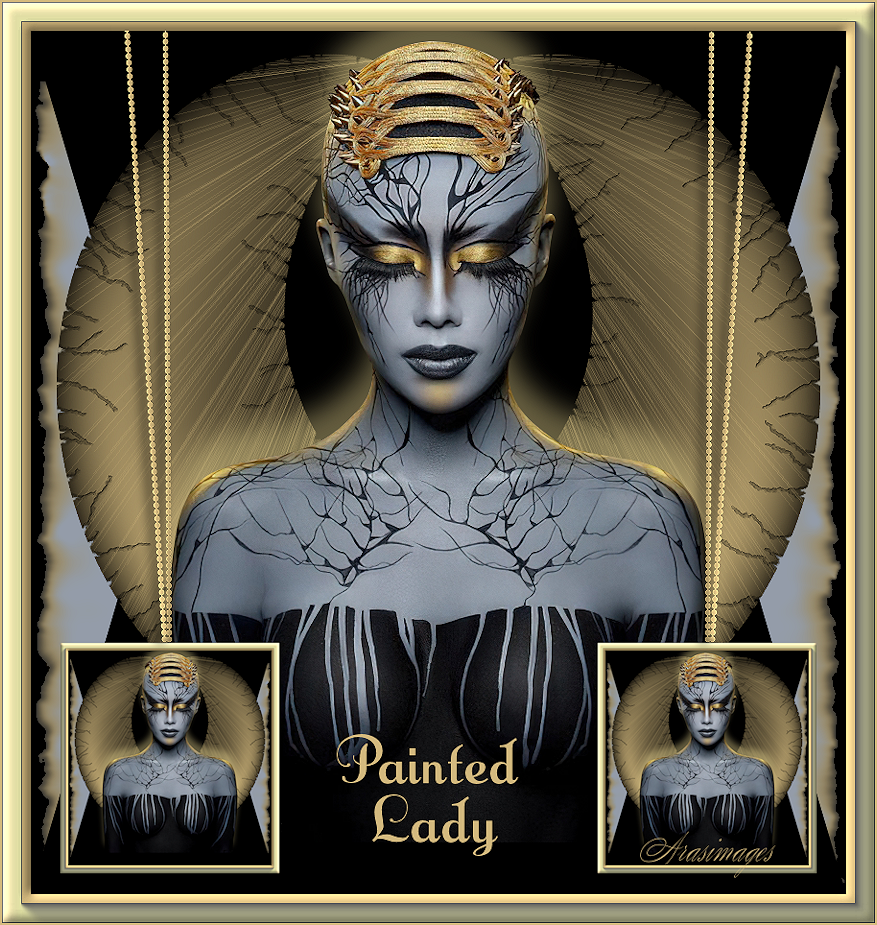
Painted Lady
For this tutorial you will need the materials in the zip file below.

For an Italian, Spanish, German and French translation click on the flags.


Create a folder on your desktop named Painted Lady. Unzip the zipped Materials File into this folder. Place the Style line in your PSP Files/Styled lines folder. Import the font into your PSP Files/Fonts folder. This tutorial was written using AAA Frames/Foto Frame, AlienSkinXenofex2/Burnt Edges and Cracks, and several effects in PSP program. To work this tutorial, it is assumed you have some working knowledge of Paint Shop Pro. I used PSP Pro2019 Ultimate for this tutorial.
Thanks go to Nikita for the lady tube.
Use the generic bookmark below to mark your place along the way.

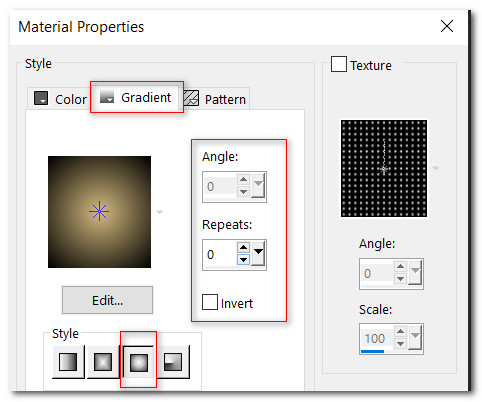
1. In Materials Palette set Foreground to #d3b97e, Background to #000000. Set to Gradient, Style Sunburst, Angle/Repeats 0, Invert unchecked, Center Points to 50, Focal points null, Link center and focal points checked.
2. New/New Image 850px by 900px. Flood fill with Background #000000.
3. Layers/New Raster Layer. Flood fill with color #949ca9.
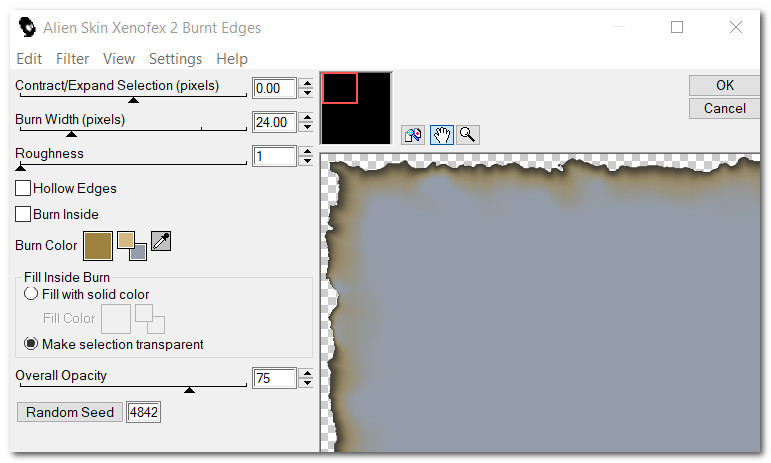
4. Effects/Alien Skin Xenofex 2/Burnt Edges. Use settings below.
5. Layers/New Raster Layer. Flood fill with color #000000.
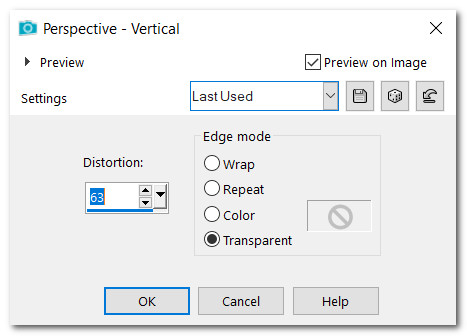
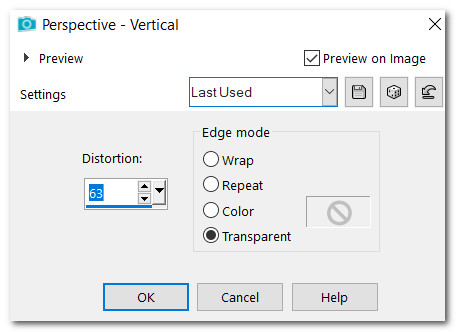
6. Effects/Geometric Effects/Perspective-Vertical.
7. Duplicate. Image Flip/Flip Vertical.
8. Layers/New Raster Layer. Flood fill with Gradient.
9. Effects/Geometric Effects/Perspective-Vertical.
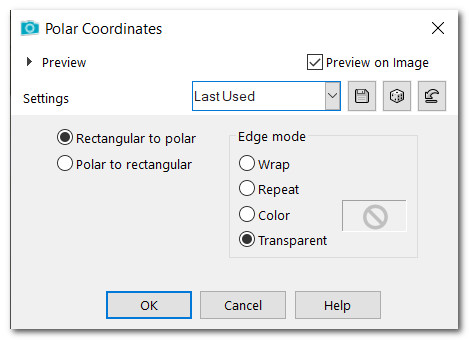
10. Effects/Distortion Effects/Polar Coordinates. Apply again.
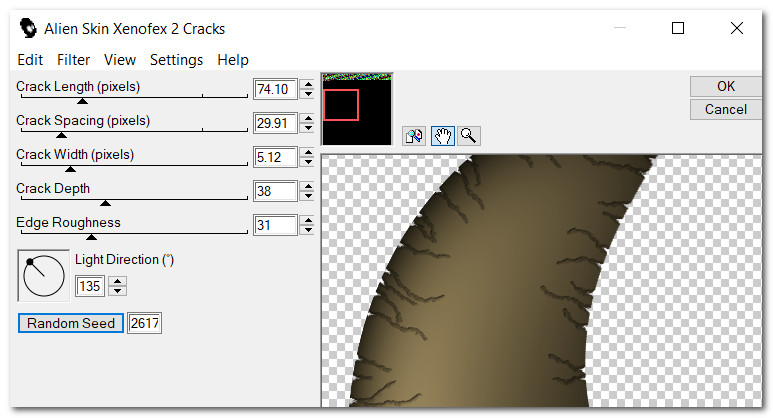
11. Effects/Alien Skin Xenofex2/Cracks.
12. Open 156914731059_femmes_nikita.png. Copy/Paste as New Layer.
13. Using Selection Tool set to Rectangle, surround Nikita's watermark. Delete. Deselect.
14. Effects/3D Effects/Drop Shadow. Vertical -34, Horizontal 0, Opacity 45, Blur 41, Color #d3b97e.
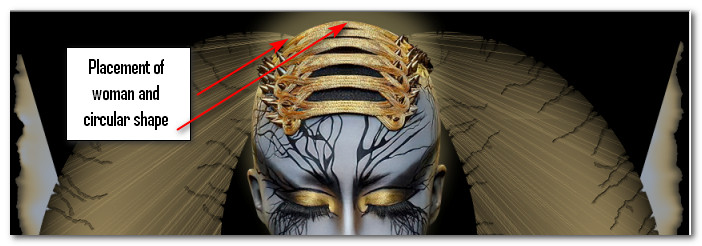
15. Pull woman almost to top of image.
16. Drop down to circular shape and pull upward behind woman's head as seen below. To center this layer and the woman layer, click on Objects/Align/Horizonal Center on each highlighted layer. Make sure circular shape layer is highlighted to continue the tutorial.
17. Effects/Illumination Effects/Sunburst.

18. Image/Add Borders/Add 30 px border, Symmetric checked, color #d3b97e.
19. Activate the 30px border with Magic Wand.
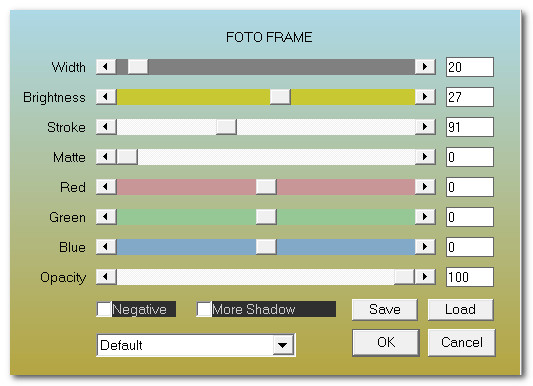
20. Effects/AAA Frames/FotoFrame.
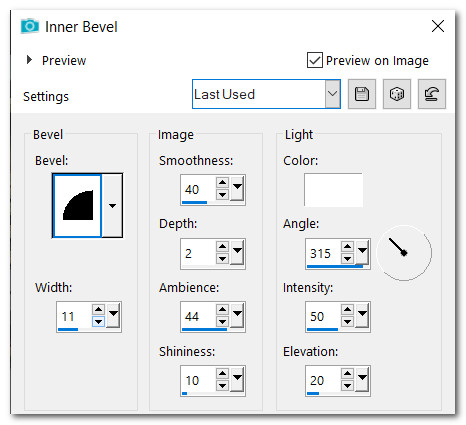
21. Effects/3D Effects/Inner Bevel.
22. Selections/Select None.
23. Copy/Paste as New Layer.
24. Resize/Resize by 25%, Resize all layers checked.
25. Move into right bottom corner. Duplicate. Image/Mirror. Mirror-Horizontal.
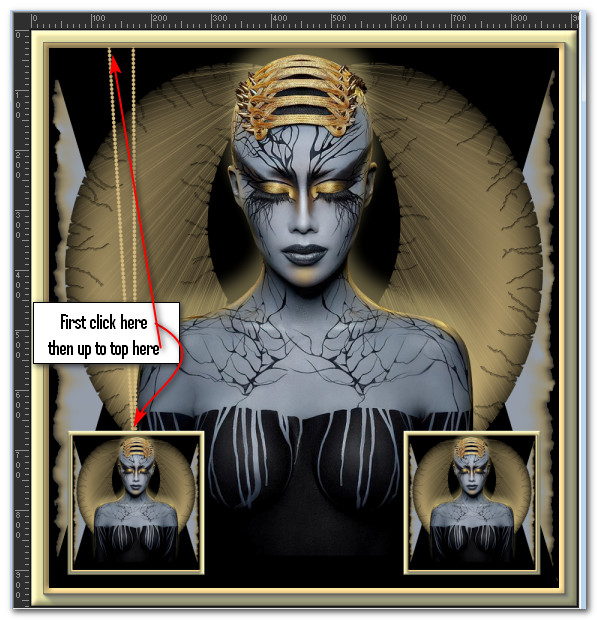
26. In Materials Palette set Foreground to #d3b97e. Set your View to Rulers. Using the Pen Tool from the Tool bar, set the line Style to Vyp-4, Width 2.00 and Draw Lines and Polylines selected. Click in center at the top of left resized picture. Click on 130px at the top inside of border. Click again on top of resized picture next to the first click, then go to the top of image and inside of border click on 170px. See example below.
27. Convert to Raster Layer. If you need to, select any excess from border and delete. Deselect.
28. Select the dotted lines with Magic Wand to activate them. Apply an Inner Bevel as in Step #21. Deselect.
29. Duplicate. Image/Mirror. Mirror-Horizontal.
30. Merge/Merge Down. Adjust/Sharpness/Sharpen.
31. Effects/3D Effects/Drop Shadow. Vertical 0, Horizontal -7, Opacity 75, Blur 15, Color #000000.
32. From Tool bar select Text Tool, Background color #d3b97e, Font Anna Nichole NF, Size 72, Style line solid, Stroke width 0.0. Use settings below.

33. Type out the word "Painted". Convert to Raster Layer. Type out the word "Lady". Convert to Raster Layer.
34. Arrange the words between the two small images.
35. View/Uncheck Rulers.
36. Sign your name or leave your watermark if you wish.
37. Image/Add Borders/Add 2px border, color #d3b97e, Symmetric checked.
38. If this 914px by 964px image is too large for you, please feel free to downsize it to whatever you wish.
Thank you PamelaD for your testing of my tutorial. January 8, 2022.
If you are going to use this tutorial for stationery, cards or place the tutorial/tag on another site, I would appreciate you contacting me for permission, giving Arasimages credit for the original tutorial and if possible, a link back to my site. Thank you.
Copyright © Arasimages All Rights Reserved