
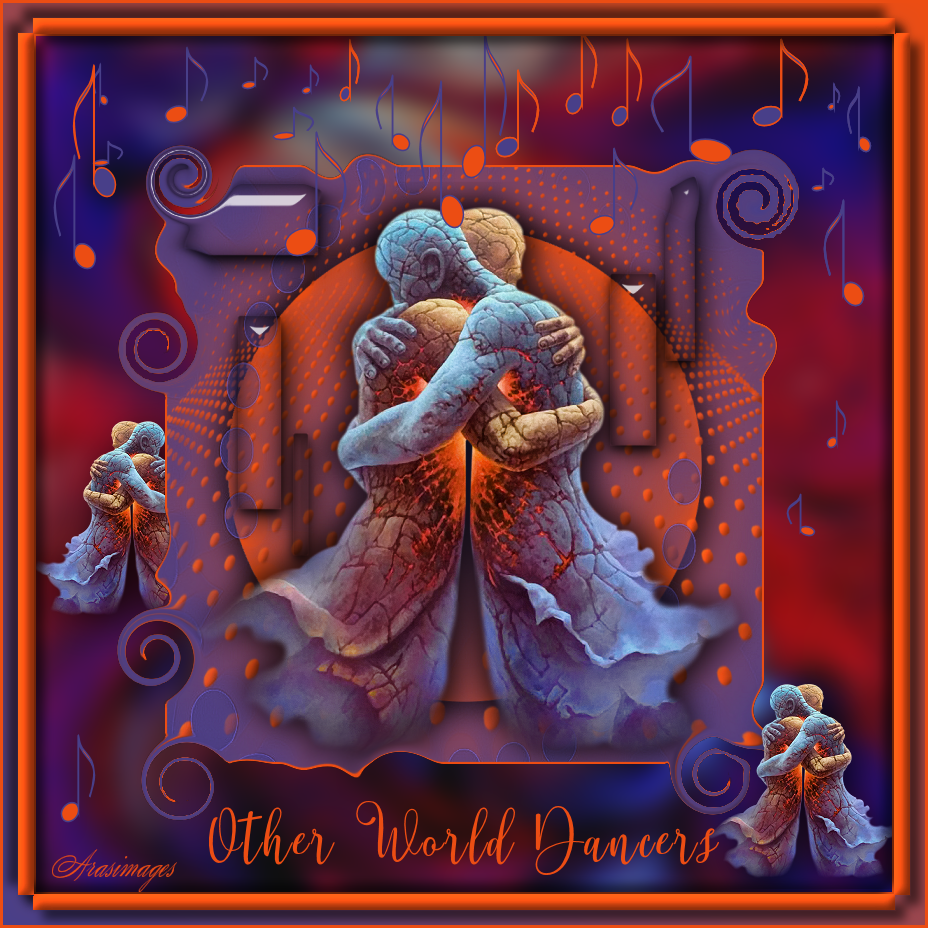
Other World Dancers
For this tutorial you will need the materials in the zip file below.

For a German, French, Italian, Spanish and Dutch translation click on the flags.


Create a folder on your desktop named Other World Dancers. Unzip the zipped Materials File into this folder. Make a copy of the tube in zipped folder and use it so the original will stay intact. Install the Font Hello Carrollina Script in your Font folder. Place the two Masks in your PSP Files/Masks folder. Place Chat_Music.1.psp Shape into your PSP Files/Presets Shapes Folder. Click on ArasClearFavorite.f1s setting and it will automatically show in your PSP/Alien Skin Eye Candy 5: Impact/Glass. This tutorial was written using FiltersUnlimited/Bkg Designer sf101/ALFs Border Mirror Bevel, Alien Skin Eye Candy 5: Impact/glass, Filter Forge/Filter Forge 6/Creative/Acid Flux/Default preset and several effects in PSP program. To work this tutorial, it is assumed you have some working knowledge of Paint Shop Pro. I used PSP Pro2020 Ultimate for this tutorial.
Thanks go to LisaT for the couple tube.
Use the generic bookmark below to mark your place along the way.

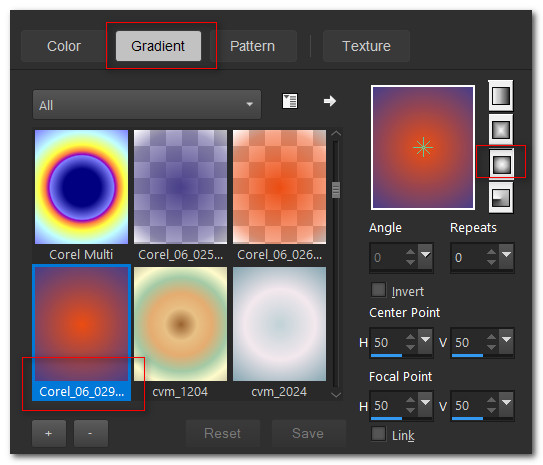
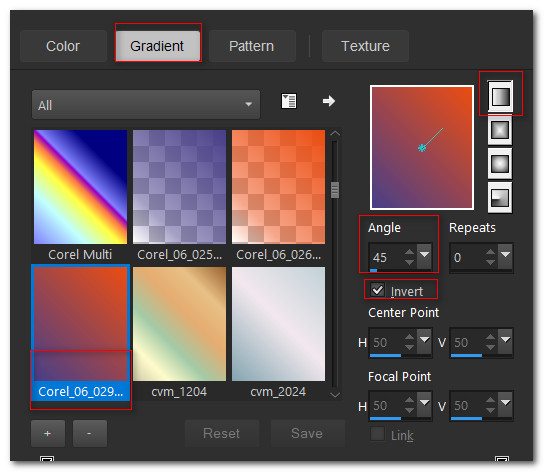
1. In Materials Palette set Foreground to #ec4d13, Background to #483f89. Set to Gradient, Corel_06_029(Foreground/Background), Style Sunburst, Angle/Repeats 0, Invert unchecked, Center Points 50, Focal points 50, Link unchecked.
2. New/New Image 850px by 850px. Flood fill with Gradient.
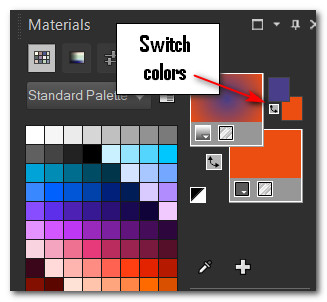
3. Layers/New Raster Layer. Click on small double arrow in Materials Palette to switch Foreground/Background colors. Flood fill with Gradient.
4. Effects/Geometric Effects/Circle.
5. Image/Resize/Resize by 80%/Resize all layers unchecked.
6. Effects/3D Effects/Drop Shadow. Vertical 10, Horizontal 10, Opacity 80, Blur 60, color #000000.
7. Effects/3D Effects/Drop Shadow. Vertical -10, Horizontal -10, Opacity 80, Blur 60, color #000000.
8. Layers/New Raster Layer. Flood fill with orange #ec4d13.
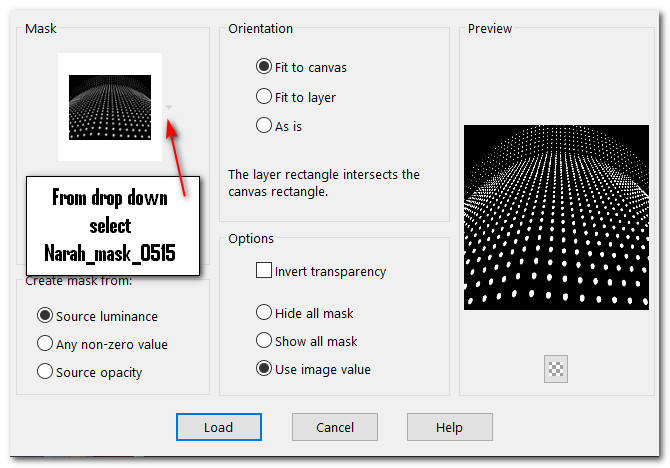
9. Layers/Load/Save Mask. Load Mask from Disk. From drop down select Narah_mask_0515. Load.
10. Merge/Merge Group.
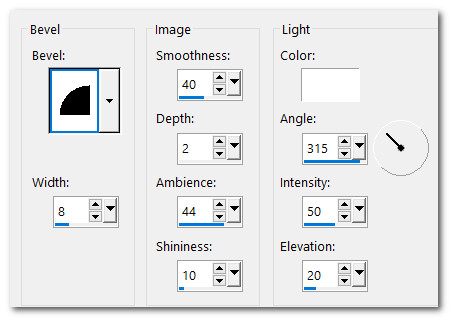
11. Use Magic Wand with below settings, click on one dot to highlight all. Effects/3D Effects/Inner Bevel. Deselect.

12. Layers/New Raster Layer. Flood fill with purple #483f89.
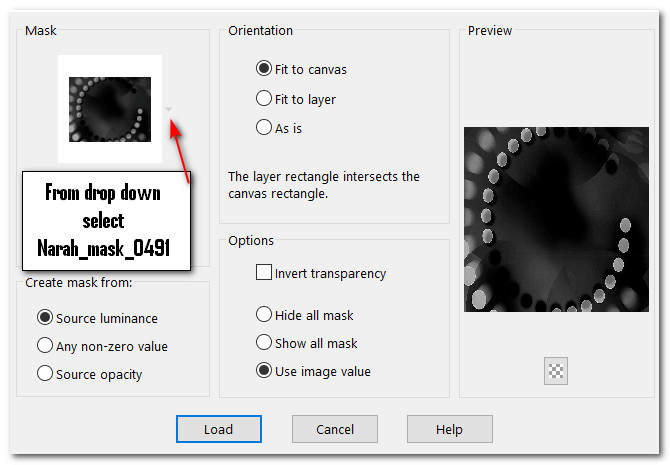
13. Layers/Load/Save Mask. Load Mask from Disk. From drop down select Narah_mask_0491. Load.
14. Merge/Merge Group. Effects/Edge Effects/Enhance.
15. Open couples_0024_lisat.png. Copy/Paste as New Layer.
16. Using Selections tool surround Lisa's watermark, Delete. Deselect.
17. Effects/3D Effects/Drop Shadow. Vertical -10, Horizontal -10, Opacity 80, Blur 60, color #000000.
18. Effects/3D Effects/Drop Shadow. Vertical 10, Horizontal 10, Opacity 80, Blur 60, color #000000.
19. Adjust/Sharpness/Sharpen. Move down a little.
20. Layers/New Raster Layer.
21. Using the Selections tool set to Rectangle/Replace/Feather 0, draw first of 5 rectangles in top left of image.
22. Effects/3D Effects/Drop Shadow. Vertical 10, Horizontal 10, Opacity 80, Blur 60, color #000000.
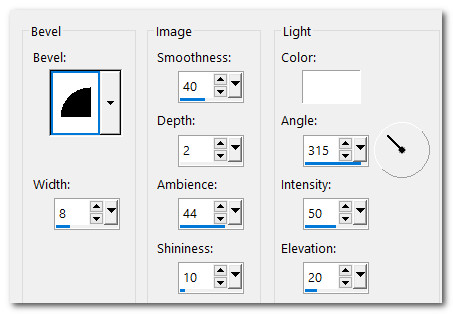
23. Effects/AlienSkin Eye Candy 5: Impact/Glass. Set as seen below. ArasClearFavorite.f1s should show in your settings. Deselect.
![]()
24. Draw out more of the rectangles using settings of Steps 21 through 23, use the image below to help you place the rectangles. Or choose where you want them, have fun with them, they do not have to be exactly where I have placed mine. Deselect after each rectangle is finished.

25. Image/Add Borders/Add 3px border, color #ec4d13, Symmetric checked.
26. Duplicate Image. Image/Resize/Resize by 70%/Resize all layers unchecked.
27. Drop down to Background (first) layer.
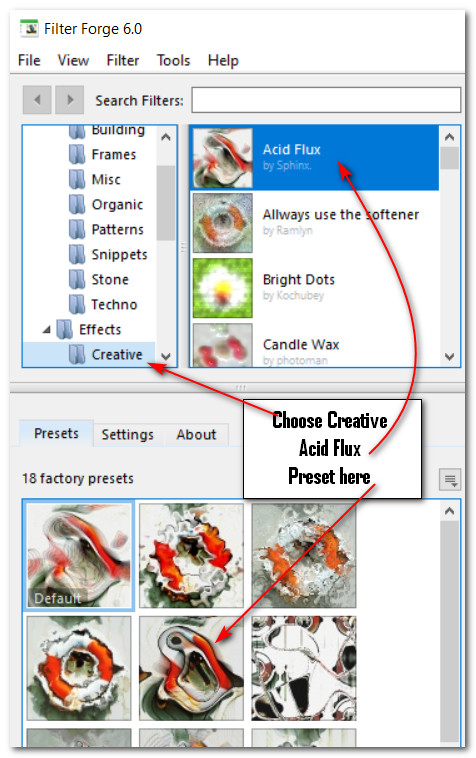
28. Effects/Filter Forge/Filter Forge 6. Creative/Acid Reflux/5th preset as shown.
29. Adjust/Blur/Gaussian Blur. Radius 10. Go back to the top layer to continue.
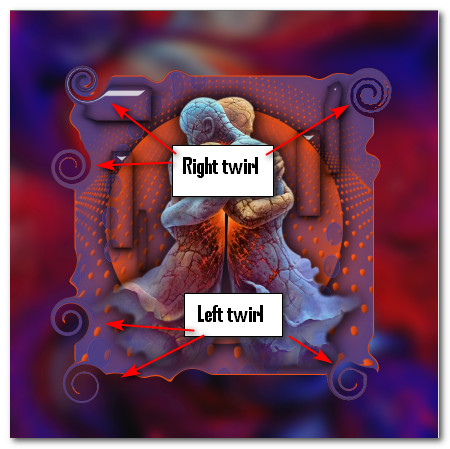
30. From Tool bar select the Warp Brush tool. Set Size to 99. Use the Right Twirl as shown below. Hold the left mouse steady over the top left corner and watch it twirl! Go down a little more along the edge and make another twirl. Make another on right top corner. Make indents along the orange 3px edge if you wish. Then switch to Left Twirl and do two on bottom left corner and one on right bottom corner. Leave all settings at Default except for Size of 99.

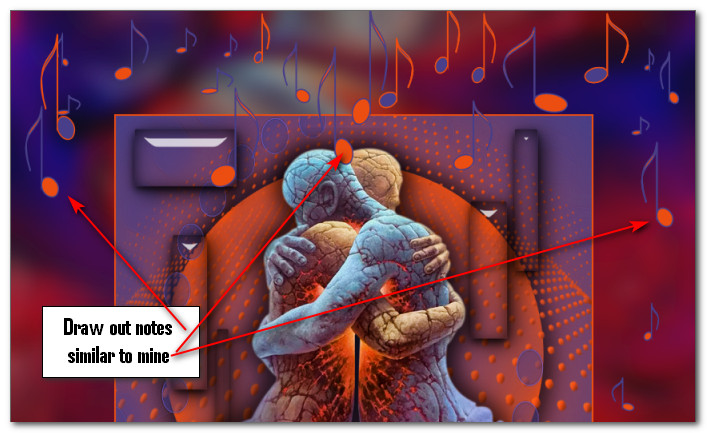
31. From the Tool bar choose the Preset Shape Tool/Presets. In the tool bar on the top of your PSP find the Chat_music 5 Preset (Music note). Use the Line style: Solid, Width: 2:00, using the colors in the Foreground and Background of the Materials Palette.

32. Left click and hold to draw out notes of differing sizes using the Foreground color. Switch the Foreground/Background colors using the small double arrows as seen below. Then do the same using the Background color. Convert to Raster Layer at the end of creating them. Place them all along the top of the image. See mine below for an idea. You can be creative and choose your own sizes and placements.
33. Open couples_0014_lisat.png. Delete Lisa's watermark. Copy/Paste as New Raster Layer.
34. Resize/Resize by 25%/Resize all layers unchecked.
35. Effects/3D Effects/Drop Shadow. Vertical 10, Horizontal 10, Opacity 80, Blur 60, color #000000.
36. Pull to bottom right corner. Adjust/Sharpness/Sharpen.
37. Repeat steps 33 and 34. Image/Mirror. Mirror Horizontal. Adjust/Sharpness/Sharpen.
38. Effects/3D Effects/Drop Shadow. Vertical 10, Horizontal 10, Opacity 80, Blur 60, color #000000.
39. Pull to left middle side. Pull couple layer below Copy of Background layer. Go back to top to continue.
40. From Tool bar select Text tool. Select Hello Carrollina Script, Size 72, Font color #ec4d13, Kerning 25. Type out the words "Other World Dancers". Convert to Raster Layer.

41. Objects/Align/Horizontal Center. Pull down a little centering between inner 3px border and bottom of image.
42. Image/Add Borders/Add 3px border, Color #ec4d13, Symmetric checked.
43. Change Materials Palette to Gradient using original colors as at Step 1, Angle 45/Repeats 0, Corel_06_29 Foreground/Background, Invert checked, Center and Focal Points all Null.
44. Image/Add Borders/Add 30px border, color #ffffff, Symmetric checked.
45. Using Magic Wand activate 30px border.

46. Layers/New Raster Layer. Flood 30px border with new Gradient.
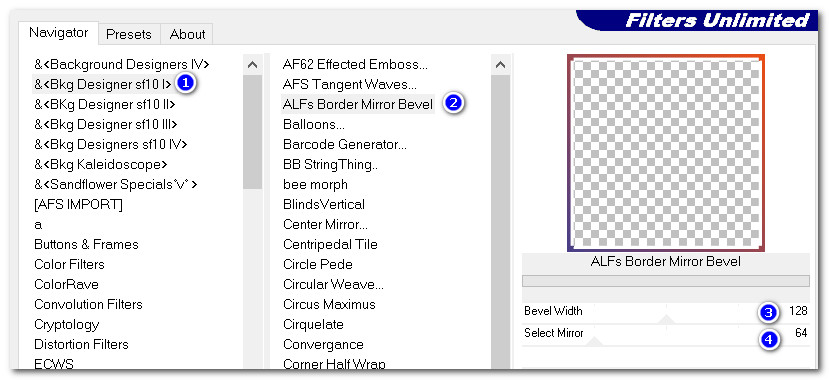
47. Effects/Filters Unlimited/Bkg Designer sf101/ALFs Border Mirror Bevel.
48. Selections/Select None. Use Magic Wand again to activate white inside border.
49. Flood fill with color #ec4d13.
50. Effects/3D Effects/Drop Shadow. Vertical 10, Horizontal 10, Opacity 60, Blur 15, color #000000.
51. Effects/3D Effects/Drop Shadow. Vertical -10, Horizontal -10, Opacity 60, Blur 15, color #000000.
52. Effects/3D Effects/Inner Bevel. Selections/Select None.
53. Image/Add Borders/Add 3px border, Color #ec4d13, Symmetric checked.
54. Leave your watermark or name if you wish and save.
Thank you PamelaD for your testing of my tutorial. February 16, 2022.
If you are going to use this tutorial for stationery, cards or place the tutorial/tag on another site, I would appreciate you contacting me for permission, giving Arasimages credit for the original tutorial and if possible, a link back to my site. Thank you.
Copyright © Arasimages All Rights Reserved