
Madam Magnolia
For a Dutch, Italian, French, German and Spanish translation click on the flags.


For this tutorial you will need the materials in the zip file below.

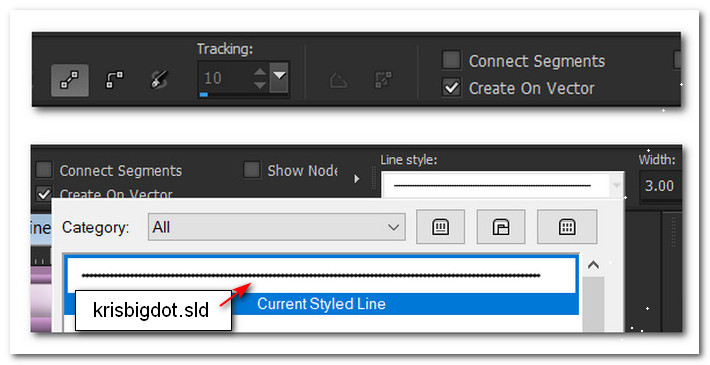
This tutorial was written using PSP2019 Ultimate and PSP2022. Export brush into your PSP Files/Brushes Folder. Place Selection in your PSP Files/Selections Folder. Place the Gradient into your PSP Files/Gradient Folder. Place krisbigdot.sld into your PSP Files/Styled Lines Folder, Install the Font Saffron into your PSP if you do not have it. For the Filter Forge 6 Filter/Effects/Distortion/The Smudge Master 2000, you may find it on Filter Forge site for free download if you do not already have it. To work this tutorial, it is assumed you have working knowledge of Paint Shop Pro.
Thanks go to Maryse for the lovely tubes used in this tutorial.
Use the bookmark below to mark your place along the way.

1. Open the Materials Palette. Under Color tab, set the Background color to #9f78a0. For the Foreground set to color #ebd6ec. Click on Gradient tab, click on the drop down arrow and select vyp_gradient_03. Set Angle to 45/Repeats 3. Invert unchecked, Style Linear.
2. New/New Image. Width at 800px/Height 800px. Flood fill with Foreground gradient.
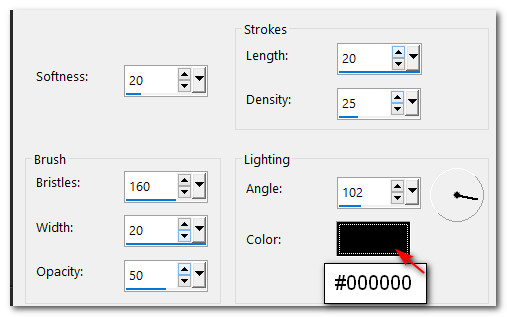
3. Effects/Art Media Effects/Brush Strokes. Apply twice.
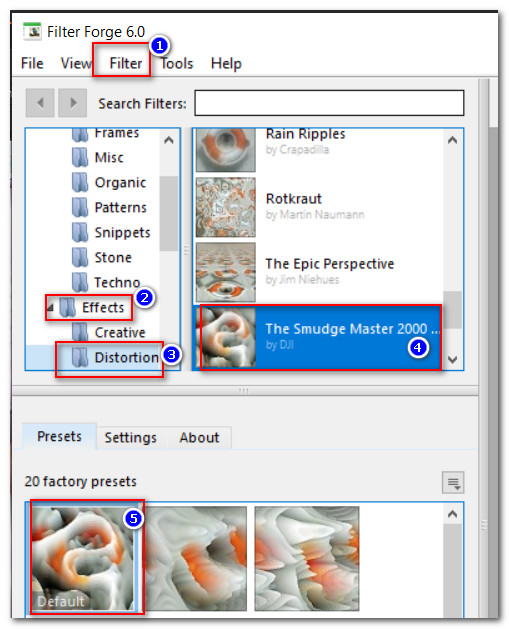
4. Effects/Filter Forge 6.0/Effects/Distortion/The Smudge Master 2000 and under factory presets choose the Default. Apply.
5. Layers/New Raster Layer.
6. From tool bar select Paint Brush/evebrush_man_8 brush.

7. Set the size to 900, using background color right click in center of main image.
8. Layers/New Raster Layer.
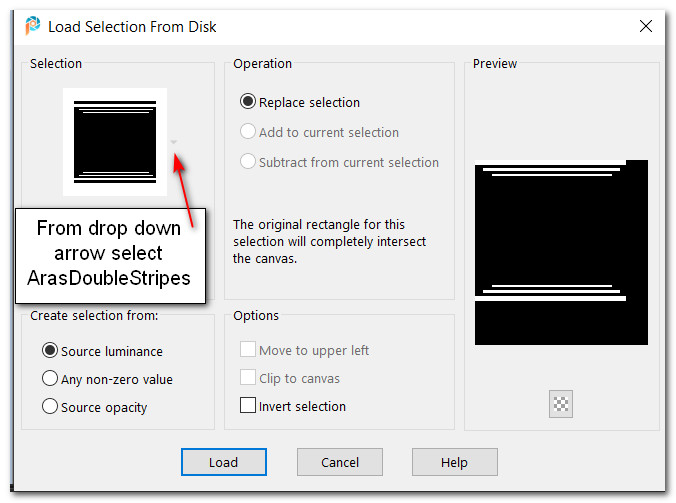
9. Selections/Load Save Selection/Load Save Selection from Disk. From drop down arrow, choose ArasDoubleStripes. Load.
10. Flood fill selections with background color #9f78a0. Deselect.
11. Objects/Align/Center in Canvas.
12. Effects/3D Effects/Inner Bevel.
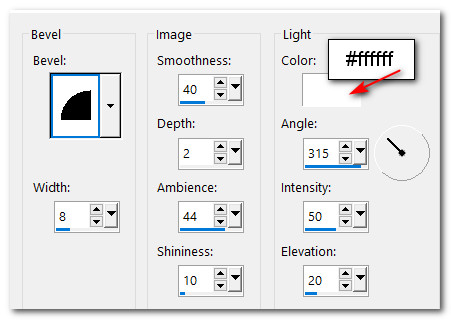
13. Effects/3D Effects/Drop Shadow. Vertical -8, Horizontal -10, Opacity 40, Blur 25, color #000000.
14. Image/Add Borders/Add 13px border, Symmetric checked, color #000000.
15. Using Magic Wand tool as set below, click on 13px border to activate it.

16. Flood fill border with background color #9f78a0.
17. Effects/3D Effects/Inner Bevel as in Step #12. Deselect.
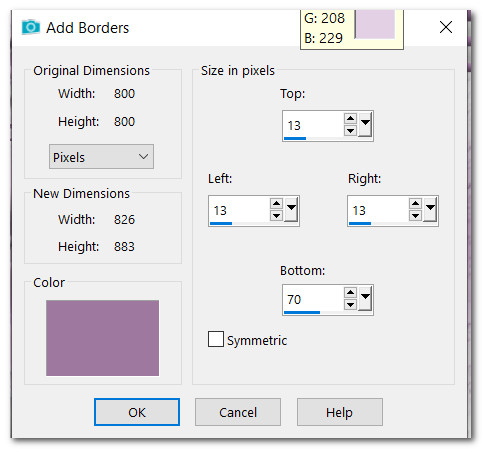
18. Image/Add Borders/Add 13px border on top, both sides and set bottom to 70px, Symmetric unchecked, color #9f78a0.
19. Image/Add Borders/Add 13px border, Symmetric checked, color #000000.
20. Using Magic Wand tool as set before, click on 13px border to activate it.
21. Flood fill border with background color #9f78a0.
22. Effects/3D Effects/Inner Bevel as in Step #12. Deselect.
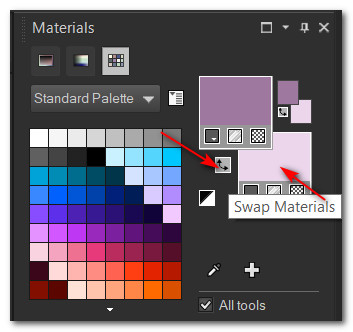
23. In Materials Palette, change Gradient tab to Color tab, change Foreground color to #ebd6ec.
24. Using small double arrows Swap Materials colors.
25. In Tool bar select Text tool. Choose Saffron, Size 72, Font color #ebd6ec, Stroke 0.0, Kerning 25. Type out the words "Madam Magnolia". Convert to Raster Layer.
26. Object/Align/Horizontal Center. Pull up or down to center in large part of frame.
27. Effects/3D Effects/Drop Shadow. Vertical 0, Horizontal -10, Opacity 40, Blur 15, color #000000.
28. Open MR_Magnolias in a bottle.png. Copy/Paste as New Layer.
29. Image/Resize/Resize by 62%/Resize all layers unchecked.
30. Using Selections tool set to Rectangle/Add Shift/Feather 0, surround Maryse watermark, delete. Deselect.
31. Image/Mirror. Mirror Horizontal.
32. Move to left side of image and set on bottom border.
33. Duplicate. Image/Mirror. Mirror Horizontal.
34. Move flowers to center of image and move upward a little.
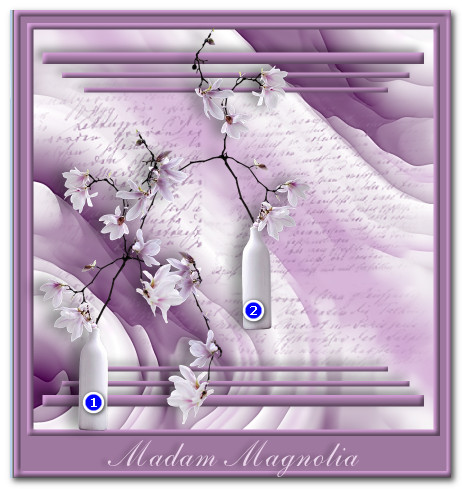
35. Merge/Merge Down.
36. Effects/3D Effects/Drop Shadow. Vertical -2, Horizontal -21, Opacity 40, Blur 35, color #000000.
37. Adjust/Sharpness/Sharpen.
38. Open MR_Lesulya.png. Remove Maryse watermark as in Step #30.
39. Using the Freehand Selections Tool set Point to point/Add(Shift)/Feather 0. Surround the lady's dress so marching ants are all around the dress.

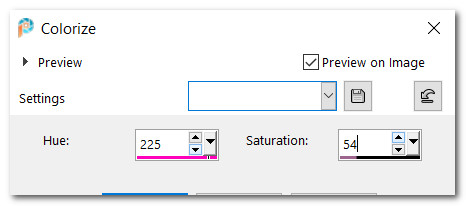
40. Adjust/Hue and Saturation. Colorize. Deselect.
41. Copy MR_Lesulya.png/Paste as New Layer on main image.
42. Move her to bottom right corner.
43. Effects/3DEffects/Drop Shadow. Vertical 23, Horizontal 23, Opacity 40, Blur 40, color #00000.
44. Effects/3DEffects/Drop Shadow. Vertical -30, Horizontal -30, Opacity 25, Blur 40, color #00000.
45. Adjust/Sharpness/Sharpen.
46. Merge/Merge Visible.
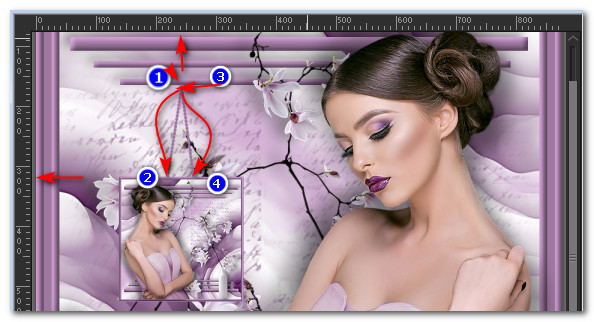
47. In Materials Palette change foreground color to #9f78a0. From Tool bar select the Pen Tool. Using the krisigdot Styled Lines set to width 3.00 and other settings as seen below, draw out a line from shortest line on top at 240px down on a left angle to 320px, Apply, then go up to 240px at top again and draw down another line on a right angle to 320px. Apply. This forms an inverted V for the picture to hang from when animated.
48. Convert to Raster Layer.
49. Sign your name and Merge/Merge Visible. COPY.
50. Open Animation Shop. Paste as New Image.
51. Duplicate New Image 24 times having 25 frames in all. Click in first frame. Edit/Select All.
52. File/Open Madam Magnolia Animagion.mng. Click within first frame/Edit/Select All. From top blue bar Copy.
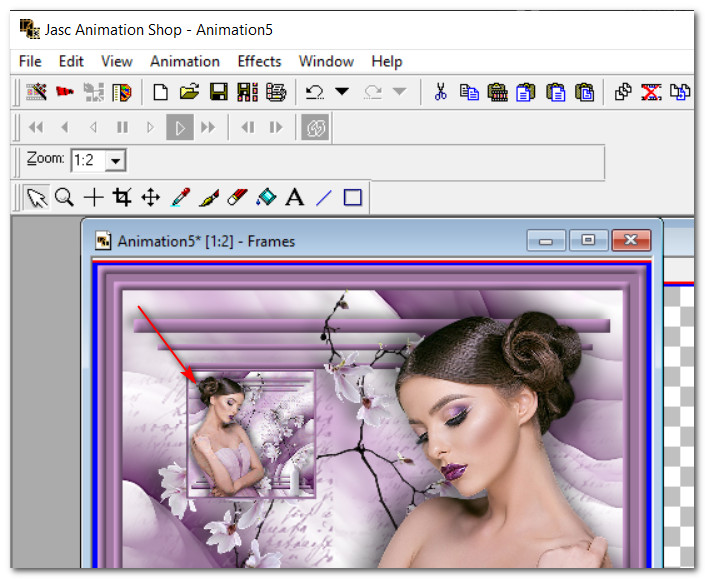
53. Go back to main image and within the first frame, right click, Paste/Into Selected Frame. Hover the small picture over the bottom of the short line over the dotted inverted V you made and Left click into place.
54. Check how your animation works by clicking on View Animation in top tool bar. If it is okay then we will save your work.
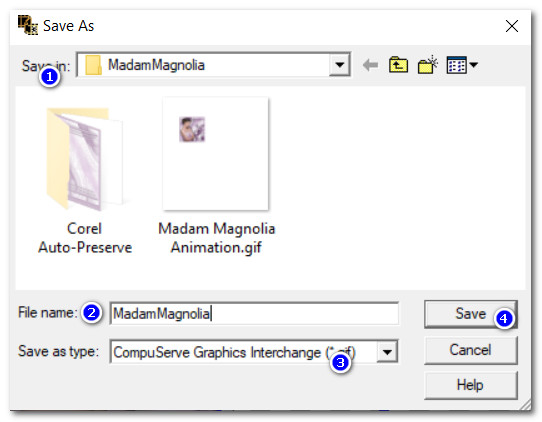
55. File/Save As. When the SaveAs box appears, Save in your MadamMagnolia folder, File name: MadamMagnolia, leave type as .gif and click Save.
56. As the boxes appear and change, click Next, Next, Next and Finish. Your work is now saved in your working folder.
I would like to give thanks to my wonderful tester, PamelaD who so faithfully tests these tutorials for me. (May 9, 2022)
If you are going to use this tutorial for stationery, cards or place the tutorial/tag on another site, I would appreciate you contacting me for permission, giving Arasimages credit for the original tutorial and if possible, a link back to my site. Thank you.
Copyright © Arasimages All Rights Reserved