Happy Little Meeces
For this tutorial you will need the materials in the zip file below.
For an Italian, German, Dutch, French and Spanish translation click on the flags.


Create a folder on your desktop and unzip the materials in to it. This tutorial was written using PSP2020 Ultimate. Export Bokeh 33 brush into your PSP Files/Brushes Folder. Install the Font Reisling into your PSP if you do not have it. On this tutorial I have used Plugins Alien Skin|Eye Candy 5: Textures|Marble, Alf's Border|FX Mirror Bevel, Alien Skin|Eye Candy 4000: Water Drops, MuraMeister/Perspective Tiling and Xero/Fritillary. To install ArasYellowBorder and ArasMarble Eye Candy 5 settings simply click on the files and they will automatically install. To work this tutorial, it is assumed you have working knowledge of Paint Shop Pro.
Thanks go to PamelaD for the lovely mice tubes used in this tutorial.
Use the bookmark below to mark your place along the way.

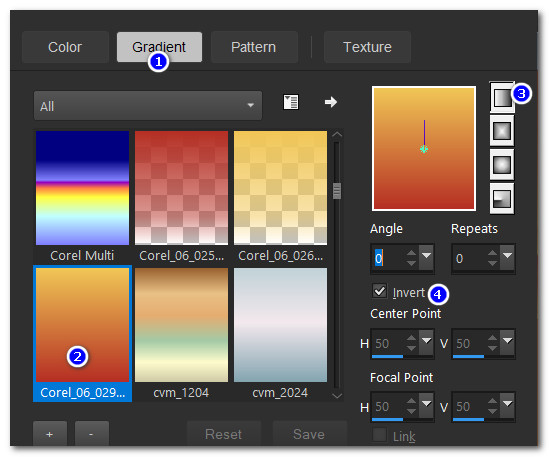
1. Open the Materials Palette. Set the Foreground color to #f0c656. Set the Background color to #b52f24. Set to Gradient tab, Style Linear, Angle to 0/Repeats 0. Invert checked.
2. New/New Image. Width at 900px/Height 800px. Flood fill with gradient.
3. Layers/New Layer.
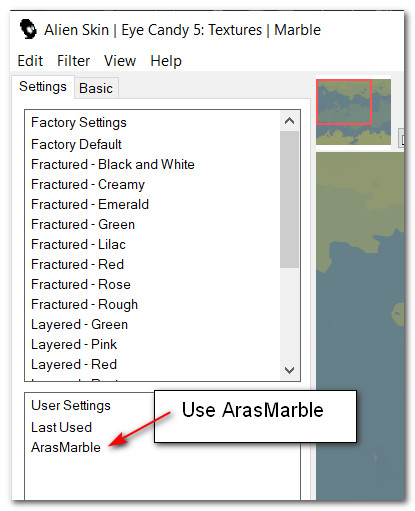
4. Effects/Alien Skin|Eye Candy:5|Textures|Marble. Click on ArasMarble. Apply.
5. Set Blend Mode to Luminance (Legacy.
6. Effects/Edge Effects/Enhance. Effects/Edge Effects/Enhance More.
7. Layers/New Raster Layer.
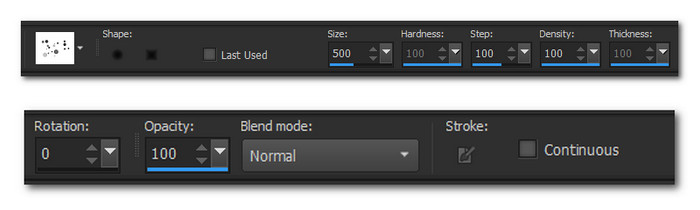
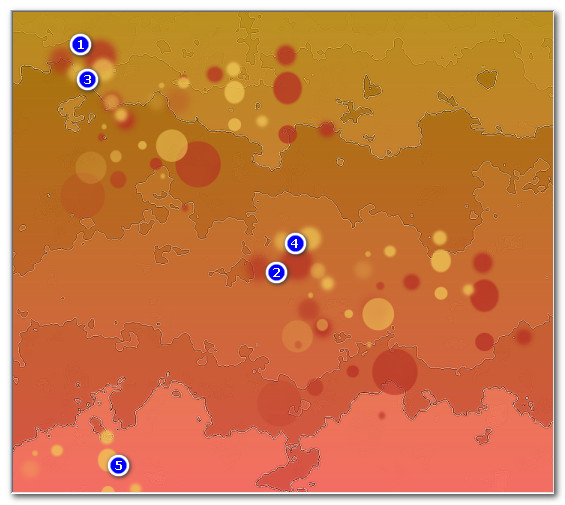
8. From tool bar select Paint Brush tool. Select Bokeh_33 Brush. Change Size to 500 for Background stamping of color 1 and 2, then change Size to 350 for Foreground stamping of 3, 4 and 5, all other settings remain at default.
9. Using Background color #b52f24 and Foreground color #f0c656, stamp as shown in example below.
10. Layers/New Layer. Flood fill with Gradient.
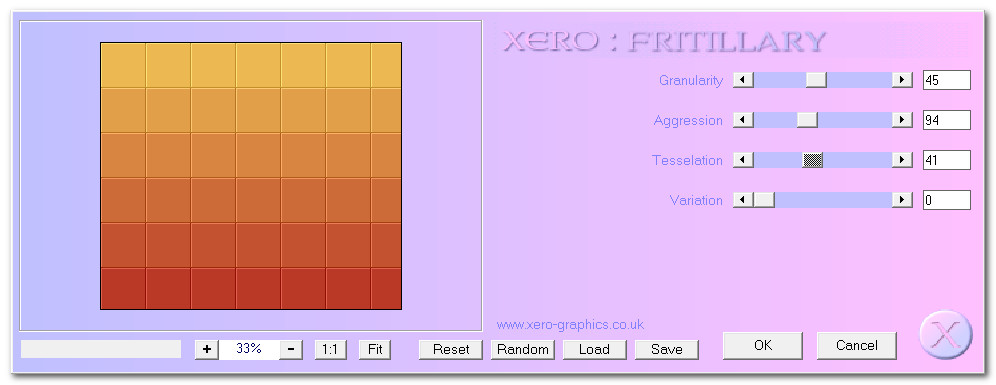
11. Effects/Xero/Fritillary.
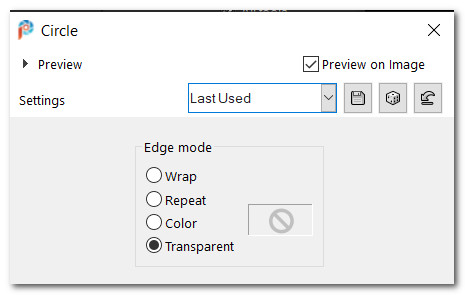
12. Effects/Geometric Effects/Circle.
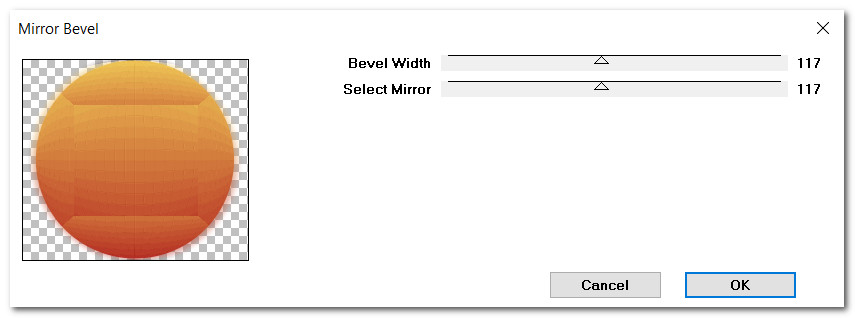
13. Effects/Alfs Border FX/Mirror Bevel.
14. Effects/3D Effects/Drop Shadow. Vertical -7, Horizontal -15, Opacity 46, Blur 35, color #482b22.
15. Effects/3D Effects/Drop Shadow. Vertical 7, Horizontal 15, Opacity 46, Blur 35, color #482b22.
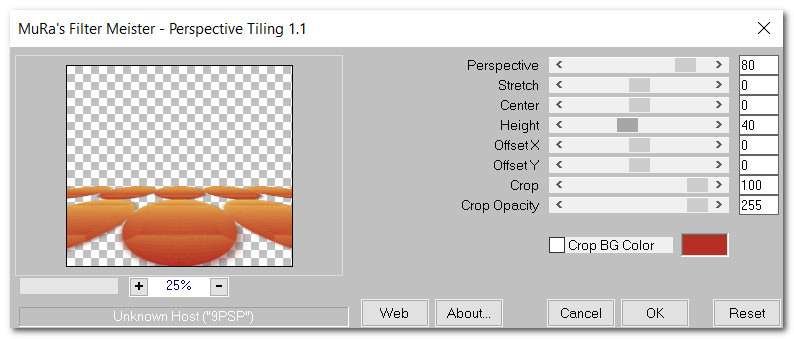
16. Effects/Mura's Meister/Perspective Tiling.
17. Duplicate. Image/Mirror. Mirror Vertical.
18. Open harvest-mice-miles-herbert-10.pspimage. Copy/Paste as New Layer. Pull mouse layer down between circles layer.
19. Effects/3D Effects/Drop Shadow. Vertical -7, Horizontal -15, Opacity 46, Blur 25, color #482b22.
20. Adjust/Sharpness/Sharpen.
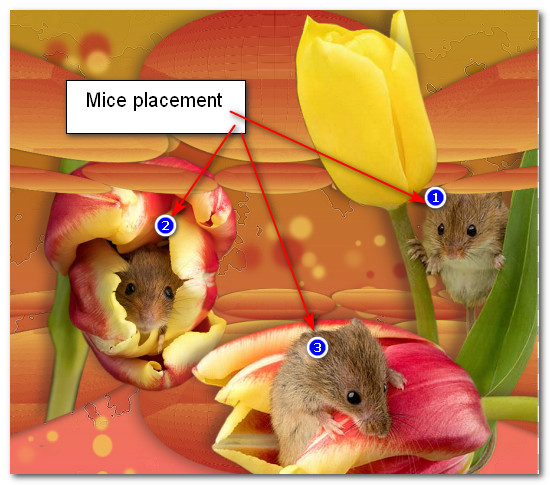
21. Move mouse to right side of image. (See example for where all mice are to be placed).
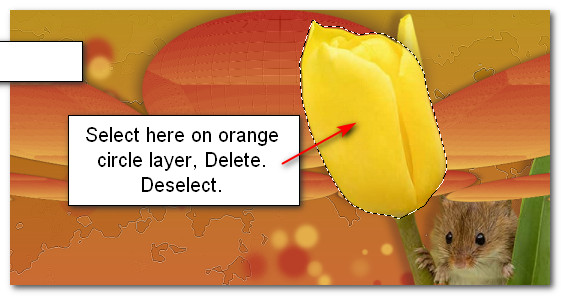
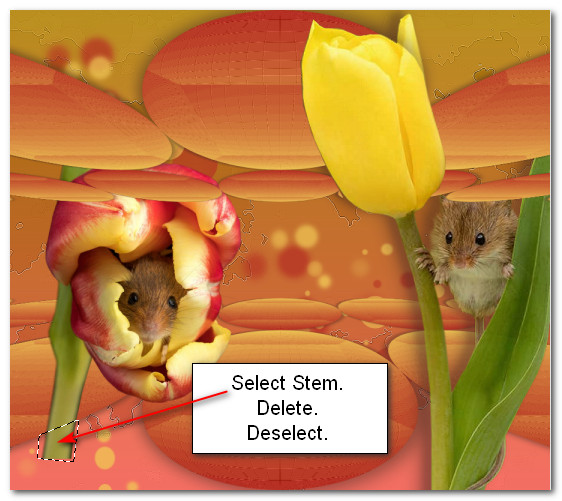
22. Highlight duplicate layer of orange circles. Using Free Hand Selection tool set to Point to Point, Add (Shift), Feather 0, select around tulip, press Delete key to remove orange circles off from tulip. Deselect.

23. Highlight first mouse layer. Open harvest-mice-miles-herbert-16.pspimage. Copy/Paste as New Layer.
24. Image/Resize/Resize by 47%. All layers unchecked.
25. Using same settings as in Step #22, select around bottom of stem. Delete. Deselect.
26. Effects/3D Effects/Drop Shadow. Vertical -7, Horizontal -15, Opacity 46, Blur 25, color #482b22.
27. Adjust/Sharpness/Sharpen.
28. Open harvest-mice-miles-herbert-12.pspimage. Copy/Paste as New Layer.
29. Image/Mirror. Mirror Horizontal.
30. Effects/3D Effects/Drop Shadow. Vertical -7, Horizontal -15, Opacity 46, Blur 25, color #482b22.
31. Adjust/Sharpness/Sharpen.
32. Place in center bottom into border. (See example in Step #21 for mice placements).33. Image/Add Borders/Add 3px border, Symmetric checked, color #b52f24.
34. Image/Add Borders/Add 50px border, Symmetric checked, color #f0c656.
35. Using Magic Wand Tool select the 50px border to activate it.
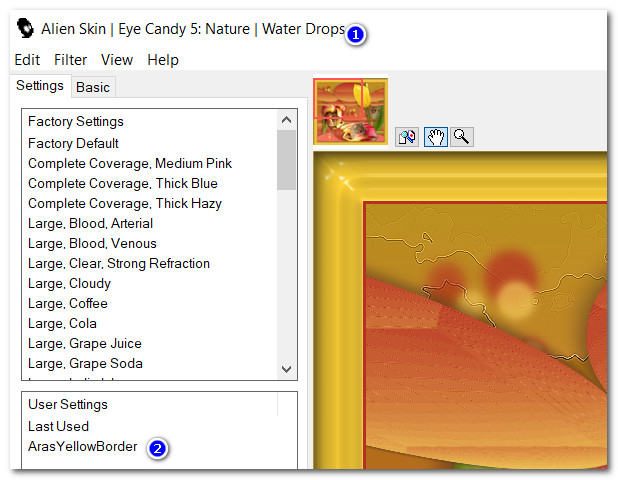
36. Effects/Alien Skin|Eye Candy 5: Nature|Water Drops. Use ArasYellowBorder setting.
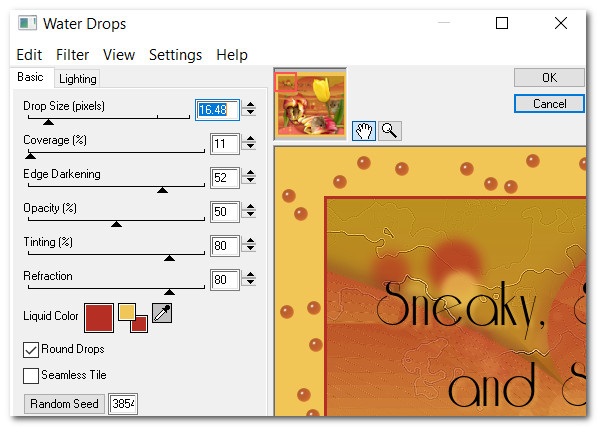
37. Effects/Eye Candy 4000/Water Drops.
38. Image/Add Borders/Add 3px border, Symmetric checked, color #b52f24. Deselect.
39. In Materials Palette change the Background color to #151c02.
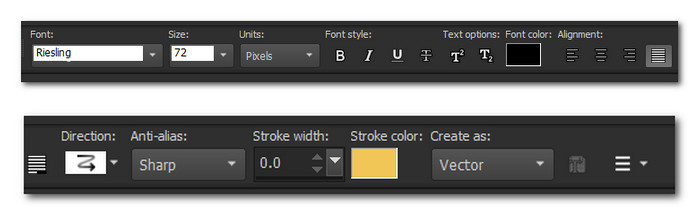
40. From tool bar select the Text tool. Select the font Riesling, Size 72, Font color #151c02, Stroke width: 0.0, Kerning 25. Type out the words "Sneaky," space one time, "Squeaky" enter, space three times and type out "and Snoop". Convert to Raster Layer.
41. Duplicate. Merge/Merge Down. Place in upper left quadrant.
42. Effects/3D Effects/Drop Shadow. Vertical -7, Horizontal -15, Opacity 46, Blur 25, color #f0c656.
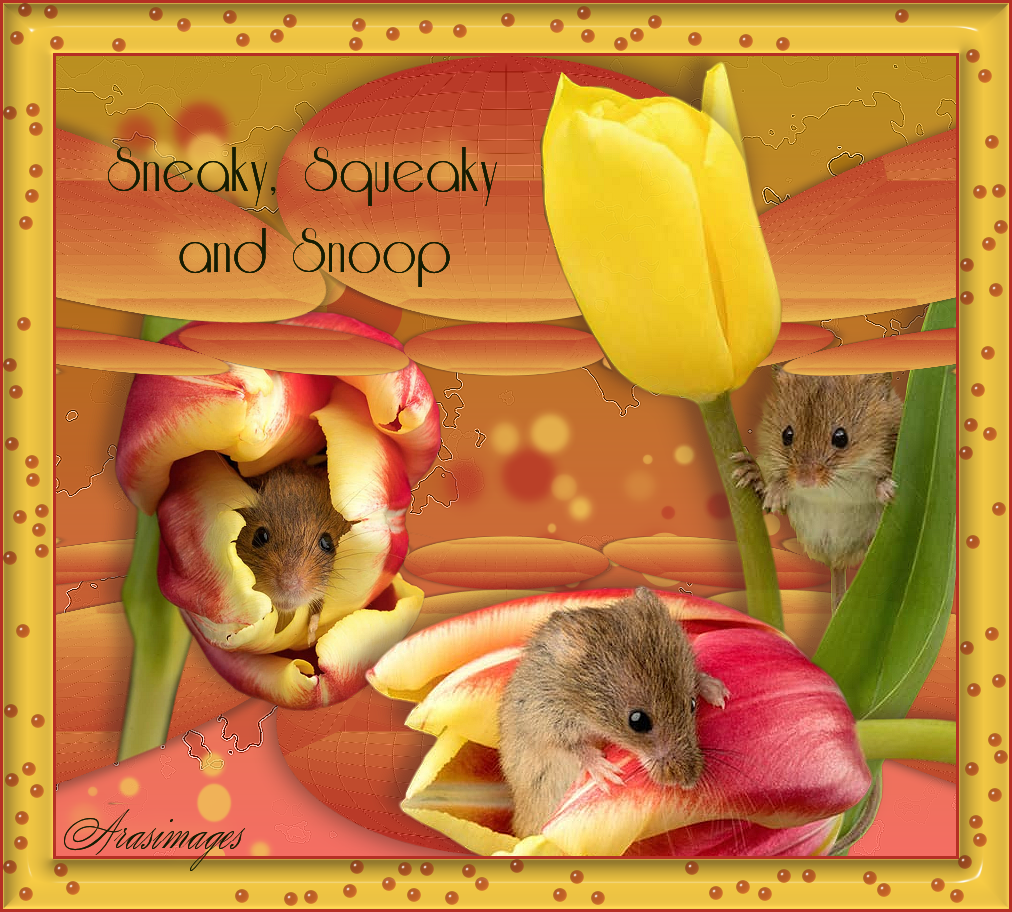
43. Place your watermark on image, Merge/Merge Visible and save as a .jpg.
If this image is too large for your use, please feel free to reduce in size.
I would like to give thanks to my wonderful tester, PamelaD who so faithfully tests these tutorials for me. (May 28, 2022)
If you are going to use this tutorial for stationery, cards or place the tutorial/tag on another site, I would appreciate you contacting me for permission, giving Arasimages credit for the original tutorial and if possible, a link back to my site. Thank you.
Copyright © Arasimages All Rights Reserved