
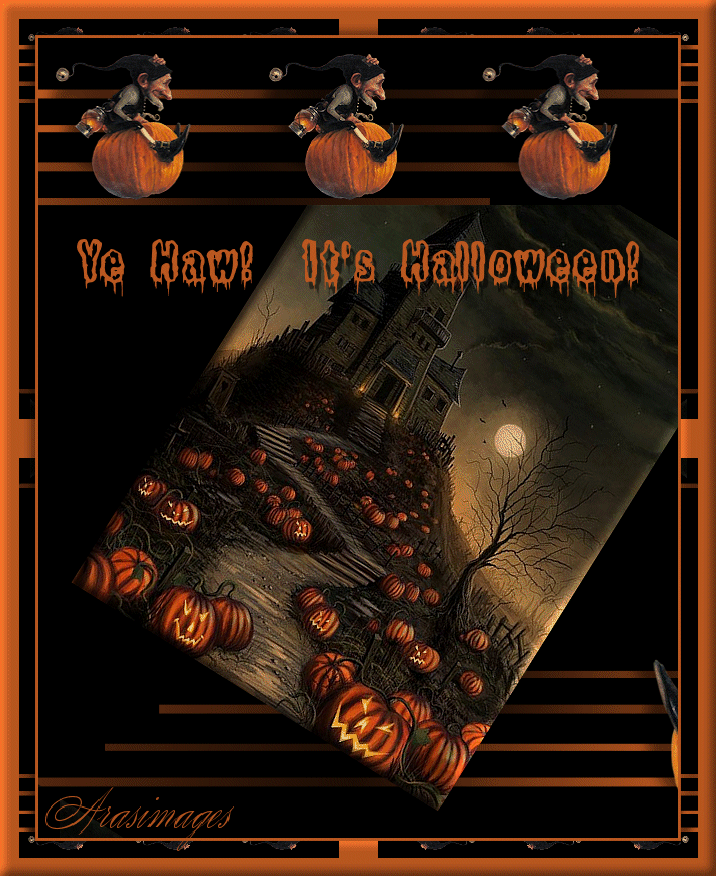
Ye Haw... It's Halloween!
For this tutorial you will need the materials in the zip file below.

For an Italian, French, Spanish and German translation click on the flags.


Create a folder on your desktop named Ye Haw It's Halloween. Unzip the materials zip file into this folder. Place the mask BJ3 in your PSP Files/Masks folder. Install the font It Lives In The Swamp (BRK) in your PSP. I have used the plugins Graphics Plus/Quick Tile l and MuRa's Meister/Copies in this tutorial as well as effects of the PSP. I used PSP 2019. To work this tutorial, it is assumed you have some working knowledge of Paint Shop Pro.
Thanks go to PamelaD of Arasimages for her tube of the little Elf called Doll_128 and Evatexas (now deceased but not forgotten) for her misted tube of HauntedHousewPumpkins.
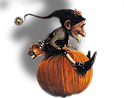
Use the FollowMe pumpkin below to mark your place along the way.
1. In Materials Palette, set the Foreground to color #ba5820, Background color to #000000.
2. File/New/New Image. 640px X 800px. Flood fill with Foreground #ba5820.
3. Layers/New Raster Layer. Flood fill with Background color #000000.
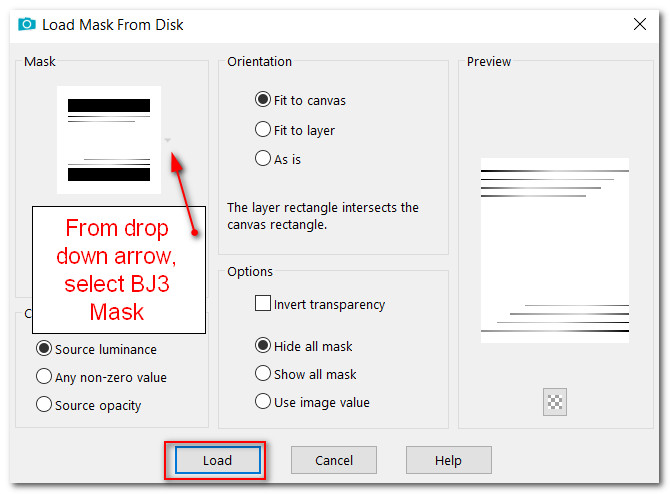
4. Layers/Load/Save Mask/Load Mask from Disk. From drop down arrow, select Mask BJ3. Load.
5. Merge/Merge Group.
6. Open HauntedHousewPumpkins.psp image. CopyBackground of image/Paste as New Layer.
7. Image/Resize/Resize by 80%/Resize all layers unchecked.
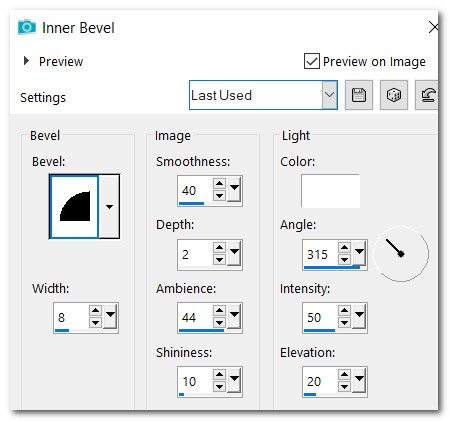
8. Effects/3D Effects/Inner Bevel.
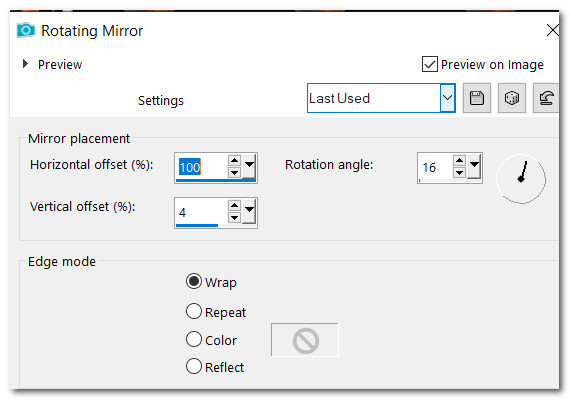
9. Effects/Reflection Effects/Rotating Mirror.
10. Place background image into right corner and under top stripes.
11. Adjust/Sharpness/Sharpen.
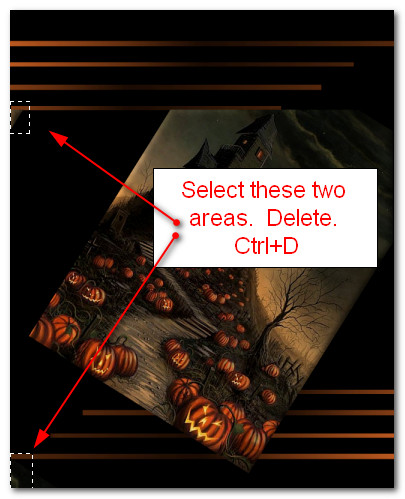
12. Using Selections tool set to Rectangle/Add(Shift)/Feather 0, surround the excess areas as shown below. Delete. CTRL+D.
13. Open Doll_128.pspimage tube layer. Image/Mirror/Mirror Horizontal.
14. Image/Resize/Resize by 31%/Resize all layers unchecked.
15. Effects/3D Effects/Drop Shadow. Vertical -28, Horizontal -26, Opacity 52, Blur 18, color #000000.
16. Copy/Paste as New Layer on main image.
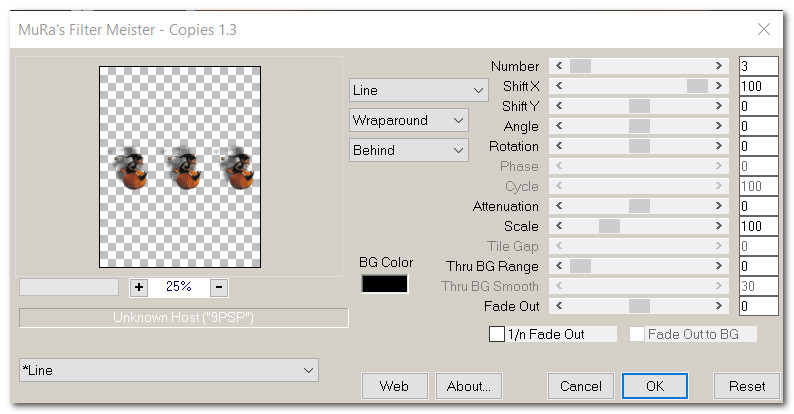
17. Effects/Mura's Meister/Copies.
18. Move three Elves to the top so they sit on the lowest orange line.
19. Adjust/Sharpness/Sharpen.
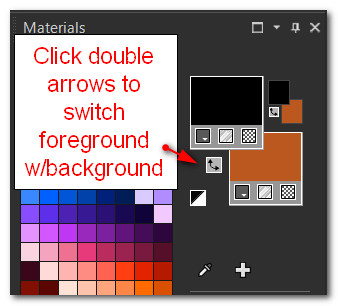
20. In Materials Palette, click on the double arrows to change Foreground to Background color.
21. From the tool bar choose the Text tool. Select Font "It Lives In The Swamp (BRK)", Size 62, Stroke width 0.0, color #000000, Kerning 25.

22. Type out the words "Ye Haw! It's Halloween!". Convert to Raster Layer.
23. Objects/Align/Horizontal Center. Place appropriately below the three dolls on pumpkins.

24. Effects/3D Effects/Drop Shadow. Vertical 7, Horizontal 4, Opacity 50, Blur 1, color #000000.
25. Image/Add Borders/Add 3px border, Symmetric checked, color #ba5820.
26. Image/Add Borders/Add a 35px border, Symmetric checked, color #ffffff.
27. Using Magic Wand, select the white 35px border to activate it.
28. Flood fill with #ba5820.
29. Effects/Graphics Plus/Quick Tile l.

30. Effects/3D Effects/Inner Bevel. CTRL+D.
31. Sign your name and Save as .png file.
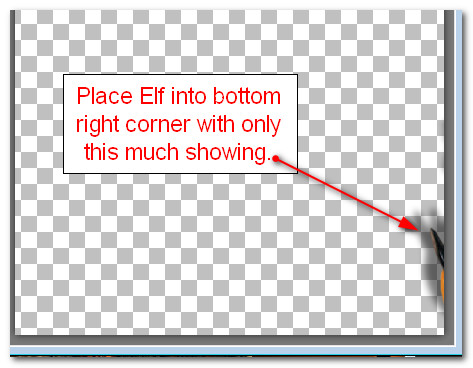
32. If you would like to make your own animation, follow the instructions from this step to when I tell you to save it. You will need your PSP to create it and Animation Shop to finish it. If you don't wish to create the animation yourself, then use the pre-made animation I will include in the materials.
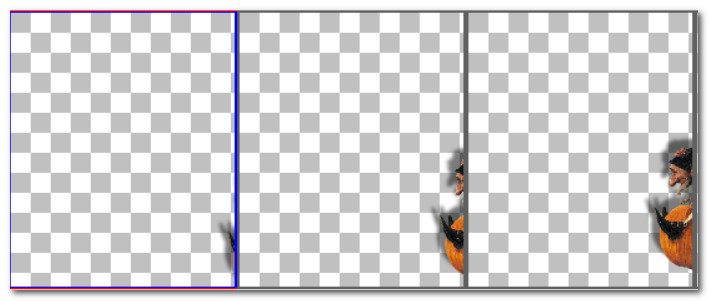
33. Animation: Begin by making a blank image 716px x 876px. This is the size of your finished main image you have completed. In your PSP program open Doll_128.pspimage TUBE layer. Copy/Paste as New Selection in the blank image. Left click to set into place in center. CTRL+D.
34. Image/Resize/Resize by 68%/Resize all layers unchecked.
35. Effects/3D Effects/Drop Shadow. Vertical -28, Horizontal -26, Opacity 50, Blur 18, color #000000.
36. Adjust/Sharpness/Sharpen.
37. Pull the little Elf into the right bottom having his shoe showing just a little bit. Remame Raster 1.
38. Duplicate Raster 1. Move duplicate to the left a little bit. Rename Raster 2.
39. Duplicate Raster 2. Move to the left a little bit and a little higher. Rename Raster 3. (This is what it looks like in AS with three frames if saved as a PSP Animation Shop (*psp) file).
40. Duplicate Raster 3. Move to the left a little bit and a little lower. Rename Raster 4.(This is what it looks like in PSP prior to saving).
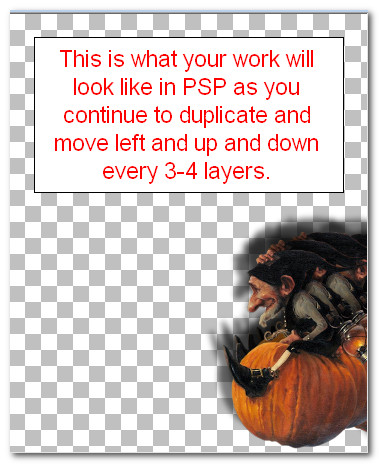
41. Continue duplicating, moving and renaming layers. Move each layer to the left and up 3 times, then down 3 times so he rides slowly up and down as the layers progress. Mine ended up with 33 frames. Yours may be more or less.
42. When you get him to the left side and the bell tassle disappears, File/Save As/PSP Animation Shop (*psp) file. Open Animation Shop.
43. Open the Animation you just made and Edit/Select All. Go to top tool bar in Animation Shop and click on the View Animation icon to test your animation.

44. Animation/Frame Properties. Change from 10 to 14 to slow down the movement.
45. File/Open YeHawItsHalloween file. Using the Duplication icon from the top tool bar, click on it 6 times to get the number of frames of my animation. I am using 33 frames in this .mng animation file. Make sure your main image has the same number of frames as your animation.
46. Go to your animation. Edit/Select All. Right click/Copy from top of animation images.
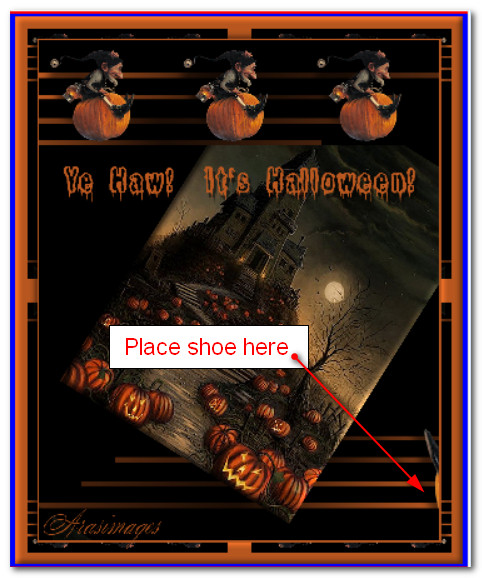
47. Go back to the main image. Edit/Select All. Right click within the first frame/Paste/Into Selected Frame. Place the first frame shoe to the right side of image/second line up.
48. Left click into place. All frames should now have the little Elf showing.
49. From top tool bar, click on Animation/Frame Properties. Set it to 14 to slow down the animation. The higher the number the slower it goes.
50. To check the animation, click on the top tool bar View Animation. If it is not as you wish, undo using the back arrow at the top. Redo and check again. If all is as you like it we will now save.
51. File/SaveAs. When the SaveAs box appears, Save in: Your working folder on your desktop. File name: Ye Haw Its Halloween. Save as type: leave as a .gif setting. Save.
52. As the boxes appear, click Next, Next, Next in the three boxes and finally, click Finish in the last box. You are now finished.
Thank you PamelaD for your faithfulness in testing my tutorials. October 2022.
If you are going to use this tutorial for stationery, cards or place the tutorial/tag on another site, I would appreciate you contacting me for permission, giving Arasimages credit for the original tutorial and if possible, a link back to my site. Thank you.
Copyright © Arasimages All Rights Reserved