

For this tutorial you will need the materials in the zip file below.

For a German, Italian, French, Spanish and Dutch translation click on the flags.


Create a folder on your desktop named Happy in Red. Unzip the materials zip file into this folder. Place the Narah_Mask_0493 in your PSP Files/Masks folder. Place the Stucco 3.bmp in your PSP Files/Textures folder. I have used the plugins Filter Factory Gallery V/Valentine'd Day and Filters Unlimited2/Buttons & Frames/3D Glass Frame 2 in this tutorial as well as effects of PSP. I used PSP 2019 for creating. To work this tutorial, it is assumed you have some working knowledge of Paint Shop Pro.
Thanks go to Angie and unknown tubers for their tubes used in this tutorial.
Use the heart below to mark your place along the way.

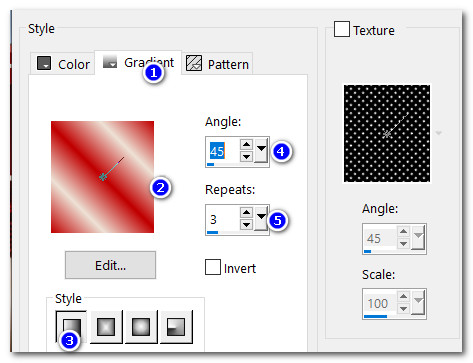
1. In Materials Palette, set the Foreground to color #c00000, Background color to #ede1d5. Create a Gradient using Corel_06_029 foreground-background, Angle 45/Repeats 3/Invert null/Style Linear.
2. Create a New Image 850px x 900px. Flood fill with Gradient.
3. Adjust/Blur/Gaussian Blur. Radius set to 28.
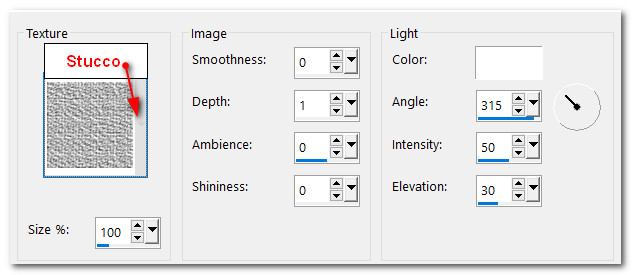
4. Effects/Texture Effects/Texture. From the drop down arrow, select the texture Stucco 03.
5. Layers/New Raster Layer.
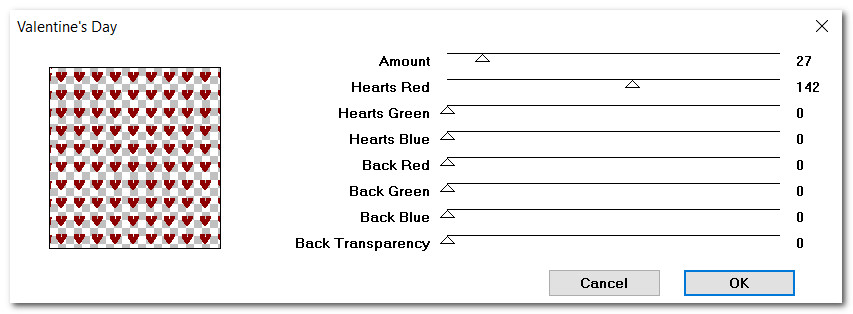
6. Effects/Filter Factory Gallery V/Valentine's Day.
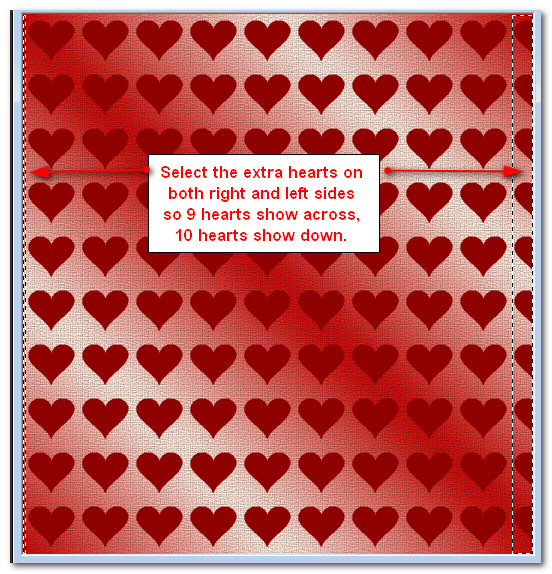
7. Select around extra hearts on right side and the narrow lines on left side of image. Delete. Deselect.
8. Objects/Align/Horizontal Center. You may have to manually adjust a little so they are centered.
9. Selections/Select All. Selections/Modify/Select Similar. Default settings.
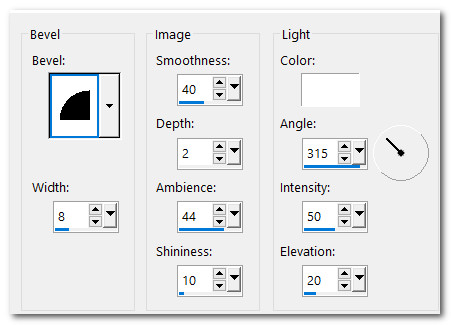
10. Effects/3D Effects/Inner Bevel.
11. Selections/Select None.
12. Effects/3D Effects/Drop Shadow. Vertical -6, Horizontal -6, Opacity 40, Blur 16, color #000000.
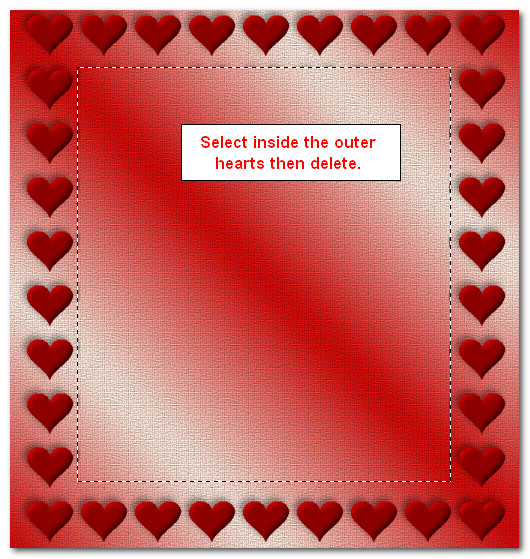
13. Using Selection tool set to Rectangle/Mode: Add (Shift)/Feather 0, draw around center hearts touching their edges. (There will be a row of hearts on outer edge of selection on top, bottom and sides). Delete center hearts.
14. Layers/New Raster Layer. Flood fill with background color #ede1d5.
15. Selections/Modify/Contract by 3px. Delete. Deselect.
16. Layers/New Raster Layer. Flood fill with background color #ede1d5.
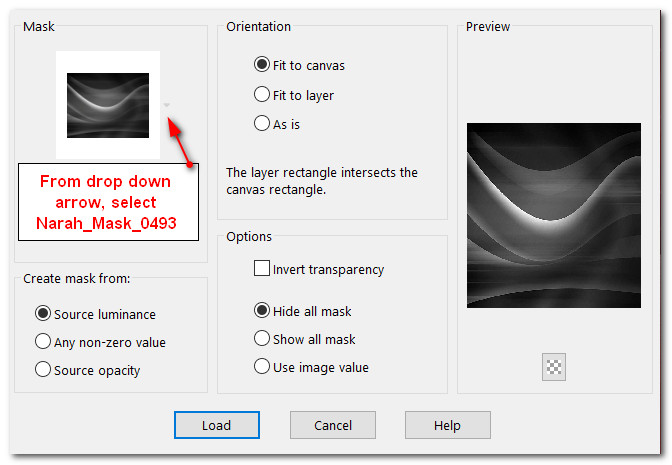
17. Layers/Load/Save Mask. Load Mask From Disk. From drop down arrow select Narah_Mask_0493. Load.
18. Merge/Merge Group.
19. Effects/Edge Effects/Enhance.
20. Open OldCar.png. Copy/Paste as New Layer. Image/Resize/Resize by 90%/Resize all layers unchecked.
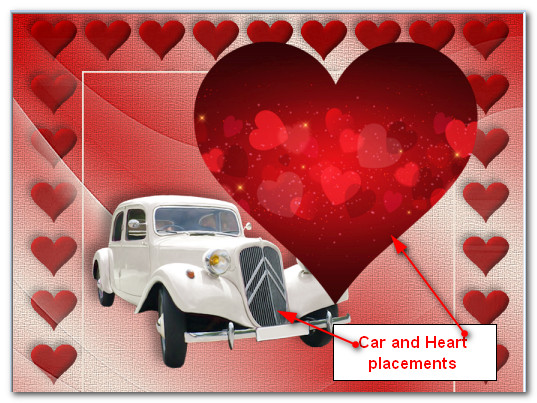
21. Place car in center to the left near the white line. (See snapshot below in Step#26 for placement).
22. Adjust/Sharpness/Sharpen.
23. Effects/3D Effects/Drop Shadow. Vertical -9, Horizontal -14, Opacity 40, Blur 25, color #000000.
24. Open LoveHeart.png. Copy/Paste as New Layer.
25. Image/Resize/Resize by 80%/Resize all layers unchecked.
26. Move heart toward the top of image in right corner.
27. Using the Magic Wand set to Mode: Add (Shift), Match mode: All Opaque/Feather 0, click on heart to activate it.
28. Effects/3D Effects/Inner Bevel. Same settings as before.
29. Effects/3D Effects/Drop Shadow. Vertical -9, Horizontal -14, Opacity 40, Blur 25, color #000000.
30. Layers/New Raster Layer. Flood fill activated heart with background color #ede1d5.
31. Selections/Modify/Contract by 3px. Delete. Deselect.
32. Open F-S2007-102.pspimage of woman. Copy/Paste as New Layer.
33. Image/Resize/Resize by 120%/Resize all layers unchecked.
34. Open WomansBustier.png. Copy/Paste as New Layer.
35. Place bustier over her skirt and under arm covering her breast to lower back.
36. Adjust/Sharpness/Sharpen.
37. Effects/3D Effects/Drop Shadow. Vertical -09, Horizontal -14, Opacity 40, Blur 25, color #000000. Merge/Merge Down.
38. Layers/New Raster Layer.
39. Using the Selections tool set to Rectangle/Add(Shift)/Feather 0, draw around the lady image. Flood fill with background color #ede1d5.
40. Selections/Modify/Contract by 3px. Delete. Deselect.
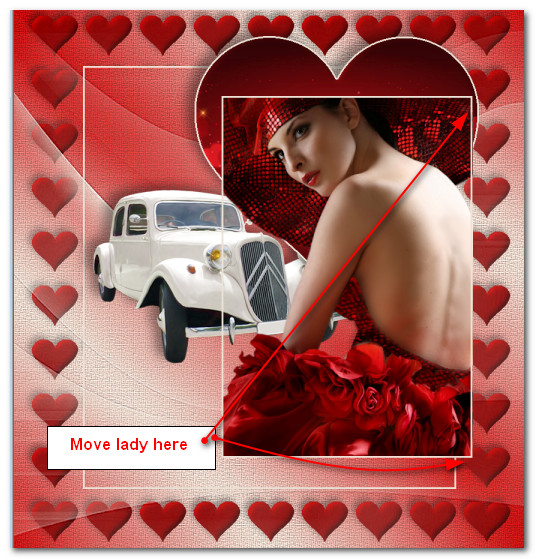
41. Merge/Merge Down. Move lady to right center part way over right hearts.
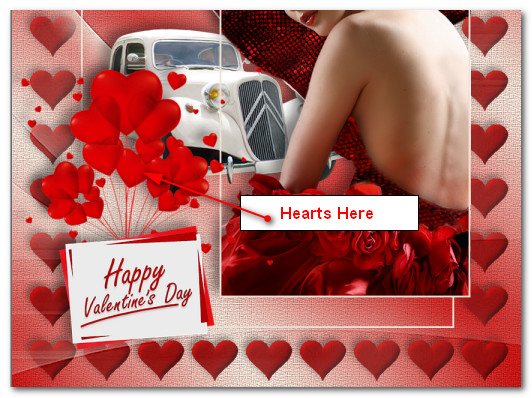
42. Open ValentineHearts.png. Copy/Paste as New Layer.
43. Resize by 80%. Adjust/Sharpness/Sharpen.
44. Effects/3D Effects/Drop Shadow. Vertical -09, Horizontal -14, Opacity 40, Blur 25, color #000000.
45. Place in bottom left corner a little over the corner hearts.
46. Image/Add Borders/Add 15px Border, Symmetric checked, color #ffffff.
47. Using Magic Wand set to Add(Shift)/RGB Value/Tolerance 20, click on 15px border to activate it.
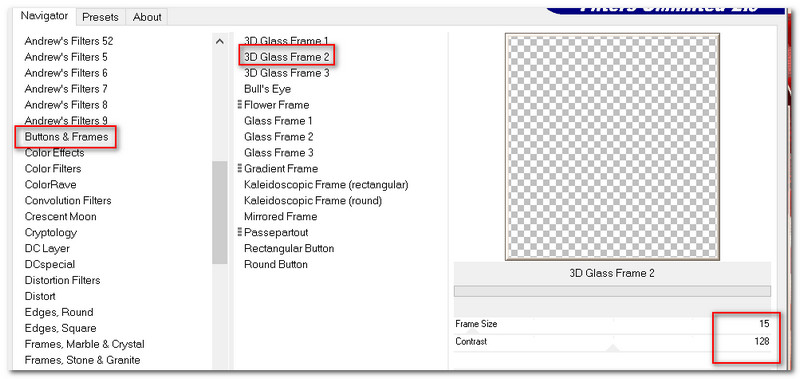
48. Effects/Filters Unlimited 2/Buttons & Frames/3D Glass Frame 2.
49. Effects/3D Effects/Inner Bevel. Deselect.
50. Sign your name or place watermark on a new layer, Merge/Merge Visible and save as .jpg file. COPY.
51. For Animation follow the directions below.
52. Open Animation Shop. In the workspace of Animation Shop Paste as New Animation.
53. Duplicate Happy in Red image 8 times, having 9 frames in all. Click in first frame/Edit/Select All.
54. Open floatie00295.gif of hearts. Click in first frame/Edit/Select All. Right click on top bar/Copy.
55. Go back to the main image and right click in first frame/Paste/ Into Selected Frame. Hover the hearts to where you want them, left click to set in to place. Do this several times over the hearts as I have done.
56. Click on View Animation in top tool bar to check your hearts movement. If you are satisfied then we will now save.
57. File/Save As. Save As box will appear. Give your work a name, designate where you will save it and leave the Save as type to (*gif). Click Save. As the boxes change, click on Next, Next, Next then Finish. Your gif image is now saved.
Thank you PamelaD for your faithfulness in testing my tutorials. January 2023.
If you are going to use this tutorial for stationery, cards or place the tutorial/tag on another site, I would appreciate you contacting me for permission, giving Arasimages credit for the original tutorial and if possible, a link back to my site. Thank you.
Copyright © Arasimages All Rights Reserved