
Halloween Visitors
For this tutorial you will need the materials in the zip file below.

For a French, Dutch, Italian and Spanish translation click on the flags.


This tutorial was written using PSP Pro2020 Ultimate and PSP 2021 Ultimate. The plugins used are Redfield's, AAA Frames/Texture and effects of the program itself. Export the smoke brushes to PSP/Brushes folder. Open the original images, create a copy and close originals. Use the copies for your work. Remember to save your work often. To work this tutorial, it is assumed you have some working knowledge of Paint Shop Pro.
The ghosts images were found on Facebook with no identification. I tubed them for this tutorial and created the animation. The OldBarn image has the name Russ Kennedy on it and I wish to give him credit for his beautiful photography.
Use the bookmark below to mark your place along the way.

1. In the Materials Palette, set to Foreground to color #f9fcf3, Background color to #704226.
2. New/New Image 811px by 580px. Flood fill with Background color #704226.
3. Layers/New Raster Layer. CRL+A.
4. Open OldBarn.jpg. Copy/Paste Into Selection. CTRL+D.
5. Duplicate. Close off top layer. Drop down to original layer.
6. Set to Luminance Legacy.
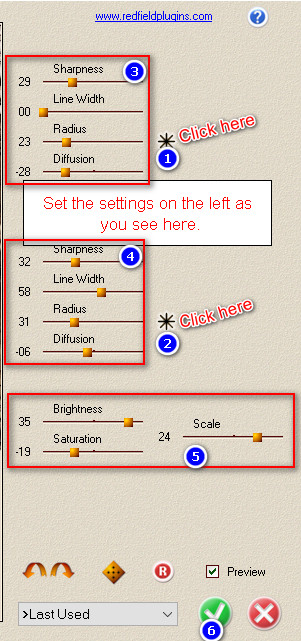
7. Effects/Redfield/Fractalius.
8. (This step is optional). Effects/Instant Effects/Fine detail. (You will need PSP2021 or higher to find this under View/Palettes/Instant Effects). Set the AI-Powered Strength to 20%. Move up to Copy of Raster 2 layer and open the eye.
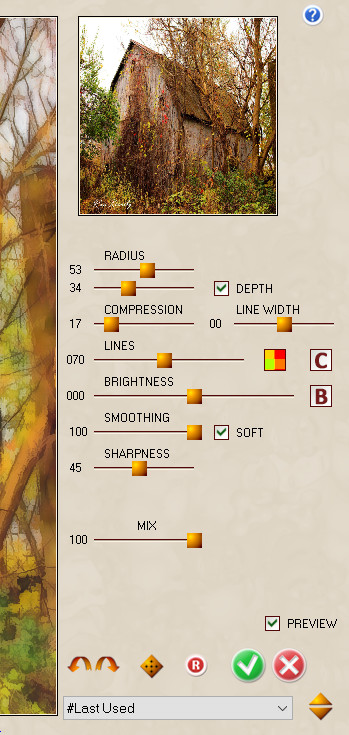
9. Effects/Redfield/Quad Pencil. (If you do not have this filter, you may use the layer I have included in the materials.)
10. Drop Opacity down to 62.
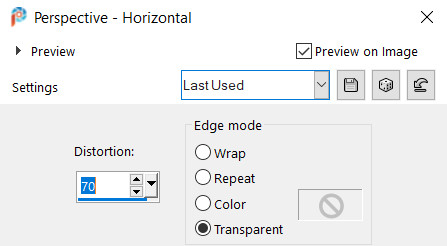
11. Effects/Geometric Effects/Perspective-Horizontal.
12. Adjust/Blur/GaussianBlur. Radius set to 14.
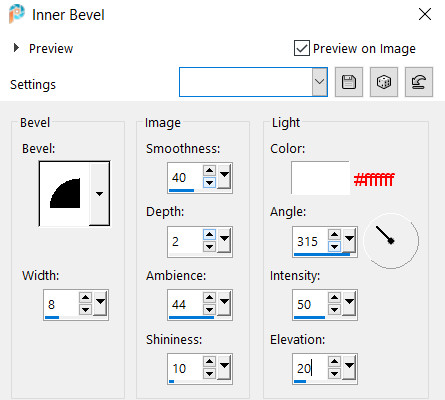
13. Effects/3D Effects/Inner Bevel.
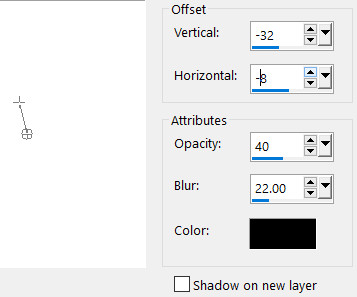
14. Effects/3D Effects/Drop Shadow. Vertical -32, Horizontal -8, Opacity 40, Opacity 22, color #000000.
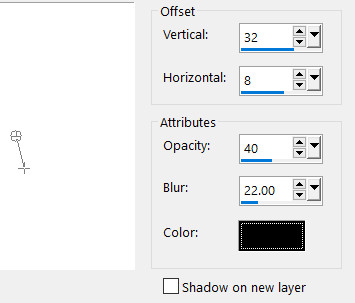
15. Effects/3D Effects/Drop Shadow. Vertical 32, Horizontal 8, Opacity 40, Opacity 22, color #000000.
16. Layers/New Raster Layer.
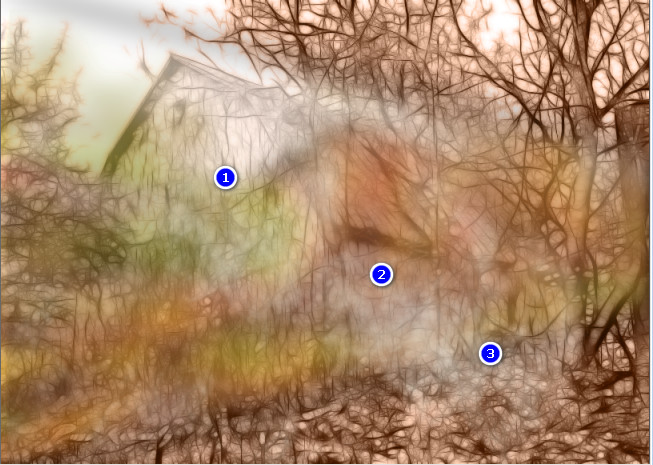
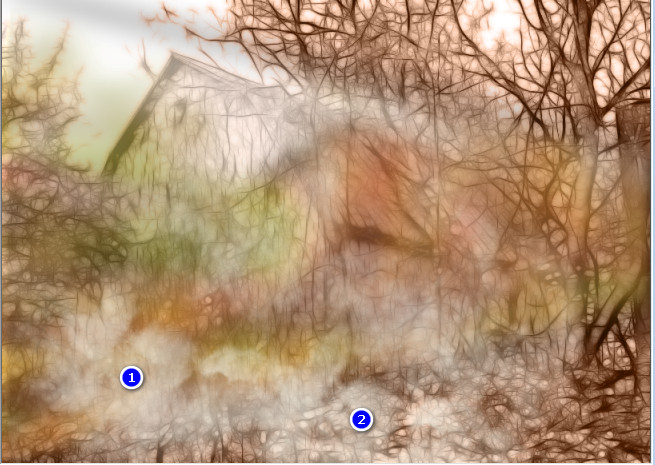
17. From tool bar select the Paint Brush tool. Find Smoke49. Size 672. Left click in the three spaces indicated by the numbered example.

18. Select Smoke92. Change size to 500 and Opacity to 80. Leave all the rest at default.

19. Open LargeGhosts.png. Copy/Paste as New Layer.
20. Image/Resize/Resize by 45%/Resize all layers unchecked.
21. Move ghosts to bottom and left of middle of image.
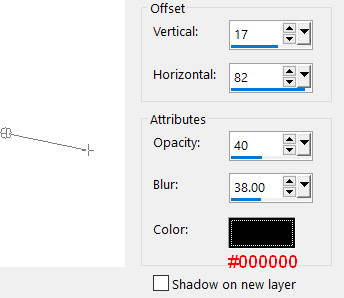
22. Effects/3D Effects/Drop Shadow. Verical 17, Horizontal 82, Opacity 40 Blur 38, color #000000.
23. Adjust/Sharpness/Sharpen.
24. Image/Add Borders/Add 3px border, Symmetric checked, color #704226.
25. Image/Add Borders/Add 3px border, Symmetric checked, color #f9fcf3.
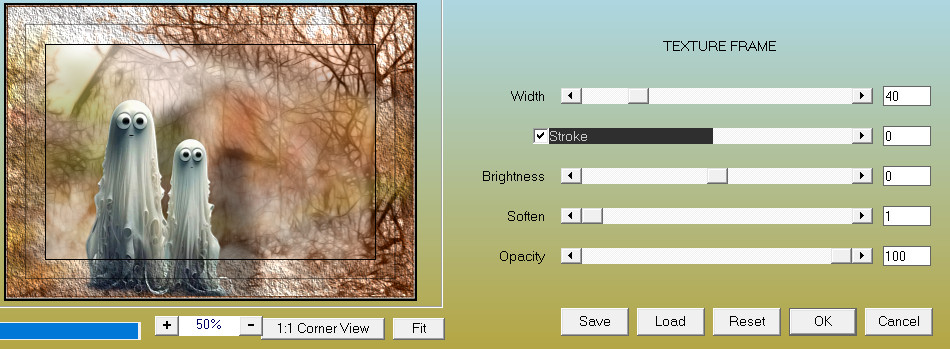
26. Effects/AAA Frames/Texture Frame. Apply twice.
27. Sign your name to your work or leave your watermark and save as .jpg file.
28. Animation directions: In PSP Copy the image/go to Amimation Shop. In the workspace Paste as New Animation.
29. Using the method of your choice to duplicate, duplicate the main image 20 times, having 21 frames in all. One easy way to duplicate is to hold down the CTRL key while pressing the letter L for each frame you wish to duplicate.
30. Edit/Select All.
31. File/Open BooSwing.mng file. Click in the first frame and Edit/Select All. Copy.
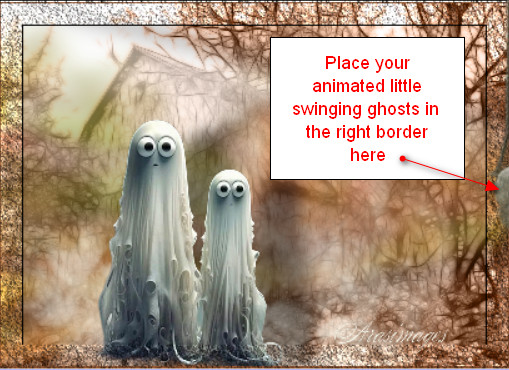
32. Go back to the main image. Right click within the first frame. Paste/Into Selected Frame. Hover the ghosts to where I indicated in snapshot and left click in place.
33. Click on the View Animation icon in the top tool bar to see how your animation is working. If you like it you can save it now. If not, use the undo arrow and try again then test until you are satisfied, then save doing the following.
34. File/SaveAs. When the Save As box appears, designate where it will be saved (your working folder for instance), give it a name (Halloween Visitors) and leave it to save as a .gif file. Save.
35. As the boxes change, click on Next, Next, Next and Finish. Your animation is now saved!
Thanks to my friend and faithful tester, PamelaD. October 28-2023.
If you are going to use this tutorial for stationery, cards or place the tutorial/tag on another site, I would appreciate you contacting me for permission, giving Arasimages credit for the original tutorial and if possible, a link back to my site. Thank you.
Copyright © Arasimages All Rights Reserved