
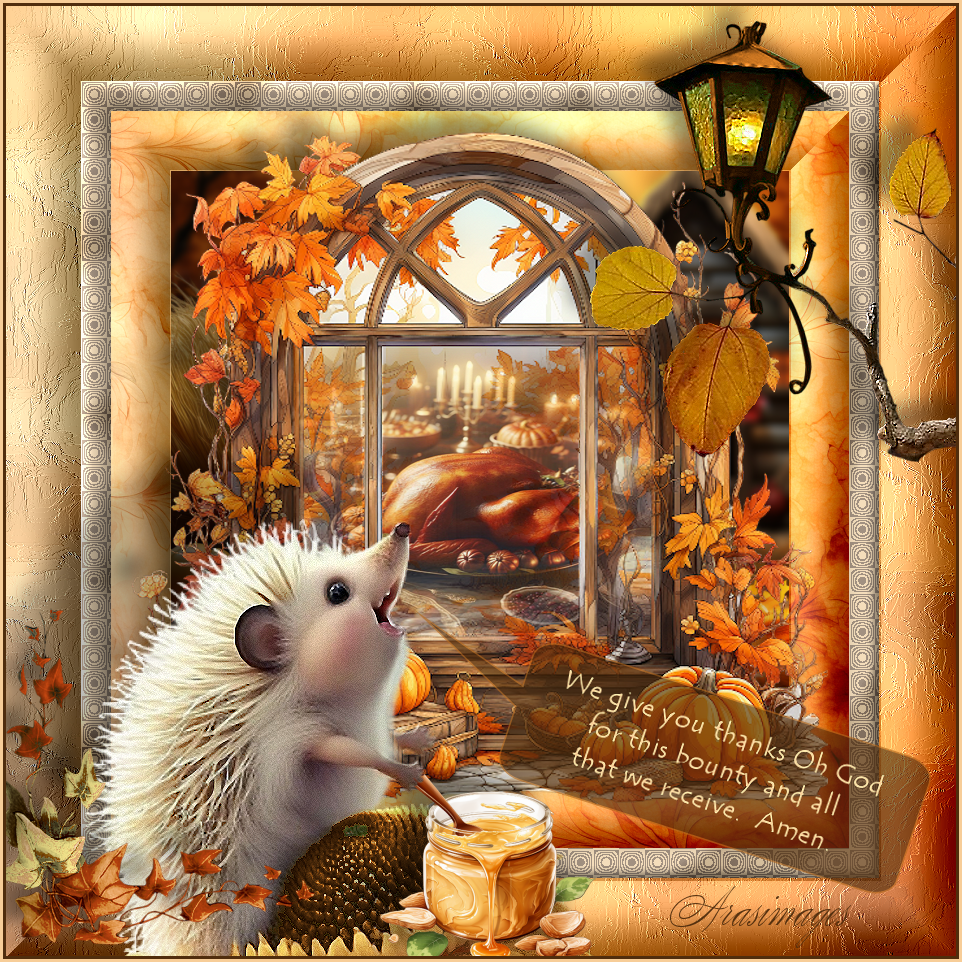
Thankful
For this tutorial you will need the materials in the zip file below.

For an Italian, French, Spanish, Dutch and German translation click on the flags.


This tutorial was written using PSP Pro2020 Ultimate. The plugins used are FiltersUnlimited/Buttons & Frames, AP 07[Gradients/Pattern]/Pattern Square and effects of the program itself. Check to make sure your PSP has the Preset Shape Callout 02. If not, place the Preset I have included in Materials in your Preset Shapes folder. The font included can be opened on your workspace and it will show up in the Font list OR you can install it in your PSP program. Open the original images, create a copy and close originals. Use the copies for your work. Remember to save your work often. To work this tutorial, it is assumed you have some working knowledge of Paint Shop Pro.
Thanks go to Maryse, Adrienne Designs and to Silvie for the beautiful tubes and elements used in this tutorial.
Use the bookmark below to mark your place along the way.

1. In the Materials Palette, set to Foreground to color #d07923, Background color to #502d0d.
2. New/New Image 950px by 950px. CTRL+A to activate the image.
3. Open 371546980_313146188094727_5208885575681486426_n.jpg background. Copy/Paste into Selection. CTRL+D.
4. Effects/Art Media Effects/Brush Strokes.

5. Adjust/Sharpness/Sharpen More.
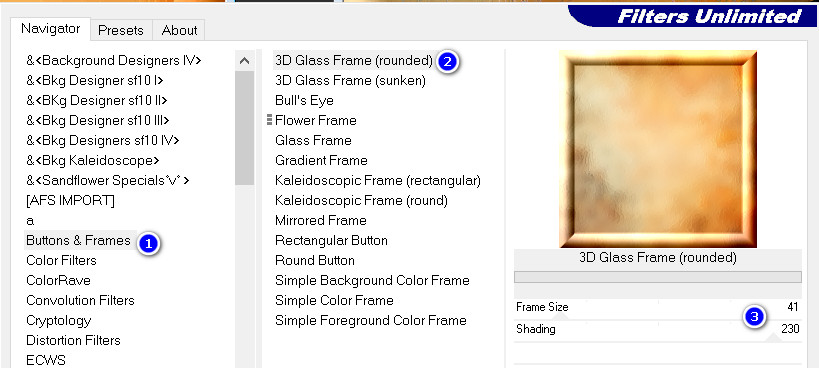
6. Effects/Filters Unlimited/Buttons&Frames/3D Glass Frame (rounded).
7. Duplicate. Using Selections tool set to Rectangle/Add(Shift)/Feather 0, select inside of large border.
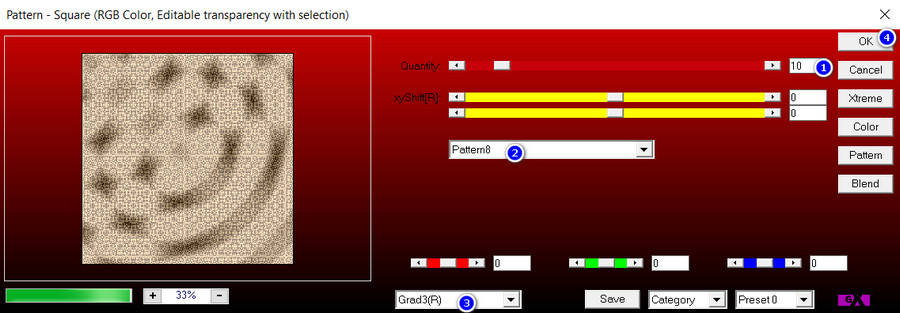
8. Effects/AP 07[Gradients/Pattern]/Pattern Square. Click OK.
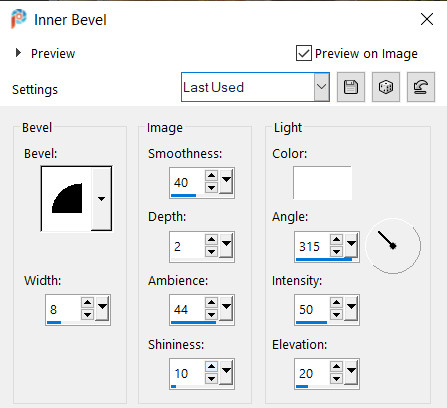
9. Effects/3D Effects/Inner Bevel.
10. Selections/Modify/Contract. Contract by 30px. Delete.
11. Layers/New Raster Layer.
12. Open Thanksgiving Paper (12).png. Copy/Paste Into Selection.
13. Effects/Filters Unlimited/Buttons&Frames/3D Glass Frame (rounded). Frame size 41/Shading 230.
14. Effects/3D Effects/Drop Shadow. Vertical -8, Horizontal -8, Opacity 40, Blur 26, color #000000.
15. Selections/Modify/Contract. Contract by 60px.
16. Open Thanksgiving Paper (7).png. Copy/Paste Into Selection. CTRL+D.
17. Open Thanksgiving Element (18).png. Copy/Paste as New Layer.
18. Image/Resize/Resize by 130%/Resize all layers unchecked.
19. Effects/3D Effects/Drop Shadow. Vertical -18, Horizontal -22, Opacity 40, Blur 26, color #000000.
20. Adjust/Sharpness/Sharpen.
21. Using Selections tool set to Rectangle/Mode (Shift)/Feather 0, individually select the three lower windows.
22. Layers/New Raster Layer.
23. Open 370198834_1016151256282212_2404665156941365364_n.pspimage of turkey dinner.
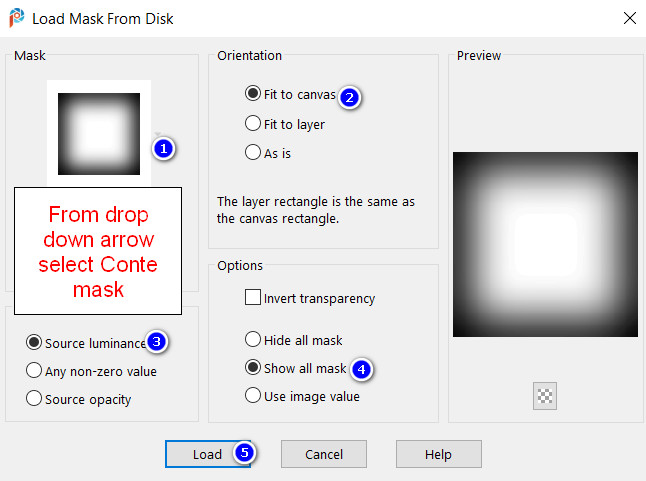
24. Layers/Load/Save Mask. Load Mask From Disk. From the drop down arrow select Conte Mask. Load.
25. Merge/Merge Group. Copy/Paste Into Selection. Drop Opacity down to 90%. CTRL+D.
26. Adjust/Sharpness/Sharpen.
27. Open MR_Autumn Lantern.png. Image/Mirror. Mirror Horizontal.
28. Using the Selections tool set to Rectangle/Mode(Shift)/Feather 0, select around watermark on image. Delete. CTRL+D.
29. Using the Color Changer tool, using Foreground color left click on the green portions of the lantern to change color to gold. Copy/Paste as New Layer on working image.
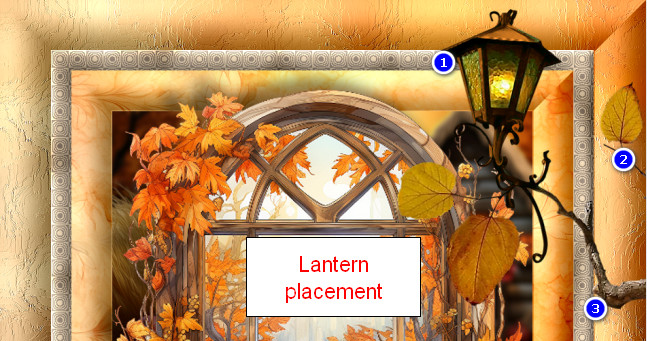
30. Place the lantern in upper right corner.
31. Effects/3D Effects/Drop Shadow. Vertical -18, Horizontal -22, Opacity 40, Blur 26, color #000000.
32. Open Sweet Hedgehog88W_Silvie_08.05.2023.pspimage. Change the Foreground color to #b2671c. Using the Color Changer tool, left click in the center of the Sunflower the Hedgehog is leaning on to darken it. Copy/Paste as New Layer.
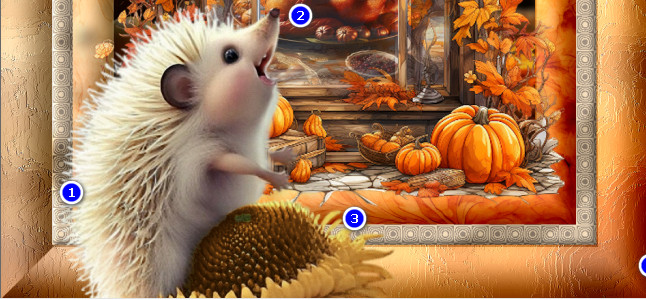
33. Move the little Hedgehog into bottom left corner.
34. Effects/3D Effects/Drop Shadow. Vertical -75, Horizontal -100, Opacity 26 , Blur 22, color #000000.
35. Adjust/Sharpness/Sharpen.
36. Open CornerLeaves.png. Copy/Paste as New Layer. Place into bottom left corner.
37. Adjust/Sharpness/Sharpen.
38. Effects/3D Effects/Drop Shadow. Vertical -18, Horizontal -22, Opacity 40, Blur 26, color #000000.
39. Open Thanksgiving Element (150).png of jar. Copy/Paste as New Layer.
40. Image/Resize/Resize by 40%/Resize all layers unchecked.
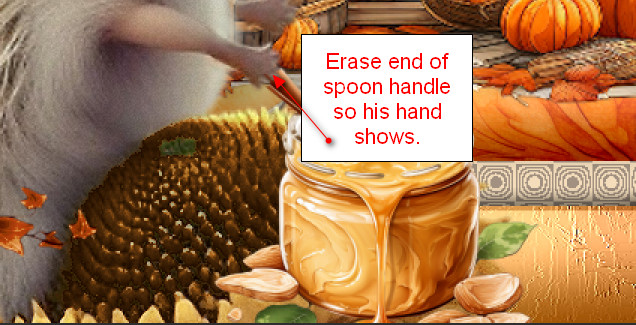
41. Place jar over the right side of the Sunflower so the spoon is a little over the Hedgehog's hand. Use Eraser tool set to Size 7 to erase the end of the spoon handle so it looks like the Hedgehog is hanging on to it.
42. Effects/3D Effects/Drop Shadow. Vertical -18, Horizontal -22, Opacity 40, Blur 26, color #000000.
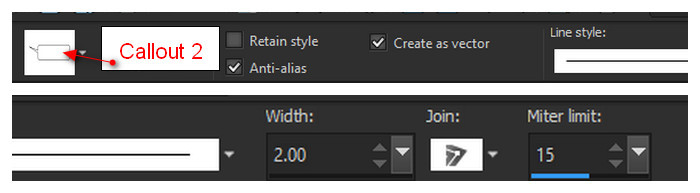
43. From the tool bar select the Preset Shapes tool. Select the Preset Callout 02. Start near the Hedgehog's mouth and draw out a rounded rectangle. Use the turn node and shape nodes to create a rounded rectangle as seen here. Adjust as needed to place it on a slant and change size/make wider or longer if necessary.
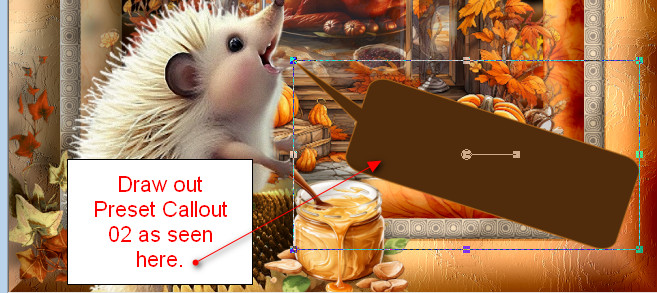
44. Convert to Raster Layer. Place Callout as seen on snapshot above. Lower Opacity down to 64.
45. Change Background color in Materials Palette to #f7cd98.
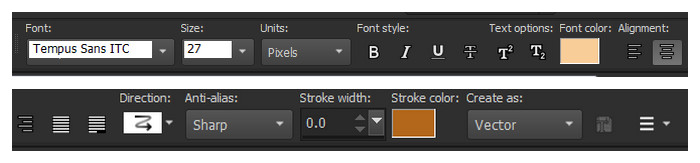
46. From tool bar select the Text tool. Set it to what you see in snapshot below/Kerning at 15.
47. Type out the words "We give you thanks Oh God", click Enter once and continue to type "for this bounty and all", click Enter once again and continue to type "that we receive from you. Amen.".
48. Use the turn node to line up the text with the Callout shape and center it with the Move node in center of Font. Convert to Raster Layer. Adjust if needed.
49. Adjust/Sharpness/Sharpen.
50. Image/Add Borders/Add 3px border, Symmetric checked, color #502d0d.
51. Image/Add Borders/Add 3px border, Symmetric checked, color #f7cd98.
52. Add your name or place watermark. Save As Thankful.jpg or .png file.
Thanks to my friend and faithful tester, PamelaD for testing this tutorial. November 9-2023.
If you are going to use this tutorial for stationery, cards or place the tutorial/tag on another site, I would appreciate you contacting me for permission, giving Arasimages credit for the original tutorial and if possible, a link back to my site. Thank you.
Copyright © Arasimages All Rights Reserved