
Owls in Winter
For this tutorial you will need the materials in the zip file below.

For a German, French, Italian, Dutch and Spanish translation click on the flags.


This tutorial was written using the zipped materials in the download. Create a folder on your desktop called Owls in Winter and unzip the materials in to it. Click on the ArasimagesIcicles.fs1 in materials and it will automatically install in your Eye Candy 5: Nature plugin. I have used Animation Shop in this tutorial. I have used the effects of Xero/Porcelain and Alien Skin Eye Candy 5: Nature and effects of PSP 2020. To work this tutorial, it is assumed you have some working knowledge of Paint Shop Pro.
Thanks go to Silvie for sharing the border with me. The owls and background were AI generated.
Use the bookmark below to mark your place along the way.
1. In Materials Palette, set the Foreground color to #fcfcfc, the Background color to #455363.
2. Create a New Image size 900px by 750px. Selections/Select All.
3. Open AI-Creation-Thick_Winter_Branches.png. Copy/Paste into Selection. Deselect.
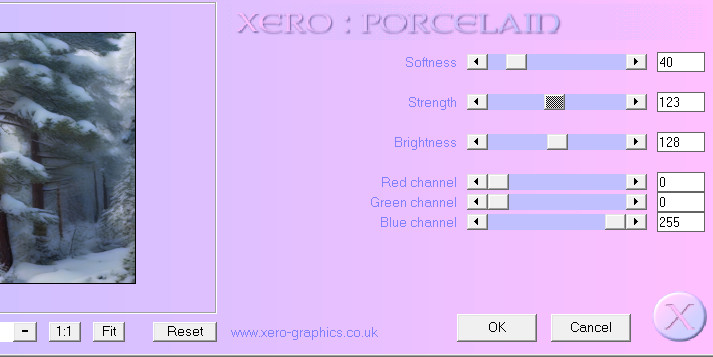
4. Effects/Xero/Porcelain. Use Settings below.
5. Layers/New Raster Layer. Selections/Select All.
6. Open Christmas_Border749.PSP_BG. Copy/Paste into Selection. Deselect.
7. Using Color Changer and Foreground color, click on border to change it to white.
8. Drop Opacity down to 85.
9. Effects/Edge Effects/Enhance.
10. Effects/3D Effects/Drop Shadow. Vertical -10, Horizontal -10, Opacity 40, Blur 10, color #000000.
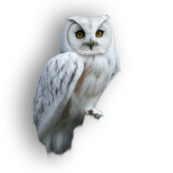
11. Open AI-Creation-Owl-One.pspimage. Copy/Paste as New Layer.
12. Place owl on branch in the bottom right corner.
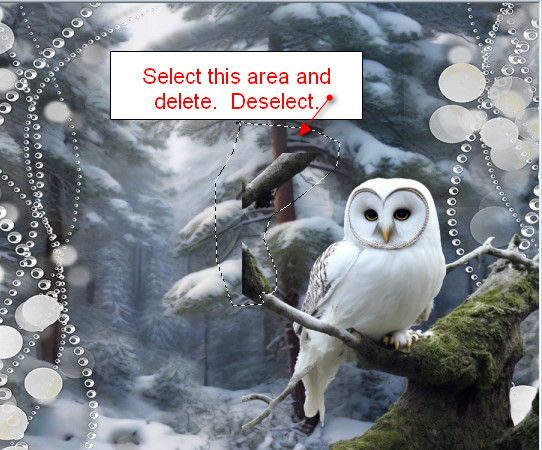
13. Using Freehand Selections/Point to point, Mode: Add (Shift), Feather 1, Anti-alias checked, select the piece of branch which is in midair and the end of the branch the owl is sitting on. Delete. Deselect.
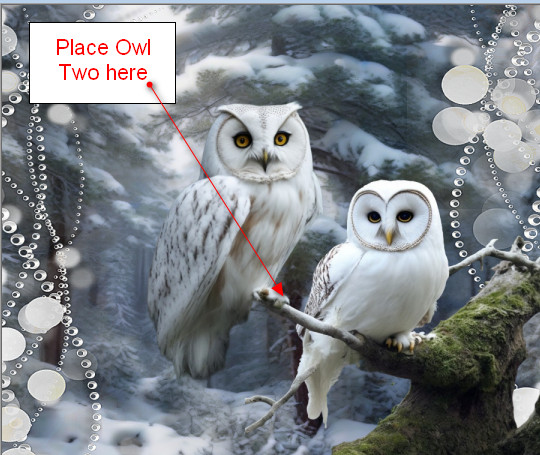
14. Open AI-Creation-Owl-Two.pspimage. Copy/Paste as New Layer.
15. Image/Resize/Resize by 75%/Resize all layers unchecked.
16. Place it as though it was sitting on end of branch the other owl is sitting on.
17. Merge/Merge Down. Pull down into bottom border a bit so tail of first owl just touches border.
18. Adjust/Sharpness/Sharpen.
19. Effects/3D Effects/Drop Shadow. Vertical -28, Horizontal -79, Opacity 40, Blur 77, color #000000.
20. Layers/New Raster Layer.
21. Using the Selections tool set to Rectangle, Mode Add (Shift), Feather 0, Anti-alias checked, draw a very narrow selection 10px from side to side across the top.
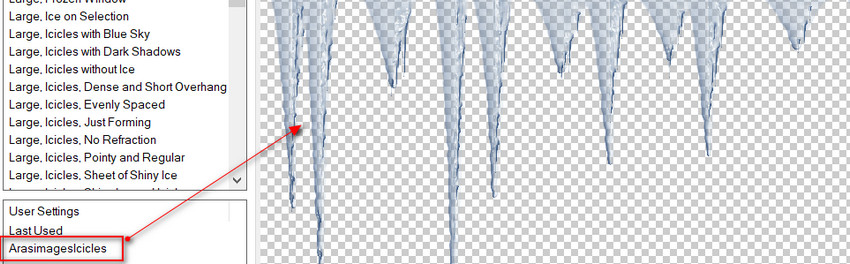
22. Effects/Alien Skin Eye Candy 5: Nature/Icicles. Select Arasimagesicicles from Settings. Click OK. Deselect.
23. Image/Mirror. Mirror Horizontal. Move the icicles up 10px so selection line will not show.
24. Effects/3D Effects/Drop Shadow. Vertical 0, Horizontal -10, Opacity 50, Blur 18, color #000000.
25. Effects/Edge Effects/Enhance.
26. Image/Add Borders/Add 2px border, Symmetric checked, color #455363.
27. Image/Add Borders/Add 20px border, Symmetric checked, color #fcfcfc.
28. Activate 20px border by clicking in it with Magic Wand.
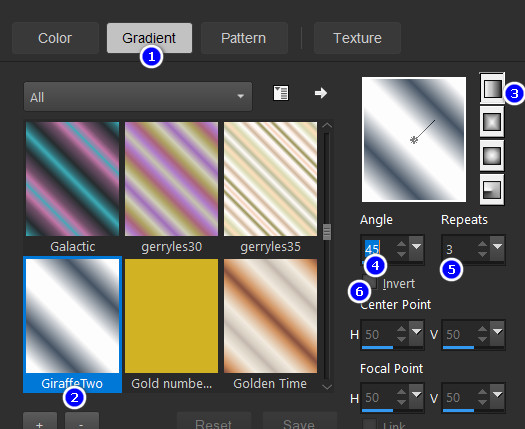
29. In Materials Palette, create a gradient by selecting the Linear style, Gradient GiraffeTwo, Angle/45, Repeats/3, Invert unckecked.
30. Layers/New Raster Layer. Flood fill 20px border with Gradient. Selections/Select None.
31. Image/Add Borders/Add 15px border, Symmetric Checked, color #455363.
32. Activate 15px border by clicking on it with Magic Wand.
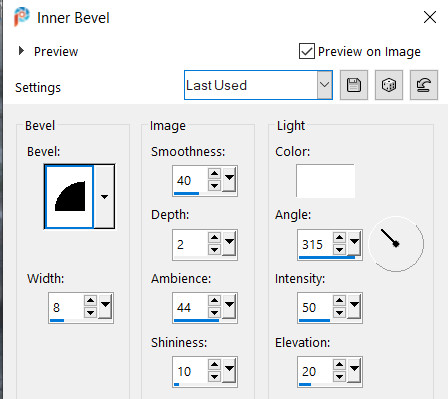
33. Effects/3D Effects/Inner Bevel.
34. Selections/Select None.
35. Sign your name or leave your watermark.
36. Save as Owls In Winter.jpg. COPY.
37. Open Animation Shop. In workspace, Paste as New Animation.
38. From top tool bar under Animation/Insert Frames/Empty, in the box for Number of frames you will add 35 as you want to have 36 frames in all to match the frames of the snow. It will read Insert before frame 34, thus we will end up with 36 frames. This may seem strange to put those numbers in to get your desired results, but it works!
![]()
39. File/Open Arassnowimage.gif. Note that it has 36 frames to it. Highlight the first frame, Edit/Select All. Right click on top bar of snow and copy.
40. Click in first frame of main image. Edit/Select All. (Check to make sure there are 36 frames).
41. Right click within first frame and hover the snow where you want it. Paste/Into Selected Frame. Left click to set it in place.
42. I set the first snow in upper left corner. Be careful not to allow it to go over the frame! Repeat the snow placement in upper right quadrant.
43. Place snow in bottom left and bottom right corners within the borders. Then check the snowfall by clicking on the View Animation icon in top tool bar. If you need to redo the snow placement, then click on the back arrow. Replace snow and check again.
44. We will now save our image. File/Save As. A Save As box will appear. Designate where you want to save it (in your working folder on your desktop), give it a name (Owls In Winter) and leave it to save as type .gif. Click on Save. As the boxes change, continue to click on Next, Next, Next then Finish. Your image is now saved in your working folder.
Thank you PamelaD for testing this tutorial for me. December 8, 2023
If you are going to use this tutorial for stationery, cards or place the tutorial/tag on another site, I would appreciate you contacting me for permission, giving Arasimages credit for the original tutorial and if possible, a link back to my site. Thank you.
Copyright © Arasimages All Rights Reserved