
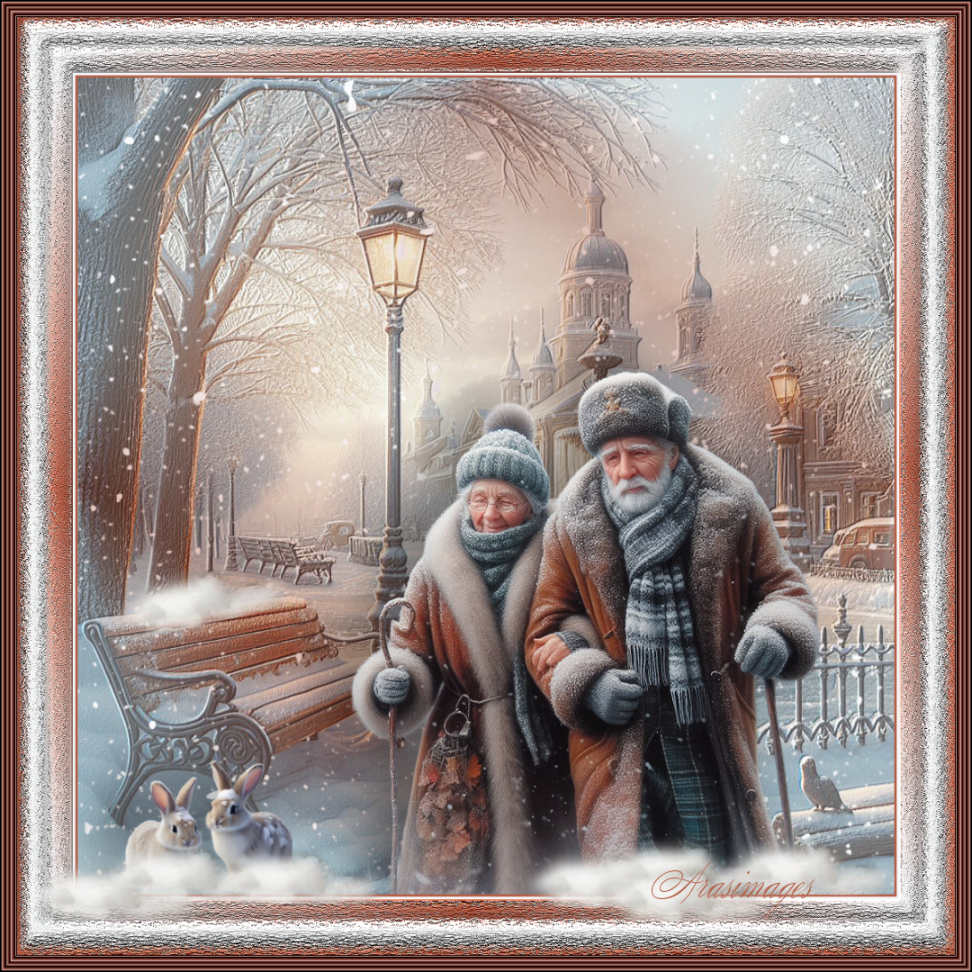
Winter Walkers
For this tutorial you will need the materials in the zip file below.

For an Italian, German, French, Spanish and Dutch translation click on the flags.


This tutorial was written using AAA Frames/Frame Works, Filter Forge 6.0/Effects/Misc/Let It Snow and the effects found in PSP itself. Place the SnowPuff.PspTube in your Picture Tubes Folder. To work this tutorial, it is assumed you have some working knowledge of Paint Shop Pro.
The tubes used in this tutorial were created in AI by Arasimages. Feel free to add them to your own collection if you wish.
Use the bookmark below to mark your place along the way.

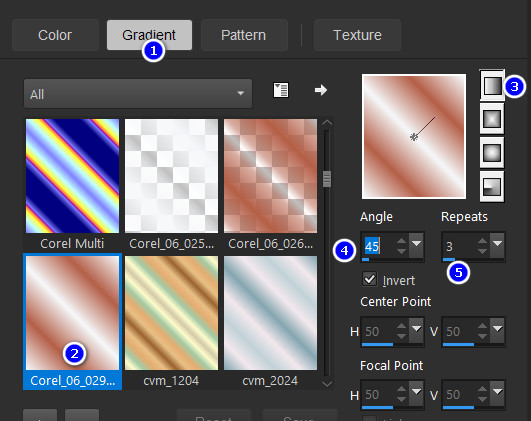
1. In Materials Palette, set Foreground to #b45f48, Background to #f5f7f9. Select Linear, Corel_06_029 Foreground-Background Gradient, Angle 45/Repeats/3, Invert checked.
2. File/New/New Image. Width 1008px by Height 1008px.
3. Flood fill with Background #f5f7f9.
4. Layers/New Raster Layer. Flood fill with Gradient.
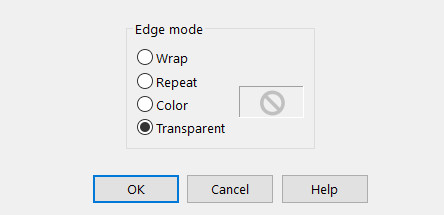
5. Effects/Geometric Effects/Circle.
6. Layers/New Raster Layer. CTRL+A.
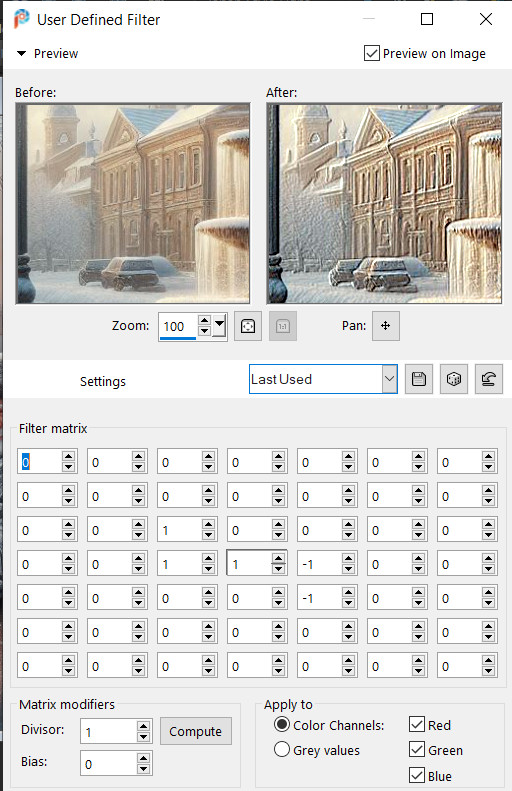
7. Open City_In_Winter.png. Copy/Paste into Selection. CTRL+D.
8. Effects/User Defined Filter. (Found above plugins list).
9. Drop Opacity down to 62.
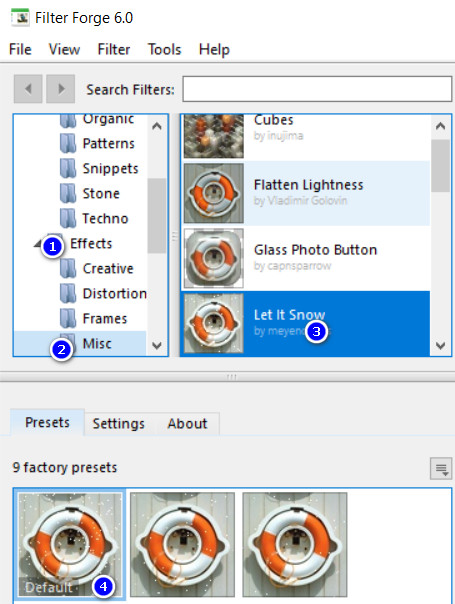
10. Effects/Filter Forge 6.0/Effects/Misc/Let It Snow, set to Default.
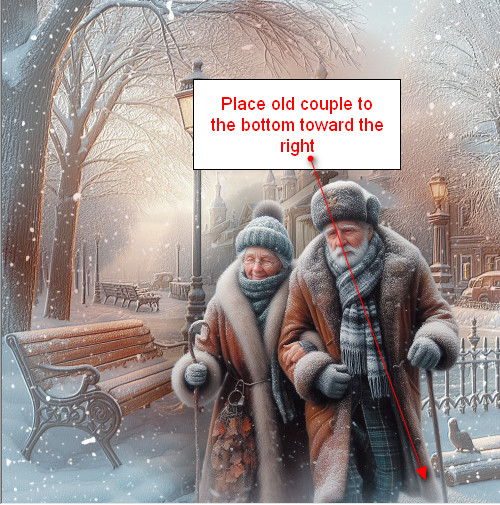
11. Open AI-OldCouple.pspimage. Copy/Paste as New Layer.
12. Image/Resize/Resize by 66%/Resize all layers unchecked.
13. Effects/3D Effects/Drop Shadow. Vertical -18, Horizontal -38, Opacity 35, Blue 82, #000000.
14. Place Old Couple at bottom of image toward right side.
15. Adjust/Sharpness/Sharpen.
16. Open Rabbits_in_Snow.png. Copy/Paste as New Layer.
17. Image/Resize/Resize by 28%/Resize all layers unchecked.
18. Apply a drop shadow on rabbits as in Step #13.
19. Adjust/Sharpness/Sharpen.
20. Place rabbits in bottom left corner.
21. Drop Opacity down to 90%.
22. Image/Add Borders/Add 3px border, Symmetric checked, color #b45f48.
23. Image/Add Borders/Add 3px border, Symmetric checked, color #f5f7f9.
24. Image/Add Borders/Add 30px border, Symmetric checked, color #b45f48.
25. With Magic Wand select the 30px border. Flood fill 30px border with Gradient.
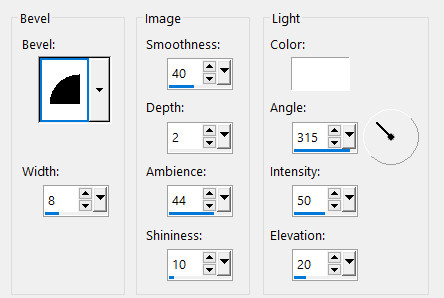
26. Effects/3D Effects/Inner Bevel on border. CTRL+D.
27. Image/Add Borders/Add 30px border, Symmetric checked, color #f5f7f9.
28. With Magic Wand select the 30px border. Effects/Inner Bevel on border as Step 26. CTRL+D.
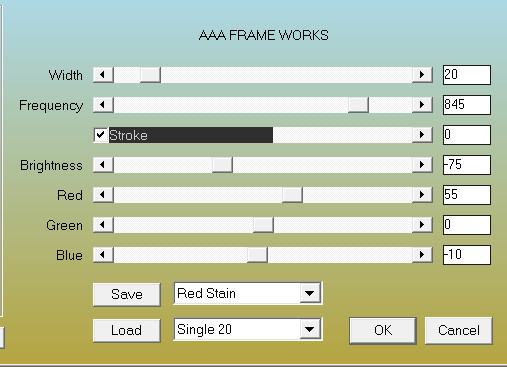
29. Image/Add Borders/Add 30px border, Symmetric checked, color #b45f48.
30. With Magic Wand select the 30px border. Effects/Inner Bevel on border as Step 26. CTRL+D.
31. CTRL+A. Selections/Modify/Contract Selection by 88px. Selections/Invert.
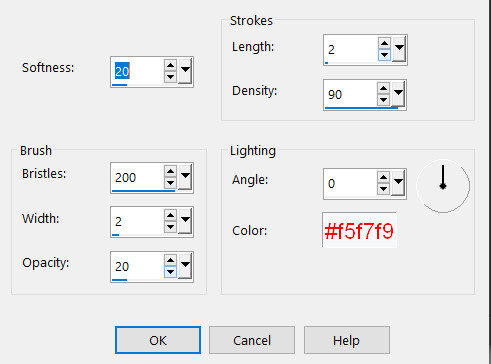
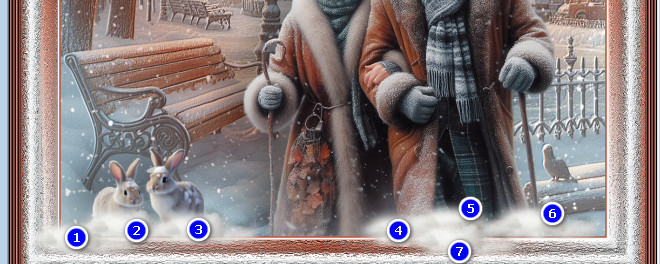
32. Effects/Art Media Effects/Brush Strokes.
33. Effects/Edge Effects/Enhance. CTRL+D.
34. Effects/AAA Frames/Frame Works.
35. Layers/New Raster Layer.
36. From Tool bar select Picture Tube tool. Find SnowPuff.Psp tube. Set scale to 86, leave all others at default.

37. Right click where indicated by numbers.
38. Layers/New Raster Layer.
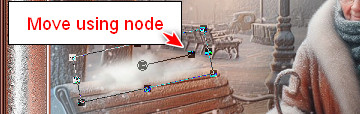
39. Right click snow on top of bench back. Using the Move Tool and its move node, move snow to an angle so it sets on top of bench back. Press M on your keyboard to deselect.
40. Merge/Merge Visible.
41. Image/Resize/Resize by 90%/Resize all layers checked.
42. Leave your watermark or name if you wish and save your work.
Thank you PamelaD for testing this tutorial for me.
If you are going to use this tutorial for stationery, cards or place the tutorial/tag on another site, I would appreciate you contacting me for permission, giving Arasimages credit for the original tutorial and if possible, a link back to my site. Thank you.
Copyright © Arasimages All Rights Reserved