
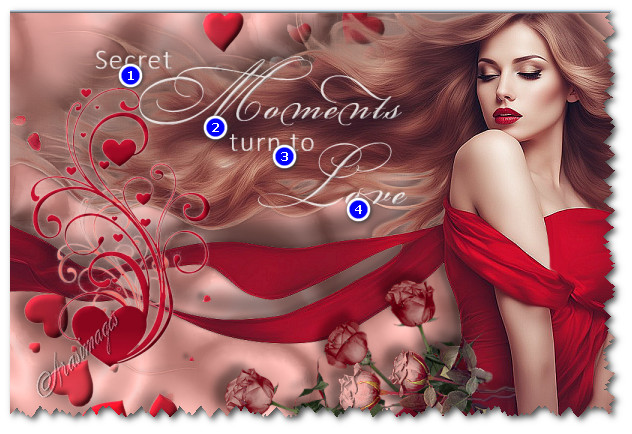
Secret Moments
For this tutorial you will need the materials in the zip file below.

For an Italian, Spanish, German, French and Dutch translation click on the flags.


This tutorial was written using Paint Shop Pro 2020 Ultimate. Plugins used are Filter Factory Gallery U/Sine Blobs3, Virtual Painter and Alien Skin SnapArt/Watercolor and effects of PSP itself. Double click on SecretMoments.f1s file to automatically place it in the settings of Alien Skin Snap Art/Watercolor. The lady was generated using AI. She is free for the taking if you wish. The other tubes are of unknown origin and placed together by me. Unzip the Materials in a folder you make on your desktop called Secret Moments. To work this tutorial, it is helpful if you have some working knowledge of Paint Shop Pro.
Use the bookmark below to mark your place along the way.

1. In Materials Palette, set the Foreground to color #f6b7b0, Background color to #c3122f.
2. New/New Image sized 1024px by 682px. Flood fill with Foreground color.
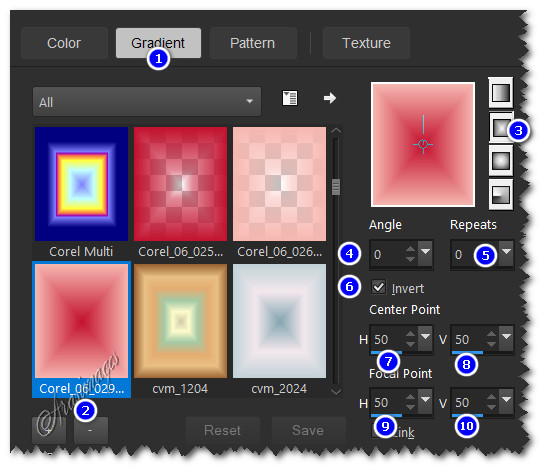
3. In Materials palette set to Gradient/Rectangular, Angle and Repeats both at 0, Invert checked, Center Point/Focal Point all set to 50, Gradient set to Corel_06_029 foreground-background.
4. Layers/New Raster Layer. Flood fill with Gradient.
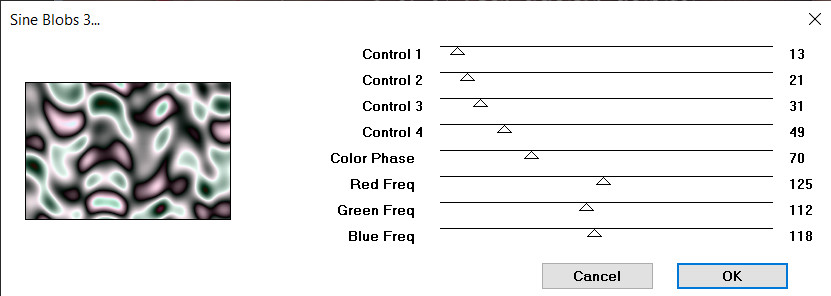
5. Effects/Filter Factory Gallery U/Sine Blobs 3. Apply.
6. Set the layer to Luminance (Legacy),drop Opacity down to 40.
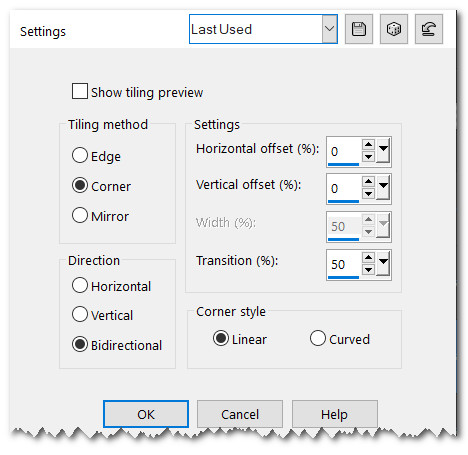
7. Effects/Image Effects/Seamless Tiling.
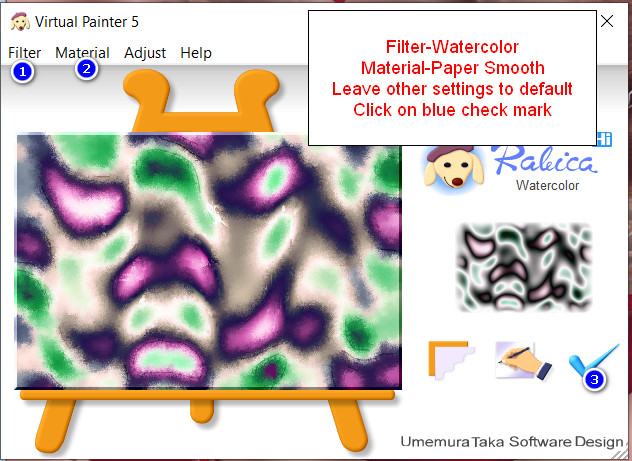
8. Effects/Virtual Painter/VP5. Set Filter to Watercolor. Set Material to Paper Smooth, leave all other settings as default. Click on the blue check mark to apply.
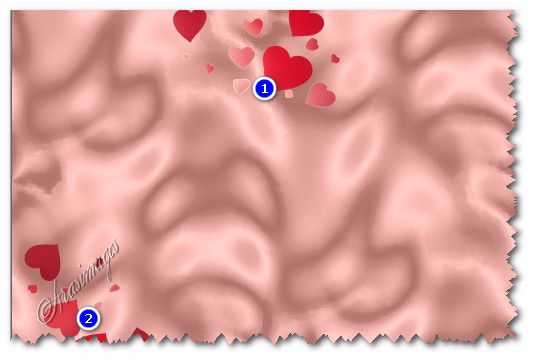
9. Open Hearts.png. Copy/Paste as New Layer.
10. Move hearts to the left as seen here.
11. Selections/Select All. Selections/Float. Selections/Defloat.
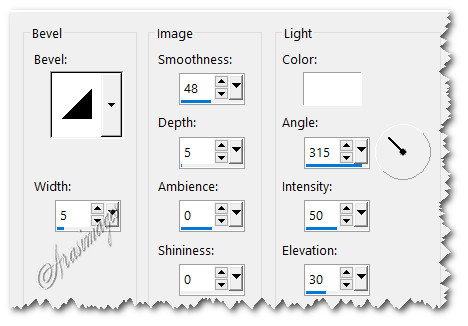
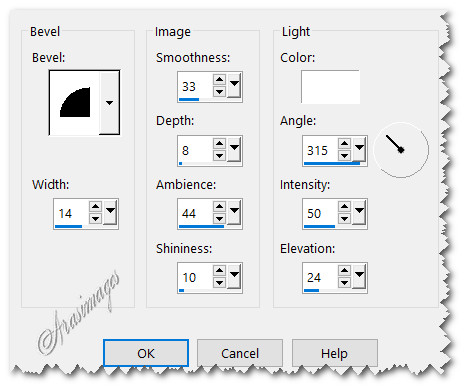
12. Effects/3D Effects/Inner Bevel. Deselect.
13. Effects/3D Effects/Drop Shadow. Vertical -5, Horizontal -18, Opacity 35, Blur 35, color #000000.
14. Open LadyFlowingHair. Copy/Paste as New Layer.
15. Adjust/Sharpness/Sharpen.
16. Open 0_81609_57e049b7_XL.png of swirly hearts. Copy/Paste as New Layer.
17. Image/Resize/Resize by 58%, Resize all layers unchecked.
18. Duplicate. Merge/Merge Down. Move into bottom left corner area.
19. Effects/3D Effects/Inner Bevel. Deselect.
20. Effects/3D Effects/Drop Shadow. Vertical -5, Horizontal -18, Opacity 35, Blur 35, color #000000.
21. Using the Color Changer Tool, Tolerance set to 20, Edge Softness set to 9, right click the deep red on the largest heart to change the red to a deeper color.
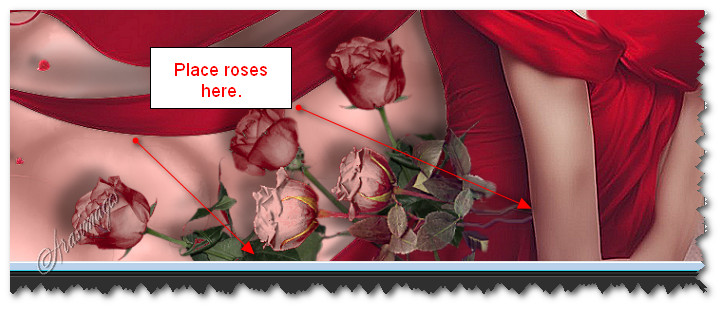
22. Open FivePinkRoses.pspimage. Copy/Paste as New Layer.
23. Place roses at the botton near woman with stems touching her arm and leaves beyond bottom border.
24. Adjust/Sharpness/Sharpen.
25. In Materials Palette, change the Background color to #ffffff.
26. From tool bar select the Text tool. Choose Font BickhamScriptFancy2, Size 100, Font color #ffffff, Alignment Center, Stroke width 0.0. Kerning set to 25.

27. Type out the word "Moments". Convert to Raster Layer. Type out the word "Love". Convert to Raster Layer.
28. Change the Font to Calibri Light, Size 48, Font color #ffffff, Center, Anti-alias Sharp, Stroke width: 0.0 and Kerning at 25.

29. Type out the word "Secret", Convert to Raster Layer. Type out the words "turn to", Convert to Raster Layer.
30. Using Move tool, move all of the words in their proper places as seen below.
31. In Layers Palette, Merge/Merge Down three (3) times so all text is on one layer.
32. Selections/Select All. Selections/Float. Selections/Defloat.
33. Effects/3D Effects/Inner Bevel. Deselect.
34. In Layers Palette, drop Opacity down to 82.
35. Effects/3D Effects/Drop Shadow. Vertical -4, Horizontal -4, Opacity 40, Blur 8, color #000000.
36. Image/Add Borders/Add 3px border, Symmetric checked, color #c3122f.
37. Image/Add Borders/Add 30px border, Symmetric checked, color #f6b7b0.
38. Using Magic Wand set to Add(Shift), Match mode: RGB , Tolerance 25, Feather 0, Anti-alias checked, activate the 30px border.

39. Layers/New Raster Layer. Flood 30px border with Gradient.
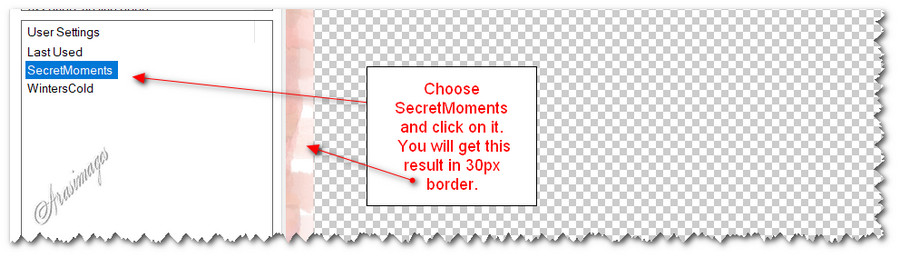
40. Effects/Alien Skin Snap Art/Watercolor. Choose the SecretMoments setting, click OK.
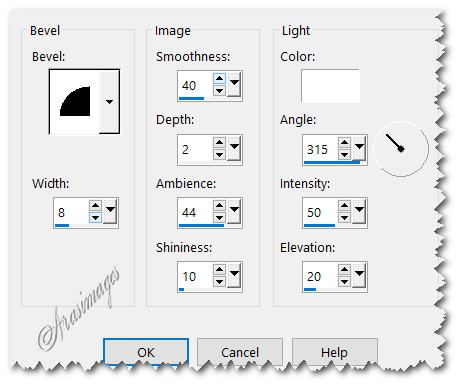
41. Effects/3D Effects/Inner Bevel.
42. Effects/Edge Effects/Enhance. Deselect.
43. Image/Add Borders/Add 15px border, Symmetric checked, color #ffffff.
44. Using Magic Wand, activate the 15px border.
45. Apply Inner Bevel as in Step 41. Deselect.
46. Add your watermark or name and Save as a .jpg image.
47. Copy this main image. Open Animation Shop and right click/Paste as New Animation. Duplicate until you have 5 frames in all. Edit/Select All. Scroll bottom bar to the first frame.
48. File/Open LargeButterfly.gif from your working folder. Left click in first frame.
49. Edit/Select All. Right click on blue bar/Copy. Go back to your main working image.
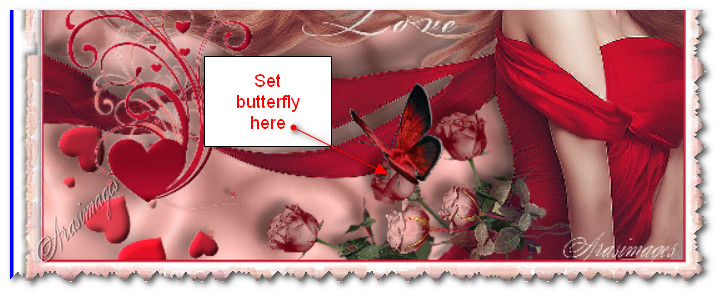
50. Right click in the first frame. Paste/Into Selected Frame. Hover your butterfly where you want to set it and left click in place.
51. From the top tool bar select View Animation. If your butterfly is flapping its wings properly and all appears right, then save your work. (Before I saved my work, I chose to resize the image in Animation Shop to 1000px by 758px to better fit my page on the website. You may resize or not, this is up to you.
52. File/Save As. When the Save as box appears, designate where it will be saved (I save my work in the working folder), give your work the name Secret Moments and leave it set to save as a .gif file. Save.
53. As the next three boxes come up, click on Next in all three, then when next box appears, click Finish.
Thank you Pam for checking this tutorial for me. You are always so faithful in being there for me and I appreciate you!
If you are going to use this tutorial for stationery, cards or place the tutorial/tag on another site, I would appreciate you contacting me for permission, giving Arasimages credit for the original tutorial and if possible, a link back to my site. Thank you.
Copyright © Arasimages All Rights Reserved