
Lotus Princess
For this tutorial you will need the materials in the zip file below.

For an Italian, Spanish, German, French and Dutch translation click on the flags.


This tutorial was written using Paint Shop Pro 2020 Ultimate. Plugins used in this tutorial are Olivers Filters/Tunnel and effects of PSP itself. Place the goldbeads in the PSP/Pattern folder. Export the Favorite White Star.Psp tube in the PSP/Picture Tube folder. The program Animation Shop is used for the animation only. The lady was generated using AI as well as the background. The gold sparkles are a gift from Silvie and I loosly took inspiration from a tag she had made for my creation. Unzip the Materials in a folder you make on your desktop called Lotus Princess. Duplicate the tubes and use the duplicates to work with. Close out the originals to keep them from getting deleted. Save your work often! To work this tutorial, it is helpful if you have some working knowledge of Paint Shop Pro.
Use the bookmark below to mark your place along the way.

1. In Materials Palette, set the Foreground to color #cfd7bb, Background color to #1b3949.
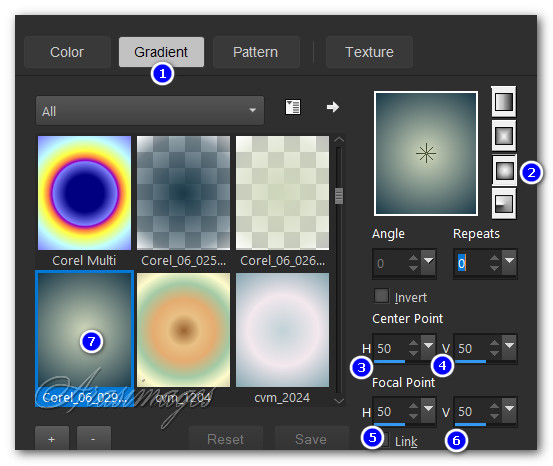
2. Create a Gradient using Sunburst, Corel_06_029 foreground/background gradient setting, angle/Repeats and Invert all at null and Center Points/Focal Points all set to 50.
3. New/New Image sized 1344px by 896px. Flood fill with Gradient.
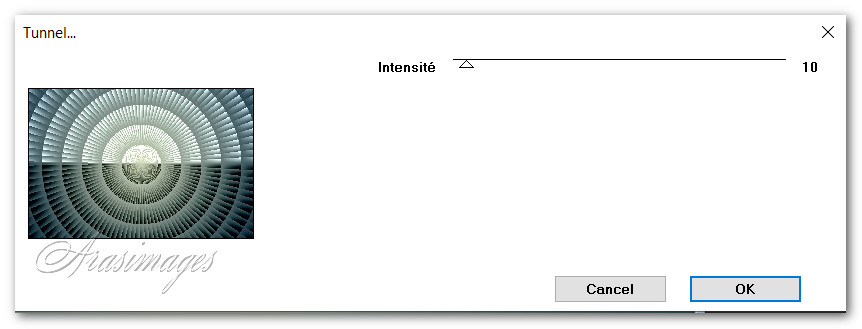
4. Effects/Olivers Filters/Tunnel.
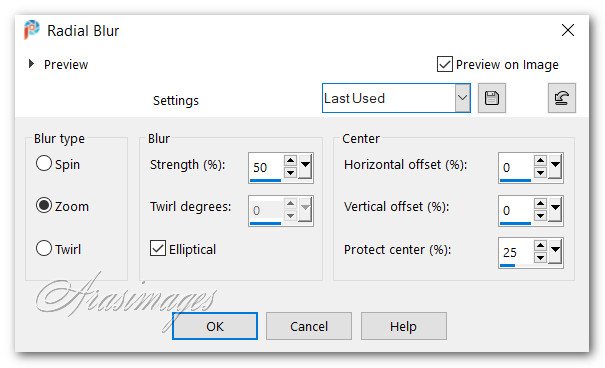
5. Adjust/Blur/RadialBlur.
6. Layers/New Raster Layer. Flood fill with Foreground.
7. Image/Resize/Resize by Pixels. Under New Resize by 1150px by 767px. Resize all layers unchecked.

8. Selections/Select All. Selections/Float. Selections/Defloat.
9. Selections/Modify/Select Selection Borders.
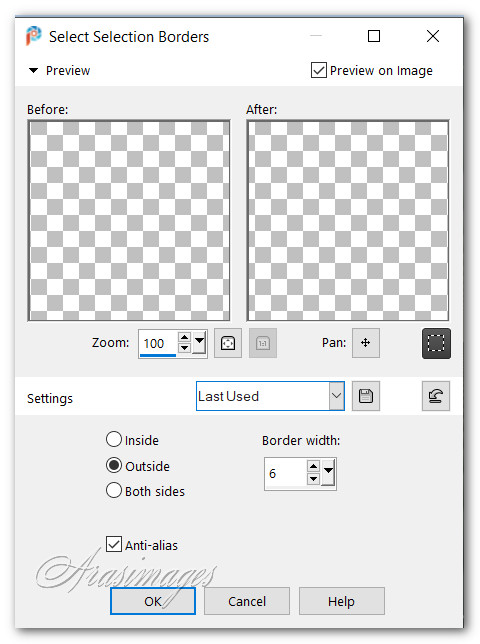
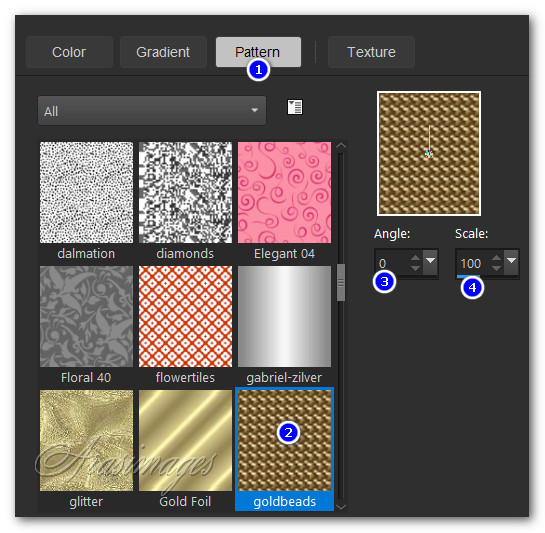
10. In Materials Palette select Pattern/goldbeads set to Angle 0/Scale 100.
11. Flood fill the 6px border with goldbeads pattern.
12. Effects/Edge Effects/Enhance. Deselect.
13. Open LotusBridgeBackground.pspimage background. Copy.
14. Using Magic Wand set to Add(Shift)/RGB Value/Tolerance 25, Feather 0 select inside the green inner rectangle.<.p>
15. Layers/New Raster Layer. Paste into Selection. Deselect.
16. Image/Resize/Resize by Pixels. Width 1150px/Height 767/Resize all layers unchecked as in step #7.
17. Selections/Select All. Selections/Float. Selections/Defloat.
18. Effects/3D Effects/Chisel.

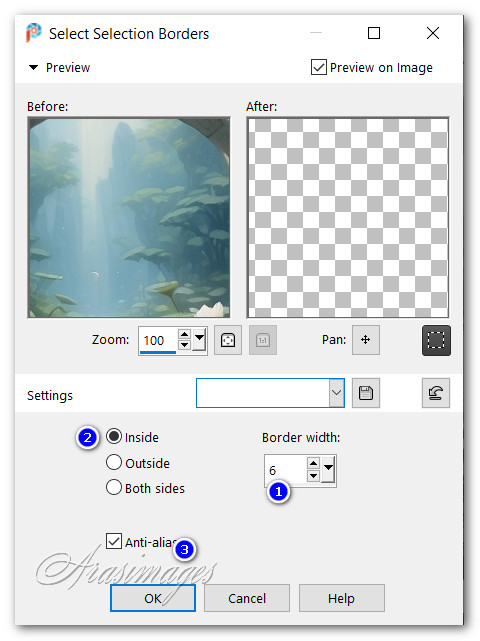
19. Selections/Modify/Select Selection Borders.
20. Layers/New Raster Layer.
21. Using the goldbeads pattern again, flood fill the 6px border.
22. Effects/Edge Effects/Enhance. Deselect.
23. LotusBridgeBackground. (Should still be in memory but if not, Copy.) Paste as New Layer.
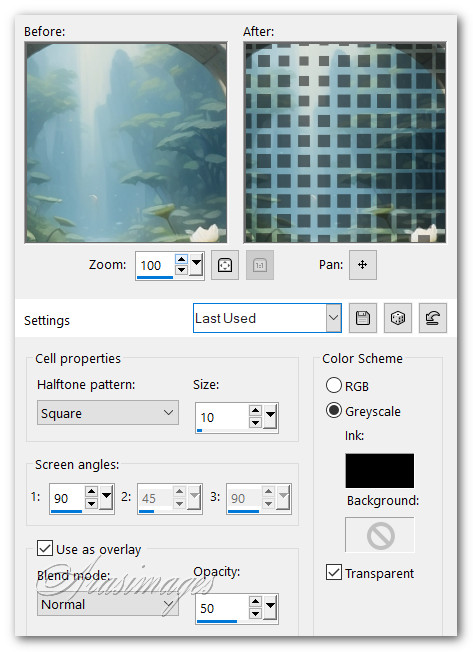
24. Effects/Artistic Effects/Halftone.
25. Effects/Geometric Effects/Circle set to Transparent.
26. Effects/Edge Effects/Enhance.
27. Image/Resize/Resize by Pixels. Width 1150px/Height 767/Resize all layers unchecked as in Step #7.
28. Drop Opacity down to 30.
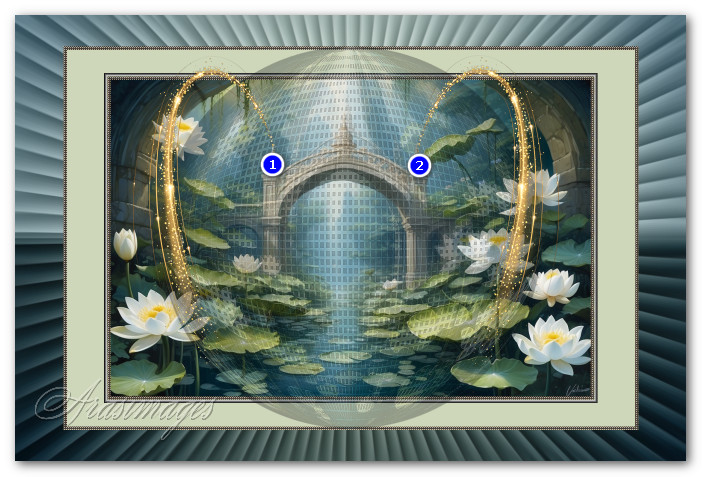
29. Open Sparkles_27.pspimage. Choose the Raster 4 layer in the layers palette. On the top of the image right click/Copy.
30. Paste as New Layer on main working image.
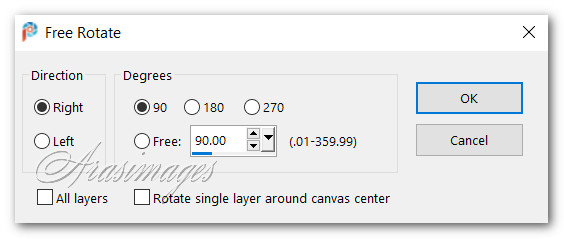
31. Image/Free Rotate. Rotate by checking Right/90 Degrees/type in 90 under Free/All layers and Rotate single layer around canvas center unchecked.
32. Duplicate Sparkle image. Image/Mirror. Mirror Horizontal.
33. Place the first Sparkle so the point touches the top left point of the arch. Place the duplicate Sparkle so it touches the right point of the arch.
34. Open AICreatedWaterLady.pspimage. Copy/Paste as New Layer.
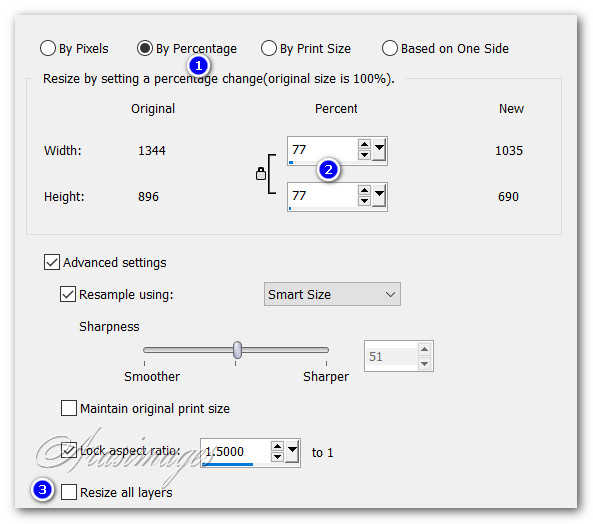
35. Image/Resize/Resize by 78%, Resize all layers unchecked. Be sure to use Percentage resize.
36. Effects/3D Effects/Drop Shadow. Vertical -15, Horizontal -29, Opacity 40, Blur 29, color #000000.
37. Adjust/Sharpness/Sharpen. Repeat.
38. Place lady in the right side of image with bottom resting along goldbead border.
39. Image/Add Borders/Add 4px border/Symmetric checked, color #ffffff.
40. Select 4px border with Magic Wand set to Add(Shift)/RGB Value/Tolerance 25, Feather 0.
41. Flood fill selected 4px border with Pattern goldbeads.
42. Effects/Edge Effects/Enhance. Deselect.
43. Sign your name or leave watermark.
44. Duplicate image 3 times having 4 layers in all.
45. Close off all layers except the top layer.
46. From the tool bar choose the Tube tool. Select Favorite White Star.Psp tube.
47. Set the Scale to 35, leave all other settings the same.

48. On the first layer have it highlighted. Left click star in various places on the gold Sparkles and close layer.
49. Drop down to next layer, open the eye and highlight layer.
50. In the top tool bar, change the scale to 25. Click again on the sparkles and close layer.
51. Drop down to the next layer, open the eye and highlight layer.
52. Change the scale to 15. Click again on the sparkles and close layer.
53. Drop down to the bottom layer, open the eye and highlight layer.
54. Change scale to 10. Click again on the sparkles and open all layers.
55. File/Save As. Save as PSP Animation Shop (*psp) file in your working file.
56. Open Animation Shop. File/Open Lotus Princess PSP Animation Shop (*psp) file. Edit/Select All.
57. Click on the View Animation icon to see if you like the way your animation is sparkling. If you want the sparkles to go slower, set the Animation/Frame Properties/Display from 10 to a higher number, for instance 13. View again. (I resized to 1052 X 608 before saving so it would best fit my webpage, but you may leave it as is if you wish.) Once you are satisfied you will now save your work.
58. File/Save As. When the Save as box appears, designate where it will be saved (I save my work in the working folder), give your work the name Lotus Princess and leave it set to save as a .gif file. Save.
59. As the next three boxes come up, click on Next in all three, then when next box appears, click Finish.
Thank you Pam for checking this tutorial for me. Your time and effort is always appreciated.
If you are going to use this tutorial for stationery, cards or place the tutorial/tag on another site, I would appreciate you contacting me for permission, giving Arasimages credit for the original tutorial and if possible, a link back to my site. Thank you.
Copyright © Arasimages All Rights Reserved