
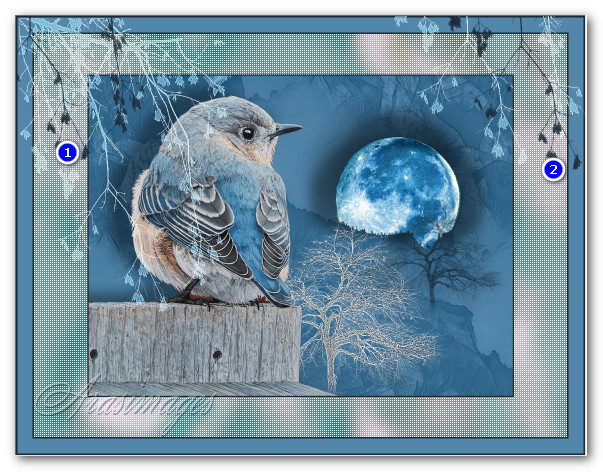
Bluebird at Midnight
For this tutorial you will need the materials in the zip file below.

For an Italian, French, Spanish, German and Dutch translation click on the flags.


Create a folder on your desktop named Bluebird at Midnight. Unzip the Materials into this folder. I have used the plugins PicToPainting/Watercolor, Alien Skin Xenofex 2/Constellation, AFS IMPORT/sqborder2 and Xero/Bad Dream along with effects of PSP. Export the 5 Dots.PspBrush, the Lone Tree.PspBrush and Tree Borders III_2.png into your PSP Files/Brushes folder. Animation Shop was also used for the animation which is optional for this tutorial. *For those who are not used to taking short cuts, I use CTRL+A for Selections/Select All, CTRL+C for Copy, CTRL+V for Paste and CTRL+D for Deselect. I will use some in this tutorial.* This tutorial was written using PSP2020. To work this tutorial, it is assumed you have some working knowledge of Paint Shop Pro.
Thanks go to Linda Youngblood for her beautiful photography of the moon. CorbyAmos reference photo/ ShirleyGreenville artwork was found on the internet. Thanks to them both for their beautiful bluebird image.
Use the bookmark below to mark your place along the way.

1. In Materials Palette set Foreground to #5286ab, Background to #1a2a36.
2. File/New/New Image 1060px by 800px. Flood fill with foreground color.
3. Layers/New Raster Layer. CTRL+A.
4. Open LindaYoungbloodPhotography.jpg. Copy.
5. Paste/Into Selection. CTRL+D.
6. Drop Opacity down to 40. Set Blend Mode to Luminance (L).
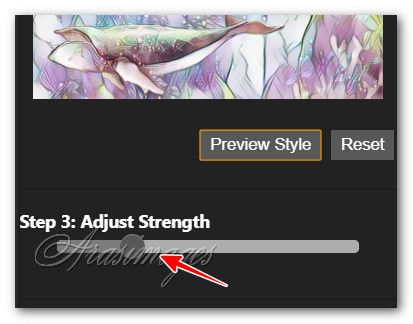
7. Effects/PicToPainting/Watercolor. Select watercolor and Adjust Strength as seen below. Send and Close.
8. Effects/Edge Effects/Enhance.
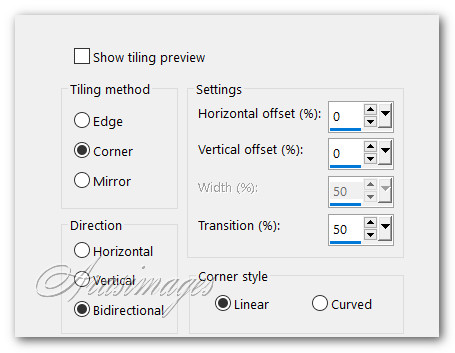
9. Effects/Image Effects/Seamless Tiling.
10. With moon photograph open, select just the moon using Selection Tool/Smart Selection Brush set to Mode: Add (Shift)/Size 20/Feather 0, Tolerance 22, Anti-alias checked, select the moon. Copy.

11. Working with main image, Paste/Paste as New Layer. Place selected moon over the moon in the image. CTRL+D.
12. Adjust/Sharpness/Sharpen.
13. Effects/3D Effects/Drop Shadow. Vertical 0, Horizontal -64, Opacity 40, Blur 44, color #000000.
14. Effects/3D Effects/Drop Shadow. Vertical -64, Horizontal 0, Opacity 40, Blur 44, color #000000.
15. Effects/3D Effects/Drop Shadow. Vertical 0, Horizontal 64, Opacity 40, Blur 44, color #000000.
16. Layers/New Raster Layer.
17. From the tool bar select the Paint Brush tool. Choose Lone Tree brush, Size set to 400, other settings at default, color #1a2a36.
18. Right click to stamp tree below the moon on right side of image.

19. Layers/New Raster Layer.
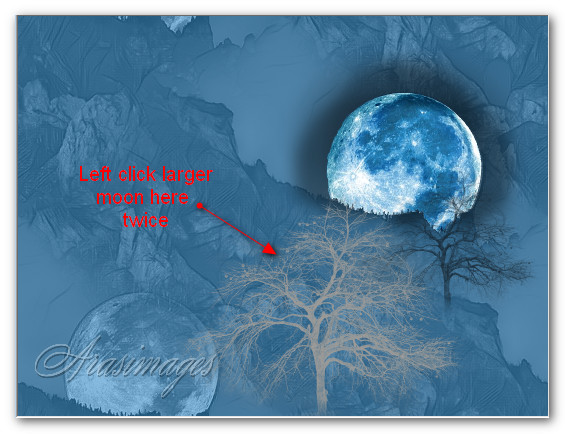
20. Resize the Lone Tree brush to 624, keep other settings as default.
21. Change foreground color to #9a9a98. Left click two times to stamp larger tree between left moon and dark tree.
22. Effects/Edge Effects/Enhance More.
23. Open ShirleyGreenvilleReferencePhotoCorbyAmos.png.
24. Copy/Paste as New Layer. Move a little to the left in left/bottom corner.
25. Effects/3D Effects/Drop Shadow. Vertical -24, Horizontal -59, Opacity 40, Blur 44, color #000000.
26. Adjust/Sharpness/Sharpen.
27. Change foreground color back to #5286ab.
28. Image/Add Borders/Add 3px border, Symmetric checked, color #1a2a36.
29. Right click on layer in Layers Palette/Duplicate.
30. Image/Resize/Resize by 80%/Resize all layers unchecked.
31. Drop down to Background (first) layer.
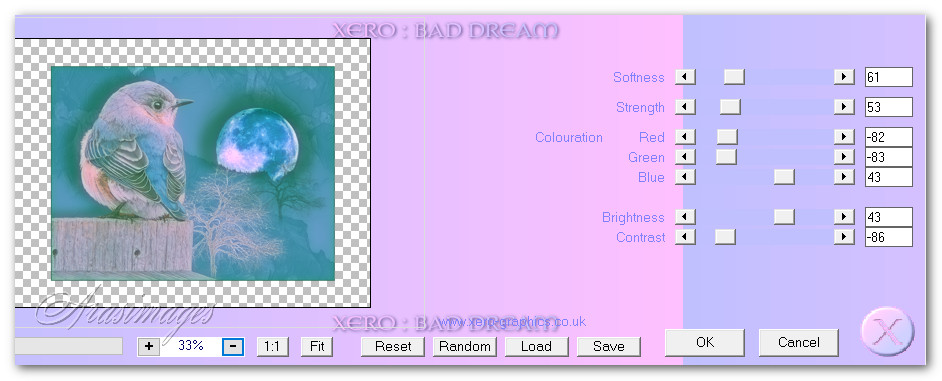
32. Effects/Xero/Bad Dream.
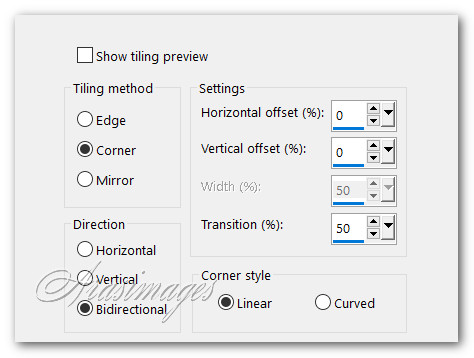
33. Effects/Image Effects/Seamless Tile.
34. Adjust/Blur/Gaussian Blur. Radius 18.
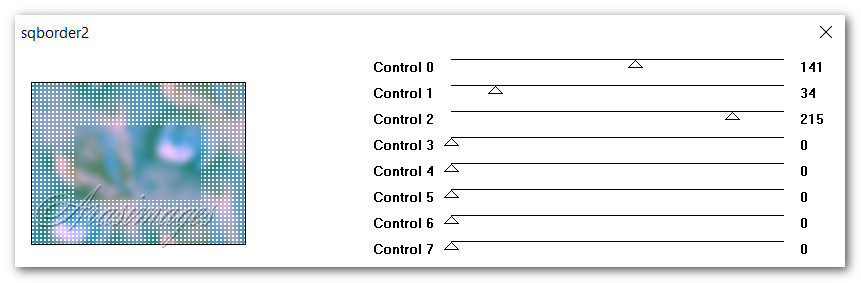
35. Effects/AFS IMPORT/sqborder2.
36. Image/Add Borders/Add 3px border, Symmetric checked, color #1a2a36.
37. Image/Add Borders/Add 30px border, Symmetric checked, color #5286ab.
38. Image/Add Borders/Add 3px border, Symmetric checked, color #1a2a36.
39. Layers/New Raster Layer.
40. From tool bar select Paint Brush tool. Choose Tree Borders III_2.PspBrush.
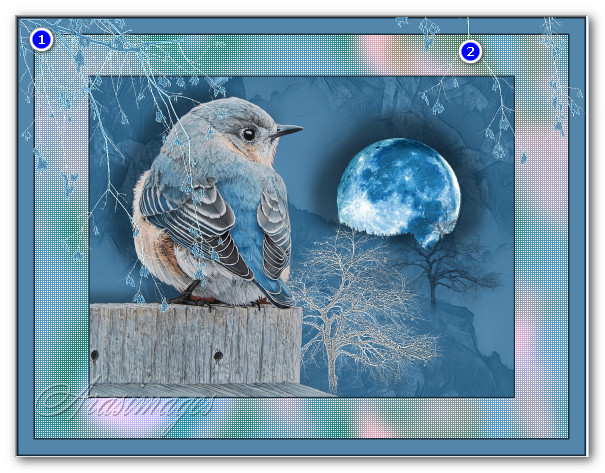
41. Using the foreground color, left click into upper left corner. Left click again in upper right corner. See example below of where I have placed mine.

42. Set Blend Mode to Screen. Opacity down to 84.
43. Effects/Edge Effects/Enhance More.
44. Layers/New Raster Layer.
45. Using background color, right click into upper left corner then in upper right corner as seen below.
46. Layers/New Raster Layer.
47. From tool bar select Paint Brush tool. Choose 5 Dots.PspBrush.


48. Using Background color, right click (stamp) using Rotation 90. Repeat using 0 Rotation. In next step, see example of where to stamp them.
49. Duplicate. Mirror. Mirror Horizontal.

50. Layers/New Raster Layer. Stamp your name or place your watermark. Merge/Merge Visible.
51. Save as .jpg file. Duplicate twice having 3 layers in all.
52. Close the bottom and middle layer, keep the top layer open.
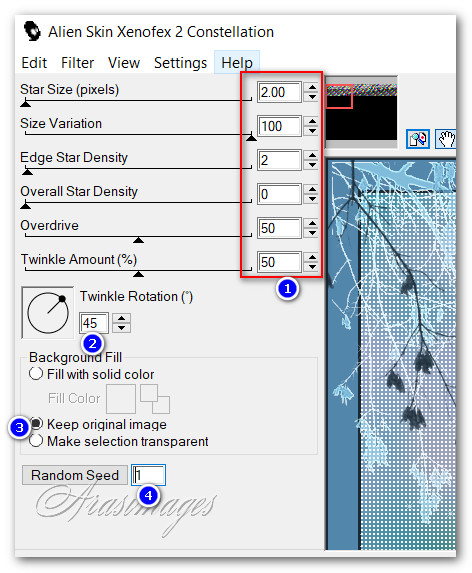
53. Effects/Alien Skin Xenofex 2/Constellation. Click OK.
54. Close off the top layer. Drop down and open middle layer and highlight it.
55. Effects/Alien Skin Xenofex 2/Constellation. Click on Random Seed to change setting. Click OK.
56. Close off the middle layer. Drop down and open bottom layer and highlight it.
57. Effects/Alien Skin Xenofex 2/Constellation. Click on Random Seed to change setting. Click OK.
58. Open middle and top layers. File/Save As/Save in: (your working folder), File name: Bluebirds of Midnight and Save as type: PSP Animation Shop (*.psp).
59. Open Animation Shop. File/Open the PSP Animation Shop file you just saved.
60. Edit/Select All. Click on the View Animation at the top tool bar and check your animation. You will now save it if it is to your liking.
61. File/Save As. When the Save As box appears, give your work a name, name where it will be saved and keep it to save as a .gif file. Save.
62. As the boxes continue to appear, click on Next, Next, Next and Finish. Your work will now be saved where you directed it to save.
Thank you dear PamelaD for your faithfulness in testing my tutorials. March 2023
If you are going to use this tutorial for stationery, cards or place the tutorial/tag on another site, I would appreciate you contacting me for permission, giving Arasimages credit for the original tutorial and if possible, a link back to my site. Thank you.
Copyright © Arasimages All Rights Reserved