

Petals and Pearls
For this tutorial you will need the materials in the zip file below.

For a French, Italian, Spanish and Dutch translation click on the flags.


This tutorial was written using Paint Shop Pro 2020 Ultimate. Plugins used in this tutorial are Richard Roseman/3D Sphere Generator, AlienSkin Eye Candy 5: Impact/Bevel, Mystic Nights/Frosted Glass, Dragonfly/Sinedot's Shader (Sinedots 1), Neology/Rotational Blender, Alien Skin Eye Candy 5 Impact/Bevel and effects of PSP itself. Click on the Rivet.f1s and it automatically installs in your Alien Skin Eye Candy 5 plugin. The program Animation Shop is used for the animation. Unzip the Materials in a folder you make on your desktop called PetalsAndPearls. Duplicate the tubes and use the duplicates to work with. Close out the originals to keep them from getting deleted. Save your work often! To work this tutorial, it is helpful if you have some working knowledge of Paint Shop Pro.
Thanks go to JHanna for the background, to Marif for her yellow rose, to Maryse for her lady.
Use the bookmark below to mark your place along the way.

1. In Materials Palette, set the Foreground to color #be8f8e, Background color to #41190d.
2. Create a New Image size 900px by 650px. Selections/Select All.
3. Open JHanna_365 background.jpg if you are going to use Pic To Painting plugin. Select the option Slumber. Preview Style. Adjust Strength as seen in snapshot and Confirm Painting by clicking on Send and Close. If you are not going to use Pic To Painting, then open the JHanna_365.jpg Slumber Applied instead. Copy your choice of background. Paste Into Selection. Deselect.

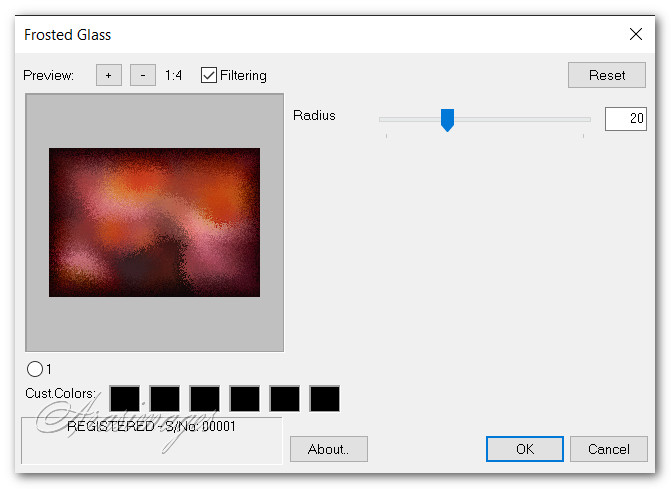
4. Effects/Mystic Nights/Frosted Glass. Repeat.
5. Effects/Image Effects/Seamless Tiling.

6. Adjust/Sharpness/Sharpen. Duplicate.
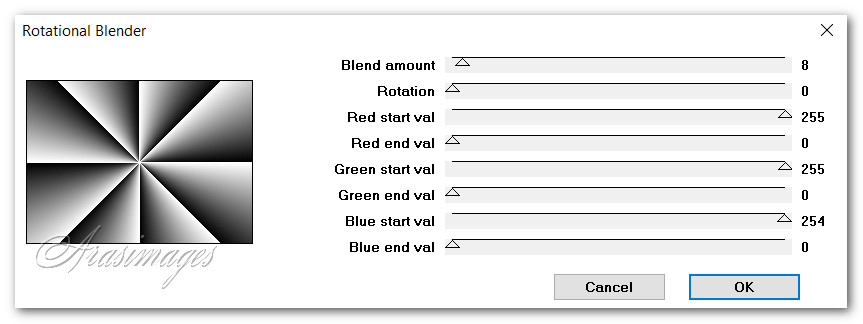
7. Effects/Neology/Rotational Blender.
8. Using the Selections tool set to Rectangle/Add (Shift)/Feather 0/Anti-alias checked. Select the top half of the Rotational Blender layer. Delete. Deselect.
9. Set the Blend Mode to Multiply.
10. Open PearlsString.Png. Copy/Paste as New Layer. Move into place at 330px on left side. Duplicate.
11. Image/Mirror. Mirror Horizontal.
12. Merge/Merge Down. Duplicate. Place at 160 pixels.
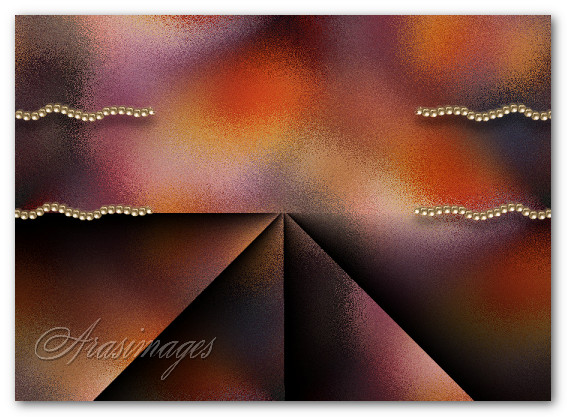
13. Effects/3D Effects/Drop Shadow. Vertical 16, Horizontal 0, Opacity 45, Blur 21, color #000000. Apply on Raster 2 layer first then on Copy of Raster 2 to contine.
14. Layers/New Raster Layer.
15. Effects/Richard Roseman/3D Sphere Generator.

16. Flood fill circle with foreground color #be8f8e.
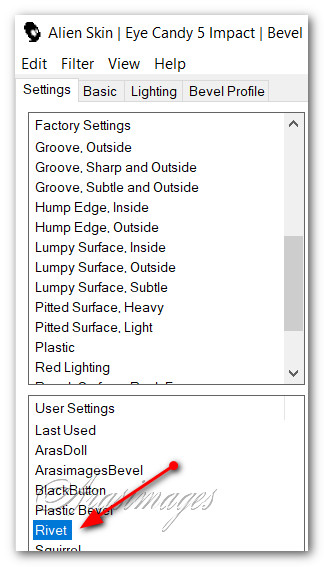
17. Effects/Alien Skin Eye Candy 5 Impact/Bevel. Click on Rivet under Settings. Click OK.
18. Image/Resize/Resize by 60%/Resize all layers unchecked.
19. Move Circle to left side. Duplicate. Image/Resize/Resize by 60%/Resize all layers unchecked.
20. Place resized smaller circle in center of largest circle.
21. Duplicate. Move duplicated circle to right side.
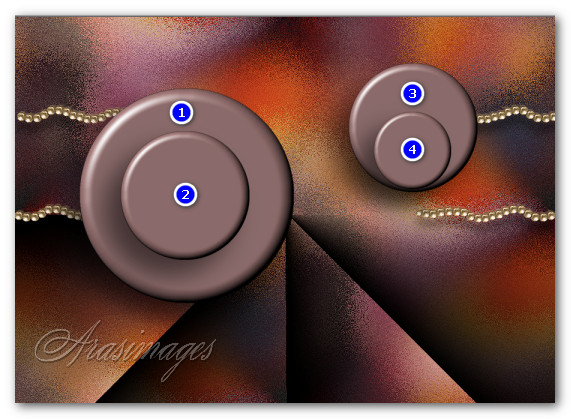
22. Duplicate once more, resize by 60% and place at bottom of third circle. You now have four circles. (as seen in snapshot below of all four circles when done with them).
23. Starting with largest circle, do a drop shadow using these settings, then continue up the layers so all four circles have drop shadows. Effects/3D Effects/Drop Shadow. Vertical 27, Horizontal -27, Opacity 50, Blur 58, color #000000.
24. Open Marif_2007_05Mai_misted_decor0161.pspimage. Copy/Paste as New Layer.
25. Image/Free Rotate/Rotate by 15%.

26. Place rose and feather between the circles, right of center. Effects/Edge Effects/Enhance.
27. Open MR_Linda Sara Mrad.pspimage. Using the Selections tool, select around Maryse watermark. Delete. Deselect.
28. Copy. Paste as New Layer on main image.
29. Image/Resize/Resize by 86%/Resize all layers unchecked. Fit lady so she is over first circles, elbow into upper edge and bottom of dress touching bottom of image.
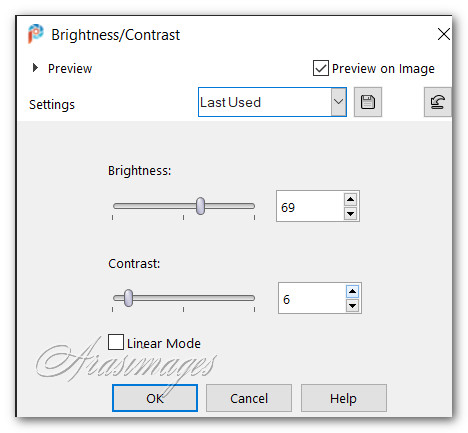
30. Adjust/Brightness and Contrast/Brightness/Contrast.
31. Adjust/Sharpness/Sharpen.
32. Effects/3D Effects/Drop Shadow. Vertical 27, Horizonal -27, Opacity 50, Blur 58, color #000000.
33. If you want to give more modesty to the dress, Open Modesty.png. Copy/Paste as New Layer and set in upper middle of dress.
34. Open TripleBars.png. Copy/Paste as New Layer.
35. Set in place over right side circles from top down.
36. Open Dragonfly.png. Copy/Paste as New Layer.
37. Place over TripleBars on upper right.
38. Open Small Dagonfly.png. Copy/Paste as New Layer.
39. Place on top right side of dress petal.
40. Image/Add Borders/Add 3px border, Symmetric checked, color #401601.
41. Image/Add Borders/Add 38px border, Symmetric checked, color #be8f8c.
42. Using Magic Wand set to Add (Shift), Match Mode:None/Feather 0, activate the 38px border.
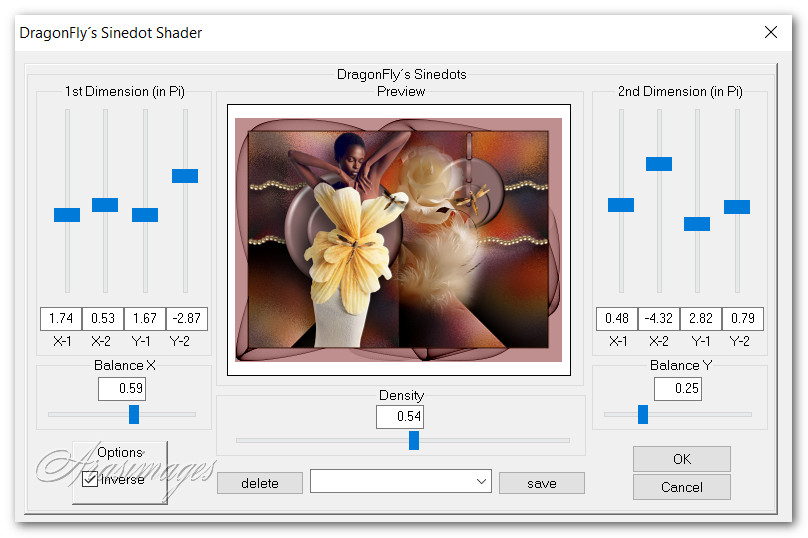
43. Effects/Dragonfly/Dragonfly's Sinedot Shader. Use settings as seen below.
44. Deselect. Image/Add Borders/Add 3px border, Symmetric checked, color #401601.
45. Add your name if you wish. Save as a .jpg file. COPY.
46. Open Animation Shop. Paste as New Animation in blank space. Duplicate image 20 times having 21 frames in all. Left click in first frame, Edit/Select All.
47. Open SmallDragonflyAnimation.psp. Left click in first frame/Edit/Select All. Copy.
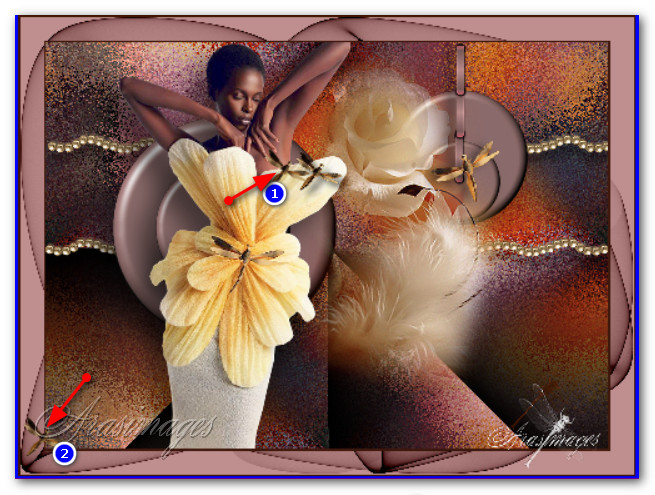
48. On main image, right click in first frame/Paste/Into Selected Frame. Hover the dragonfly to where you want it (next to dragonfly on petal) and left click to set in place.
49. Repeat the pasting of the dragonfly on the main image but this time, paste it in bottom left corner. See snapshot of where to paste the dragonflys.
50. Check your animation to see if it is as you want it. If so we will now save it.
51. File/Save As/Save as Animation box will appear. Save in: PetalsAndPearls folder. File name: PetalsAndPearls, leave it to save as a .gif file. Click on Save.
52. As the boxes change, continue to click Next, Next, Next and Finish.
53. Your image is now saved where you designated it to be.
Thank you Pam for checking this tutorial for me. Your time and effort is always appreciated. August 23, 2024.
If you are going to use this tutorial for stationery, cards or place the tutorial/tag on another site, I would appreciate you contacting me for permission, giving Arasimages credit for the original tutorial and if possible, a link back to my site. Thank you.
Copyright © Arasimages All Rights Reserved