
No Room
For this tutorial you will need the materials in the zip file below.

For a Spanish and German translations click on the flags.


This tutorial was written using PSP2020. Create a working folder on your desktop named No Room. Unzip the Materials in to it. Duplicate the tubes and use those to work with so you will not lose the originals. Place Masks supplied in your PSP Mask folder. Export Clouds.psp tubes into your PSP/ Picture Tubes folder. Plugins used were Graphics Plus/Weaver , AAA Frames/Texture and those of PSP itself. Also used was Animation Shop. To work this tutorial, it is assumed you have some working knowledge of Paint Shop Pro.
Thanks go to PamelaD for her tubing of the AI images used and for checking my work. Arasimages generated the images used in an AI generator.
Use the bookmark below to mark your place along the way.

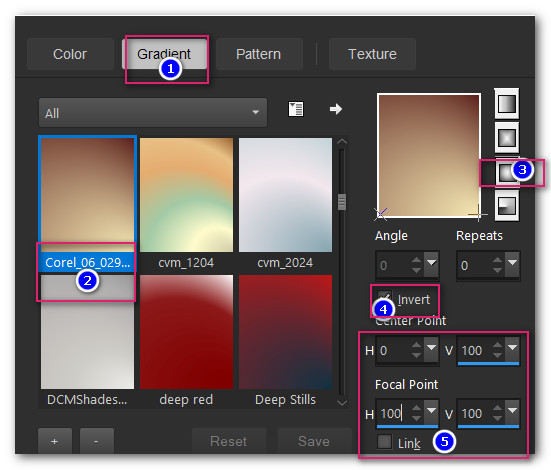
1. In the Materials Palette, set the Foreground to #5a201b, Background to #f5e8b4. In Materials Palette set to Gradient/Sunburst, Angle/Repeats 0, Invert checked, Center point H0/V100, Focal Point both at 100. Use Corel_06_029 Gradient.
2. Create a New Image 850px by 850px. Flood fill with Foreground color.
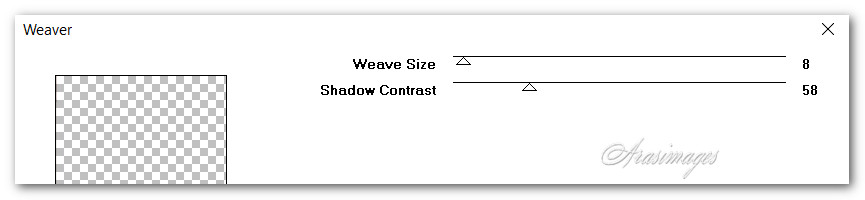
3. Effects/Graphics Plus/Weaver.
4. Layers/New Raster Layer. Switch Foreground color to Gradient. Flood fill with Gradient.
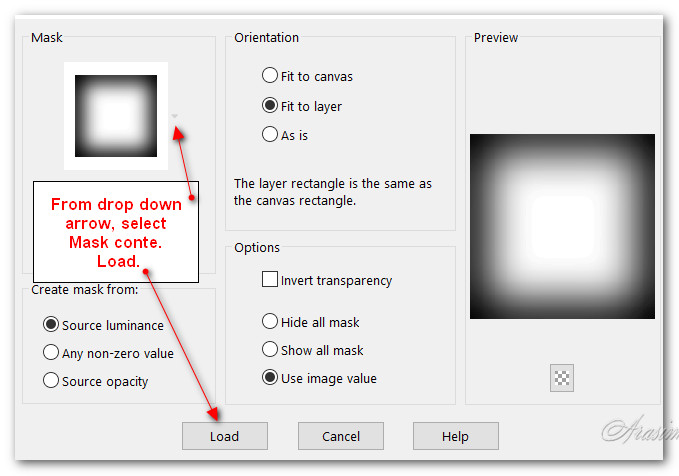
5. Layers/Load/Save Mask. Load Mask From Disk. Select Mask0125MD. Load.

6. Merge/Merge Group.
7. Layers/New Raster Layer. Flood fill with Gradient.
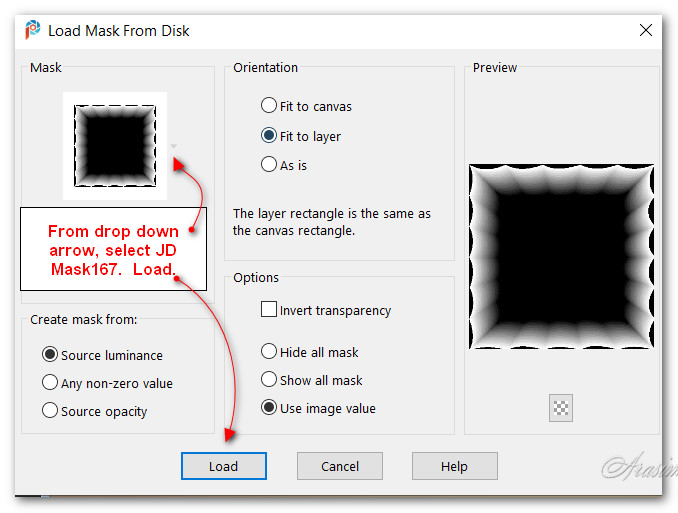
8. Layers/Load/Save Mask. Save Mask From Disk. From drop down arrow, select JDMask167. Load.
9. Merge/Merge Group.
10. Image/Resize/Resize by 80%/Resize all layers unchecked.
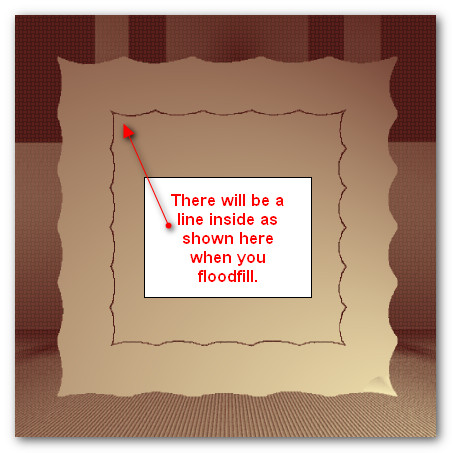
11. Using Gradient, flood fill inside square. There will be a scalloped line within square.
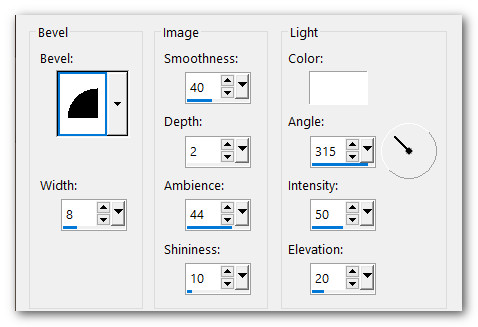
12. Effects/3D Effects/Inner Bevel.
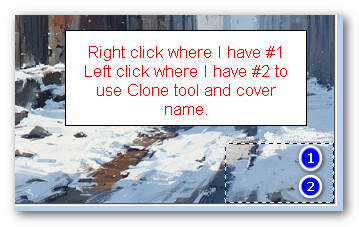
13. Open StreetScene.pspimage. Using the Clone tool set to Size 17, all other settings set to default, right click above the signature on image. Left click over the red signature to get rid of it. Deselect.
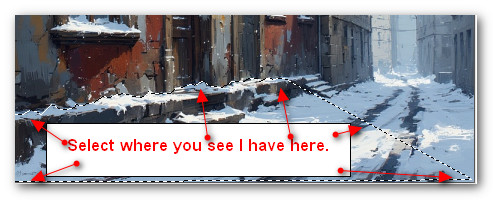
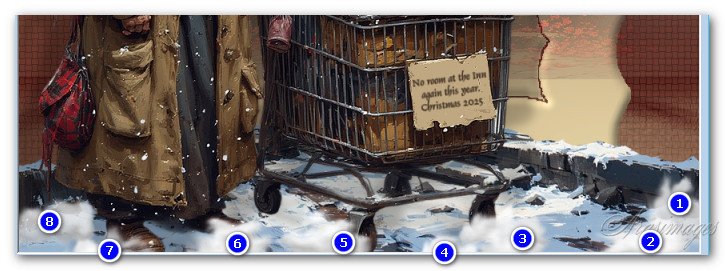
14. Using Selections tool set to Point to Point/Mode Add (Shift)/Feather 0, select around the bottom section where shown below. Copy.
15. Go to working image/Paste as New Layer.
16. Place the selected street snow at the bottom left of image.
17. Duplicate. Image/Mirror. Mirror Horizontal. Set in place on right bottom side of image to match first snow image.
18. Open InnDoorAndTree.png image. Layers/Load/Save Mask. Save Mask From Disk. From drop down arrow, select the Mask conte. Load.
19. Merge/Merge Group. Copy.
20. Go to working image and Paste/Paste as New Layer.
21. Using Move tool, move tree into top border a little and to right side.
22. Adjust/Adjust/Sharpness/Sharpen.
23. Open NoRoom.png of woman. Copy/Paste as New Raster Layer.
24. Using Selections tool set to Rectangle/(Mode: (Add Shift/Feather 0, surround my watermark. Delete. Deselect.
25. Using move tool move woman into bottom left corner.
26. Image/Adjust/Sharpness/Sharpen.
27. Effects/3D Effects/Drop Shadow. Vertical 35, Horizontal -35, Opacity 26, Blur 17, color #000000.
28. Effects/3D Effects/Drop Shadow. Vertical -35, Horizontal 35, Opacity 26, Blur 17, color #000000.
29. From Tool bar select the Picture tube tool. Choose Clouds. Set Scale to 50, leave all other settings as default.
30. Layers/New Raster Layer.
31. Using left clicks, put some snow along bottom where she is standing and by cart wheels. See example below.
32. Image/Add Border/Add 2px border, Symmetric, Color #f5e8b4.
33. Image/Add Border/Add 2px border, Symmetric, Color #5a201b.
34. Image/Add Border/Add 2px border, Symmetric, Color #f5e8b4.
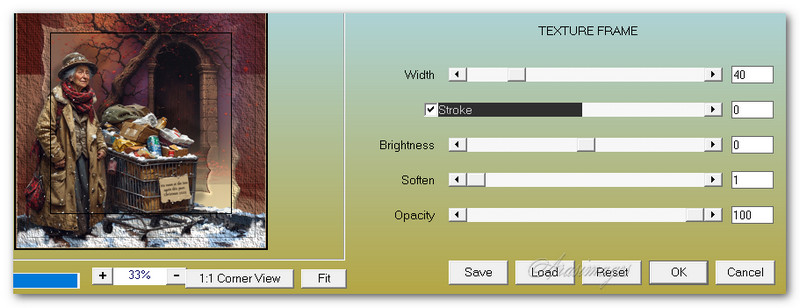
35. Effects/AAA Frames/Texture Frame.
36. Selections/Select All. Modify/Contract selection, contact by 37px. Selections/Invert.
37. Effects/3D Effects/Inner Bevel. Deselect.
38. Add your watermark. Save as NoRoom.jpg in your working folder on your desktop. COPY.
39. Open Animation Shop. In open workspace, right click. Paste/Paste as New Animation.
40. Duplicate the main image NoRoom 35 times having 36 frames in all. Left click in first frame. Edit/Select All.
41. Open Arassnowimage.gif. Left click in first frame/Edit/Select All.
42. Right click/Copy from blue bar across the top.
43. Go back to the NoRoom 36 frames. Right click within the first frame and hover the snow over top left area within the border. Paste/Paste/Into Selected Frame. Left click into place.
44. Right click within the first frame again and hover the snow over top right within the border. Paste/Paste/Into Selected Frame. Left click into place. Repeat placing snow in bottom right and bottom left quadrants so image is full of snow.
45. Animation/Frame Properties. Leave set at 10. Set from 10 to a higher number for slower snowfall. (Lower numbers make faster snowfall).
46. From the top tool bar in Animation Shop, click on the View Animation and see if you like where your snow is falling and the speed it is falling.

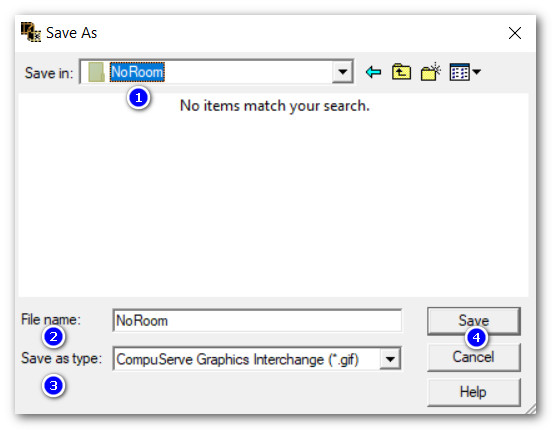
47. If all is okay, we will now save our work. File/Save As. The Save As box will appear. Designate where the file will be saved, give it a name and leave it set to save as a .gif file. Save.
48. As the boxes continue to show, click on Next three times, then click on Finish. You are all done!
Thank you PamelaD for your testing this tutorial. December 13, 2025
If you are going to use this tutorial for stationery, cards or place the tutorial/tag on another site, I would appreciate you contacting me for permission, giving Arasimages credit for the original tutorial and if possible, a link back to my site. Thank you.
Copyright © Arasimages All Rights Reserved