
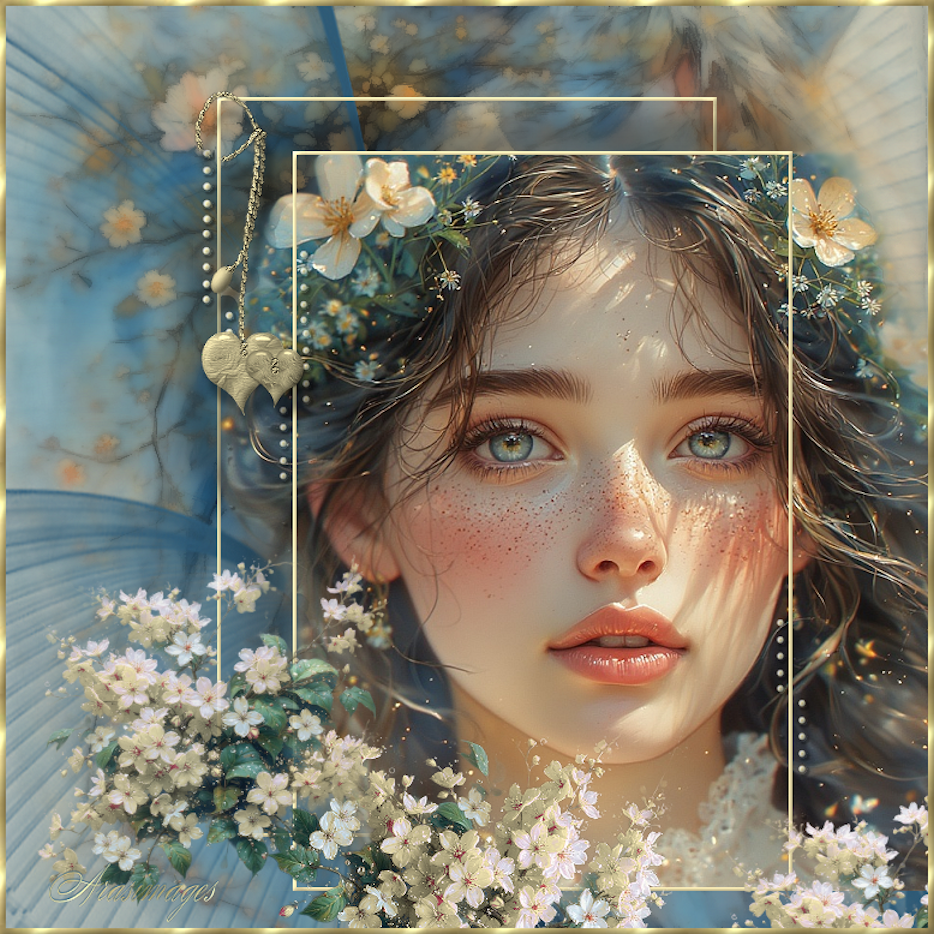
Flowers and Freckles
For this tutorial you will need the materials in the zip file below.

For Italian, Spanish, French and German translations click on the flags.


This tutorial was written using Paint Shop Pro 2020 Ultimate. Plugins used in this tutorial are Redfield/Quad Pencil or Xero/Porcelain and effects of PSP itself. Place the Mask in your PSP Files/Mask folder. Export the ArasimagesFiveDots brush into your PSP Files/Brushes folder. Place the Gold Foil into your PSP/Patterns folder. Unzip the Materials in a folder you make on your desktop called Flowers and Freckles. Duplicate the tubes and use the duplicates to work with. Close out the originals to keep them from getting deleted. Save your work often! To work this tutorial, it is helpful if you have some working knowledge of Paint Shop Pro.
The tubes used in this tutorial are those I have made in an AI generator. (There are hundreds of new AI tubes in my PSP tubes/AI section; please feel free to use these any way you wish).
Use the bookmark below to mark your place along the way.

1. In Materials Palette, set the Foreground to color #f5e8b4, Background color to #2e5a76.
2. Open the HorseInBlueYellow.pspimage.
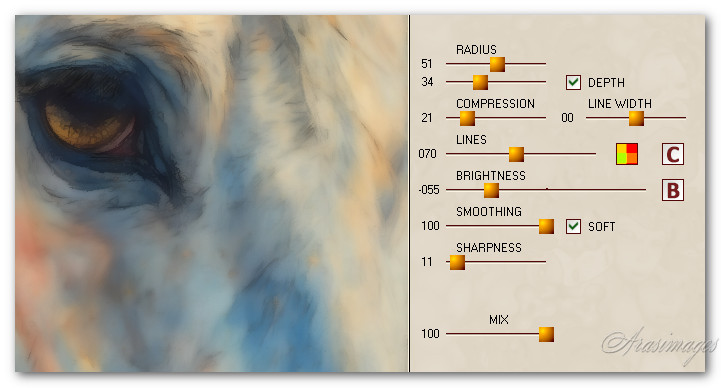
3. Effects/Redfield/Quad Pencil.
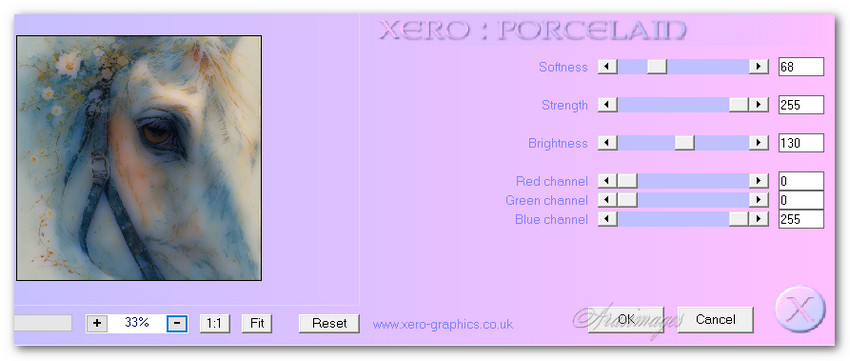
3a. OR use Effects/Xero/Porcelain. Adjust/Blur/Blur More.
4. Layers/New Raster Layer. Flood fill with background color #2e5a76.
5. Layers/Load/Save Mask. Load Mask From Disk. Select from drop down arrow Narah_Mask_0428. Load.

6. Merge/Merge Group.
7. Adjust/Sharpness/Sharpen.
8. Open Freckles.pspimage of young girl. Copy/Paste as New Layer.
9. Image/Resize/Resize by 80%/Resize all layers unchecked.
10. Using Move tool move girl to the right so the straight border lines up with working image border.
11. Move down so the bottom of girl image is at 740 pixels.
12. Effects/3D Effects/Drop Shadow. Vertical -30, Horizontal -36, Opacity 32, Blur 32, color #000000.

13. Adjust/Sharpness/Sharpen.
14. Layers/New Raster Layer.
15. Using the Selections tool set to Rectangle/Add (Shift)/Feather 0, draw a rectangle across the top of the girl's image and down to bottom making sure the sides are over flower on left of her and just touching the flower on the right. See my example below.

16. Flood fill with foreground color #f5e8b4.
17. Selections/Modify/Contract by 3px. Delete. Deselect.
18. Use the Magic Wand to activate the rectangle by clicking on it.
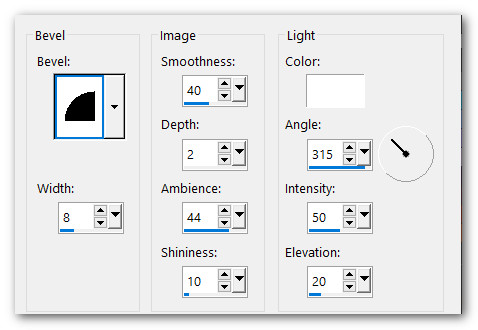
19. Effects/3D Effects/Inner Bevel. Repeat. Deselect.
20. Duplicate. Objects/Align/Center in Canvas.
21. Pull Duplicated layer below Raster 1 of girl. Click on and highlight top layer to continue.
22. Open AppleBlossoms.pspimage. From Tool bar select Color Changer from Flood Fill tool. Left click on flowers twice to change them to yellow.
23. Copy/Paste as New Layer.
24. Image/Resize/Resize by 50%/Resize all layers unchecked.
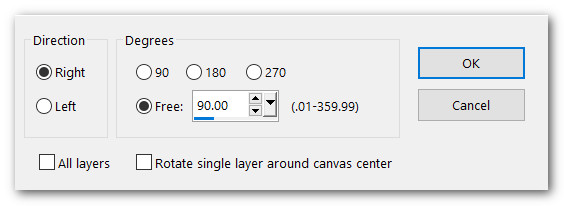
25. Image/Free Rotate. Rotate Right by 90 degrees.
26. Using Move tool move flowers to below girl and below the bottom edge of image.
27. Adjust/Sharpness/Sharpen.
28. (Flowers should still be in memory). Paste as New Layer.
29. Image/Resize/Resize by 40%/Resize all layers unchecked.
30. Move flowers to left side of image so one stem is touching her right ear.
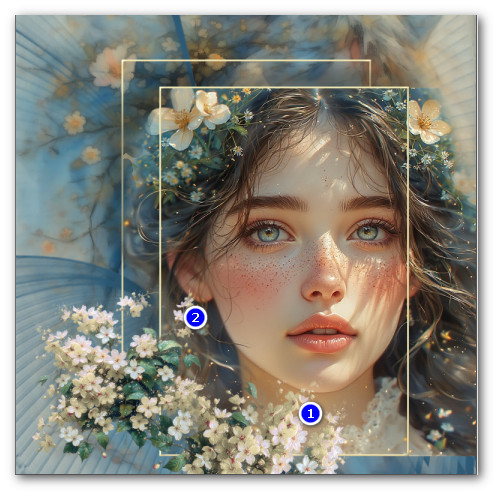
31. Lower Opacity down to 90%. Duplicate flowers and pull down into right bottom corner to cover the line between girl tube and background.
Duplicate them to make them stand out more. (See my example below for flower placement).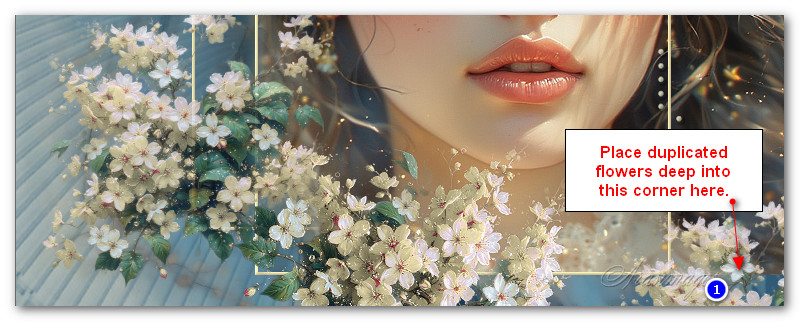
32. From Tool bar select Paint Brushes/5 Dots brush.

33. Layers/New Raster Layer.
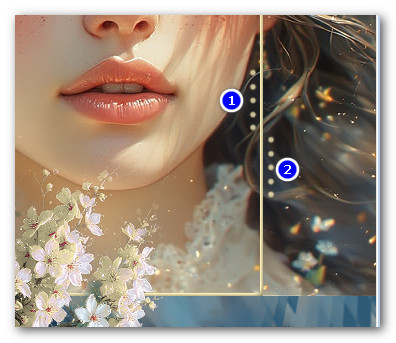
34. Left stamp 2 times in same spot: 5 Dots on outside of top/left rectangle and again below first 5 so you have 10 dots. On inside left stamp 5 dots. (See my example below).
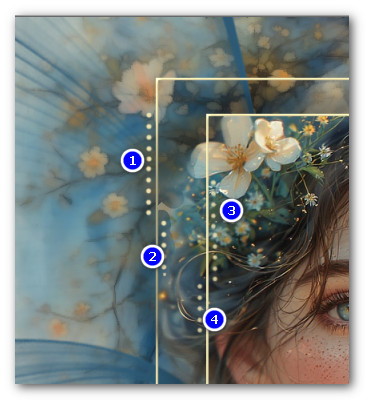
35. Beside the inner rectangle, double stamp 10 dots on inside and 5 dots on outside.
36. Adjust/Sharpness/Sharpen.
37. Toward the bottom of image by girl's cheek, stamp 5 dots twice inside and outside of outer line of rectangle. (See example below).
38. Adjust/Sharpness/Sharpen.
39. Using Magic Wand, left click anywhere between the two rectangles to activate the dots. Selections/Invert so only they will be selected.
40. Effects/3D Effects/Inner Bevel. Repeat. Deselect.
41. Effects/3D Effects/Drop Shadow. Vertical 2, Horizontal 2, Opacity 32, Blur 2, color #000000.
42. Open rose-blanche-corazones2-Soleil-23-01-07.png. Copy/Paste as New Layer.
43. Image/Resize/Resize by 80%/Resize all layers unchecked.
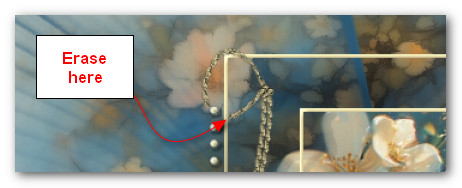
44. Using Move tool move cording to "hang" over top left rectangle.
45. Use the Eraser set to Size 5 and click on the cord so it appears it is hanging over rectangle.
46. Effects/3D Effects/Inner Bevel set the same as before.
47. Adjust/Sharpness/Sharpen.
48. Effects/3D Effects/Drop Shadow. Vertical 16, Horizontal 7, Opacity 40, Blur 9, color #000000.
49. Image/Add Borders/Add 5px border, Symmetric checked, color #f5e8b4.
50. Using Magic Wand to activate the border.
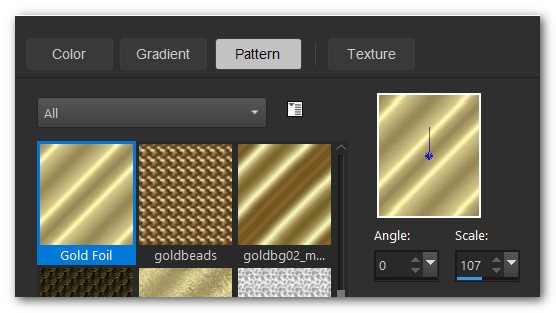
51. Go to the Materials Palette and set the Foreground to Pattern/GoldFoil. Angle: 0/Scale: 107. Flood fill border.
52. Effects/3D Effects/Inner Bevel. Same settings as all other Inner Bevels. Deselect.
53. OPTIONAL: Image/Resize/Resize by 120%/Resize all layers unchecked.
54. Sign your name or leave a watermark and save as Flowers and Freckles.jpg or .png file.
Thank you Pam for checking this tutorial for me. I appreciate all of your PSP work you help me with. December 17, 2025.
If you are going to use this tutorial for stationery, cards or place the tutorial/tag on another site, I would appreciate you contacting me for permission, giving Arasimages credit for the original tutorial and if possible, a link back to my site. Thank you.
Copyright © Arasimages All Rights Reserved