
Futuristic Shopper
For this tutorial you will need the materials in the zip file below.

For an Italian, Spanish, French and German translation click on the flags.


This tutorial was written using Paint Shop Pro 2020 Ultimate. Plugins used in this tutorial are Pic to Painting, OpticVerve Labs/Virtual Photographer, Xero/Porcelain and effects of PSP itself. Animation Shop is also used. Place the Mask in your PSP Files/Mask folder. Export the Swirl Dots pngegg brush into your PSP Files/Brushes folder. Export the Favorite White Star.Psp Tube into your PSP Picture Tube folder. Unzip the Materials in a folder you make on your desktop called Futuristic Shopper. Duplicate the tubes and use the duplicates to work with. Close out the originals to keep them from getting deleted. Save your work often! To work this tutorial, it is helpful if you have some working knowledge of Paint Shop Pro.
The tube and Background used in this tutorial are those I have made in an AI generator. (There are hundreds of new AI tubes in my PSP tubes/AI section; please feel free to use these any way you wish).
Use the bookmark below to mark your place along the way.

1. In Materials Palette, set the Foreground to color #c0cec9, Background color to #6c5a73.
2. Open the FuturisticCity.pspimage.
3. Effects/PicToPainting/PicToPainting.
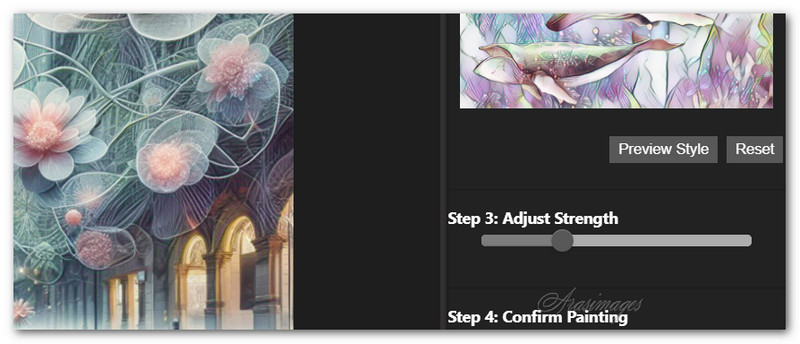
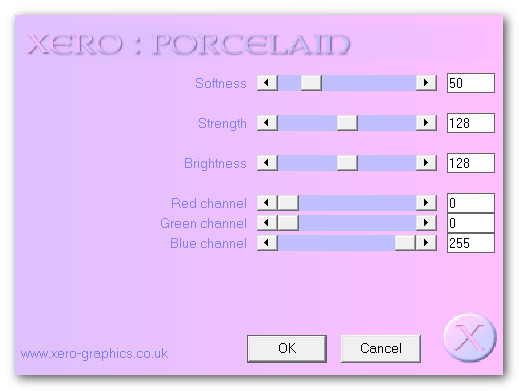
4. Effects/Xero/Porcelain. Apply twice.
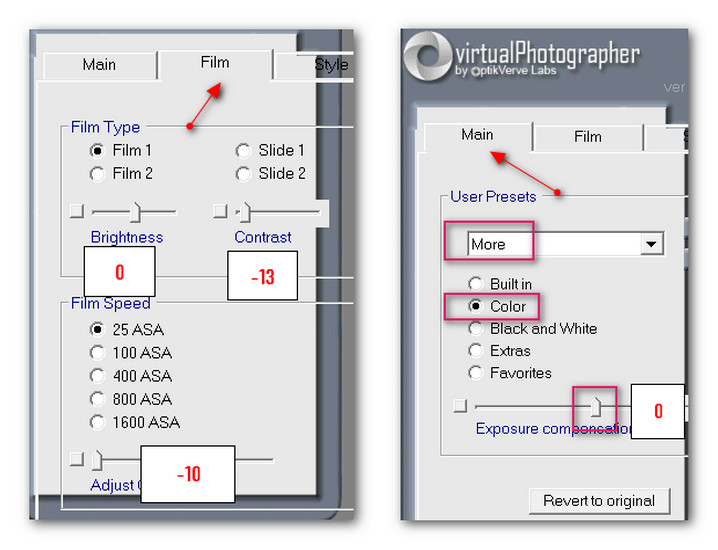
5. Effects/OpticVerve Labs/Virtual Photographer. (In my version 1.5.6, I had to click Color and from the drop down menu, selected More. Exposure set to zero, Click Process to finish).
6. Layers/New Raster Layer. Flood fill with background color #6c5a73.
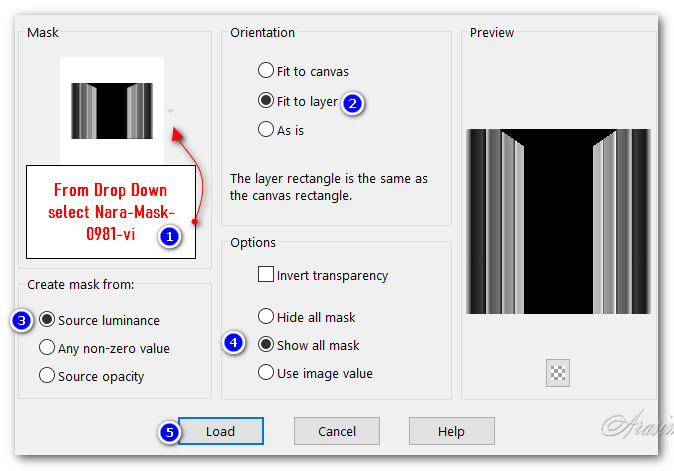
7. Layers/Load/Save Mask. Load Mask From Disk. Select from drop down arrow Narah_Mask_0981. Load.
8. Merge/Merge Group.
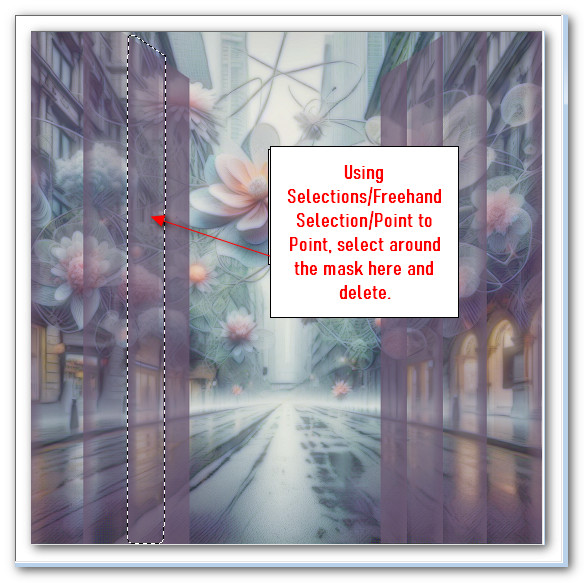
9. On the left side of the Mask, using Selections Tool set to Freehand selection/Point to Point/Add (Shift)/Feather 0, select around the second stripe of Mask. Delete. Select None.
10. Select around all of the right hand mask. Delete this also. Select None.
11. Image/Flip. Flip/Vertical the left side of Mask and move to the left, view the main image for placement.
12. Using Selection tool/Freehand Selection/Point to Point, select around the bottom of the Mask. Delete. Select None.

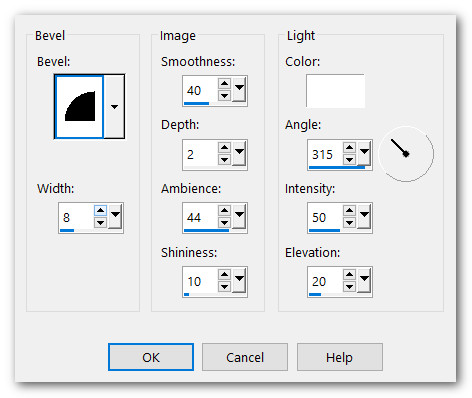
13. Effects/3D Effects/Inner Bevel. Repeat.
14. Duplicate. Image/Mirror. Mirror/Horizontal.
15. Layers/Merge/Merge Down.
16. Using the Freehand Selection tool set Point to Point, surround the two flowers as indicated in the snapshot. Delete the Mask from in front of the flowers. Select None.

17. Use the Eraser tool to touch up details of leftover mask if necessary.
18. Layers/New Raster Layer.
19. From Tool bar select the SwirlDots-pngegg.brush. Left click twice in same spot in bottom left corner with Foreground color #c0cec9.
20. Adjust/Sharpness/Sharpen. Duplicate.
21. Layers/Merge/Merge Down.
22. Using Selections Tool set to Rectangle/Add (Shift)/Feather 0, select around the "tail" of the brush from center to right side, delete. Selections/Select None.

23. Duplicate. Image/Mirror. Mirror Horizontal. Image/Flip. Flip Vertical.
24. Open AsianBeauty.png. Remove watermark. Copy/Paste as New Layer.
25. Move woman to left a little and straight bottom touching the bottom of working image.
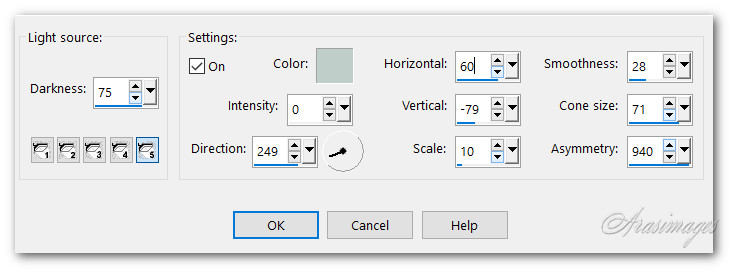
26. Effects/Illumination Effects/Lights. Use Foreground color #c0cec9.
27. Effects/3D Effects/Drop Shadow. Vertical 11, Horizontal 21, Opacity 37, Blur 26, color #000000.
28. Adjust/Sharpness/Sharpen.
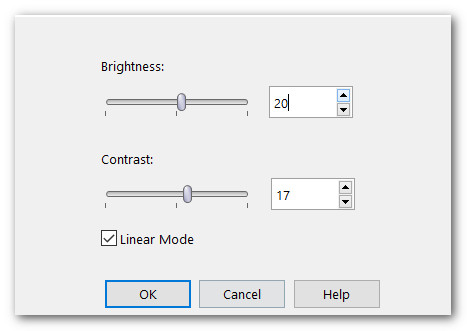
29. Adjust/Brightness and Contrast. Brightness/Contrast.
30. Open dreamstimefree_1019521.purse and shoe.pspimage.
31. Image/Resize/Resize by 44%/Resize all layers unchecked.
32. Copy. Paste as New Layer on working image. Image/Mirror. Mirror Horizontal.
33. Using Eraser tool set to Size 20, erase the shoe off image. Using Pick Tool, move the purse by the Node so it is over her hand as seen in image below.
34. Using Eraser tool set to Size 10, erase the purse from her hand so purse will appear as though she is hanging on to it. See image below.

35. Adjust/Sharpness/Sharpen.
36. Apply drop shadow as in Step 27.
37. Image/Add Borders/Add 3px border, Symmetric checked, color #c0cec9.
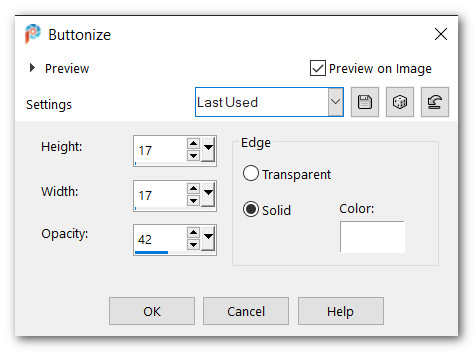
38. Effects/3D Effects/Buttonize.
39. Sign your name or place watermark. Duplicate two times. Close off bottom and middle layers.
40. From Picture Tube tool, select Favorite White Star .Psp Tube. See settings below.

41. Left click the star for sparkle in flowers and pearls on lady's dress randomly. Not too many as we have two more layers to apply star.
42. Close off top layer. Move down to middle layer, open and highlight it.
43. Change the Scale size to 20. Apply the star randomly on lady and flowers.
44. Close off middle layer. Move down to bottom layer, open and highlight it.
45. Change the Scale size to 15. Apply the star randomly on lady and flowers.
46. Open middle and top layers. All layers are open now.
47. File/Save As. Save as Futuristic Shopper PSP Animation Shop (*psp) file in working folder.
48. Open Animation Shop. File/Open the file you just saved. Click in first frame/Edit/Select All. View it from the View Animation button.
49. The animation is probably going too fast so we will change that. Go to Animation/Frame Properties. Change 10 to 20. The higher the number, the slower the animation. Change it to what you like by changing the numbers and checking then we will save your work.
50. To save, File/Save As. A Save As box will appear. Designate where it will be saved, give it a name and leave it to save as a .gif file. Save.
51. As the boxes change, click on Next three times then Finish. You are now done.
Thank you Pam for checking this tutorial for me. I appreciate all of your PSP work you help me with. January 7, 2026.
If you are going to use this tutorial for stationery, cards or place the tutorial/tag on another site, I would appreciate you contacting me for permission, giving Arasimages credit for the original tutorial and if possible, a link back to my site. Thank you.
Copyright © Arasimages All Rights Reserved