
Pink and Pretty
For this tutorial you will need the materials in the zip file below.

For a French, Italian and Spanish translation click on the flags.


This tutorial was written using Paint Shop Pro 2020 Ultimate 32 bit. Plugin used in this tutorial is AAA Filters/Frame Works and effects of PSP itself. Place the masks supplied in your PSP Plugins/Masks folder. Place the 8-cmv texture in the PSP Texture Folder. Unzip the Materials in a folder you make on your desktop called Pink and Pretty. Duplicate the tubes and use the duplicates to work with. Close out the originals to keep them from getting deleted. Save your work often! To work this tutorial, it is helpful if you have some working knowledge of Paint Shop Pro.
The tubes used in this tutorial I have made in an AI generator. (There are hundreds of new free AI tubes in my PSP tubes/AI section; please feel free to use these any way you wish).
Use the bookmark flower.png below to mark your place along the way.
1. In Materials Palette, set the Foreground to color #ffedef, Background color to #9b686d.
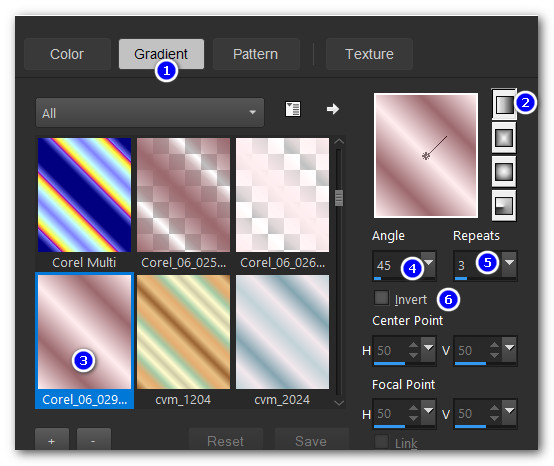
2. Using Foreground/Background colors, create a Gradient in Linear, Corel_06_029, Angle 45/Repeats 3, Invert unchecked, Center Point/Focal Point both grayed out.
3. File/New. New Image 1000px by 850px. Flood fill with background color.
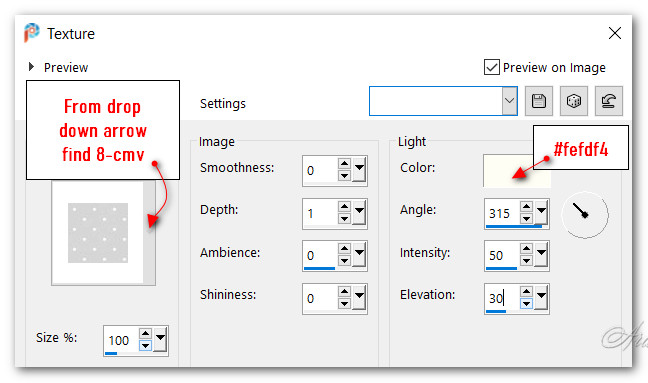
4. Effects/Texture Effects/Texture. Select Texture 8-cmv from drop down and use settings below.
5. Effects/Edge Effects/Enhance. Repeat.
6. Layers/New Raster Layer. Flood fill with Gradient.
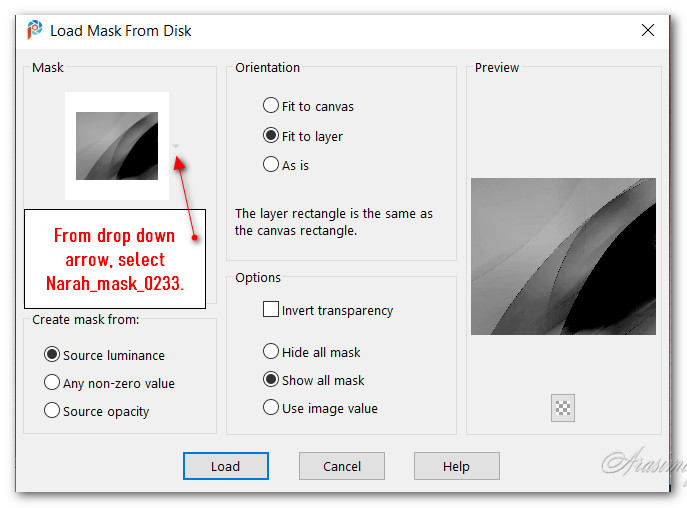
7. Layers/Load/Save Mask. Save Mask from Disk. Select Narah_mask_0233 from drop down arrow. Load.
8. Merge/Merge Group.
9. Layers/New Raster Layer. Selections/Select All.
10. Open FoatingHearts1.pspimage. Copy background layer.
11. Paste/Paste into Selection. Deselect.
12. Layers/Luminance (Legacy). Drop opacity down to 75.
13. Layers/New Raster Layer. Flood fill with Foreground color.
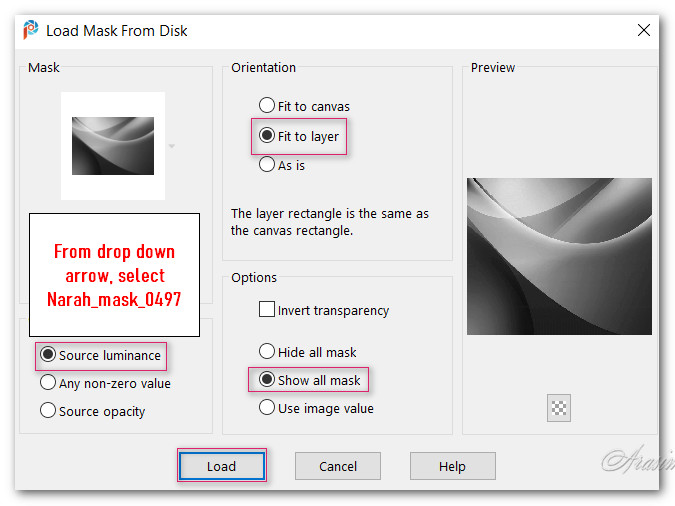
14. Layers/Load/Save Mask. Save Mask from Disk. Select Narah_mask_0497 from drop down arrow. Load.
15. Merge/Merge Group.
16. Open LadyInPink.png. Copy/Paste as New layer.
17. Move lady down so she sets a little below bottom of image.
18. Adjust/Sharpness/Sharpen.
19. Image/Add Borders/Add 2px border, Symmetric checked, color #9b686d.
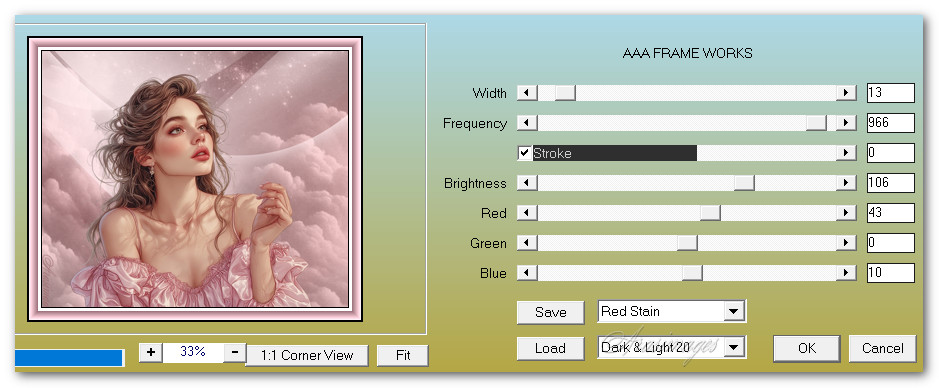
20. Effects/AAA Frames/Frame Works.
21. Sign your name or place your watermark. Save as .jpg file. Copy.
22. Open Animation Shop. In the workspace, Paste as New Animation.
23. Duplicate the new animation until you have 41 frames. Edit/Select All.
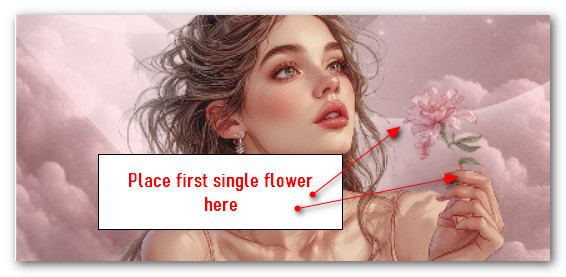
24. File/Open/SingleFlower.psp. Edit/Copy. Edit/Propagate Paste. Right click in first frame of main image/Paste into Selected Frame. Place flower so it sets above her first finger near thumb. Left click to set in place. This is now First Flower1.
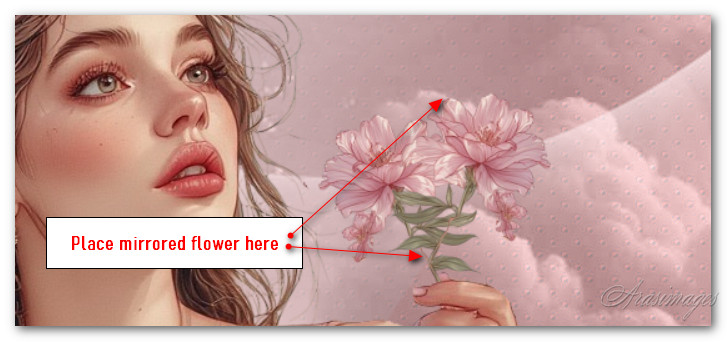
25. Go back to Single Flower.psp. Animation/Mirror.
26. Edit/Copy. Edit/Propagate Paste. Right click in first frame of main image/Paste Into Selected Frame. Place flower to right of first flower/Left click to set in place. This is now Flower2.
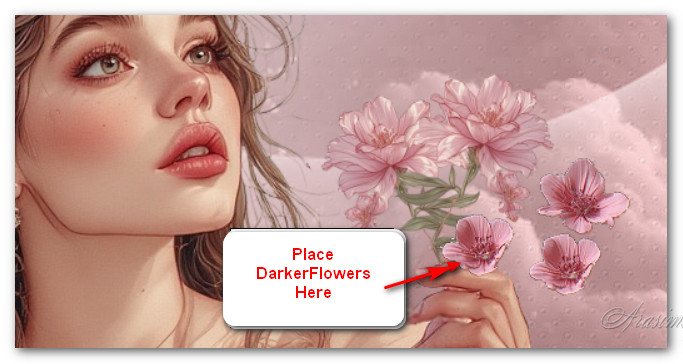
27. File/Open DarkerFlowers.psp. Edit/Copy. Edit/Propagate Paste.
28. Back to main image first frame. Right click/Paste Into Selected Frame. Place flowers to right as seen in snapshot. Left click to set into place.
29. Go to the SingleFlower.psp. Using the back arrow in the top tool bar, undo the mirror.
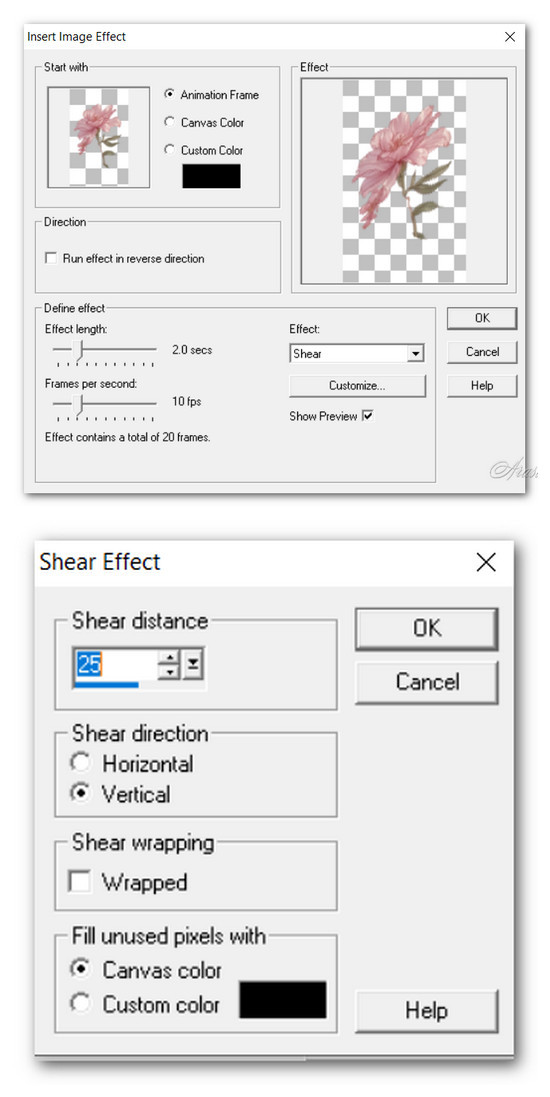
30. Top tool bar, Effects/Insert Image Effects. Select Shear from effects, then click on Customize and use settings as seen below. Click OK on each setting. You will now have 21 frames. Test the outcome by using the View Animation icon at the top tool bar.
31. Edit/Select All/Copy. Right click in first frame/Paste Before Current Frame. Scroll to last frame #42 and delete it.
32. Scroll to Frame #21 and highlight it. Left click and hold down Shift key and scroll to Frame #41 and left click. All of those frames from 21 to 41 should be highlighted.
33. Animation/Reverse Frames. Animation/Frame Properties. Set to 7. Test the animation to see if the flower is waving from side to side. If so we will continue with this animation.
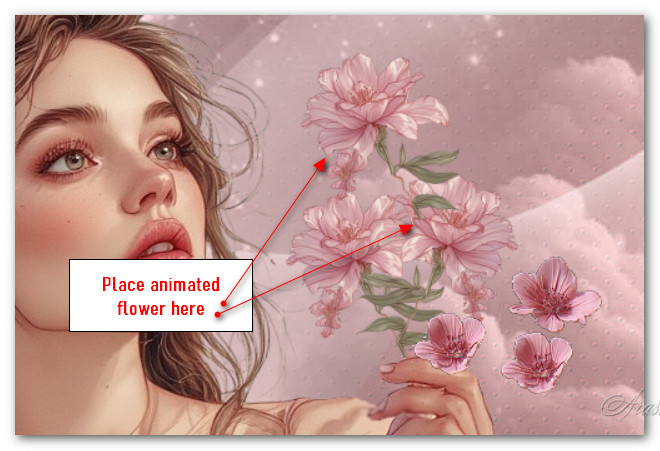
34. Go to first frame, Edit/Select All/Copy. Go back to main image. Right click in first frame/Paste into Selected Frame and place the flower above the other flowers as seen in snapshot. Left click into place.
35. File/Open/FlowerCluster.psp. Edit/Select All. Animation/Reverse Frames. Copy. Note: Propagate Paste remains selected during the pasting of the Flower Cluster.
36. Go to main image and Right click into first frame/Paste into Selected Frame. Place the flower toward the top of the image. See snapshot below.
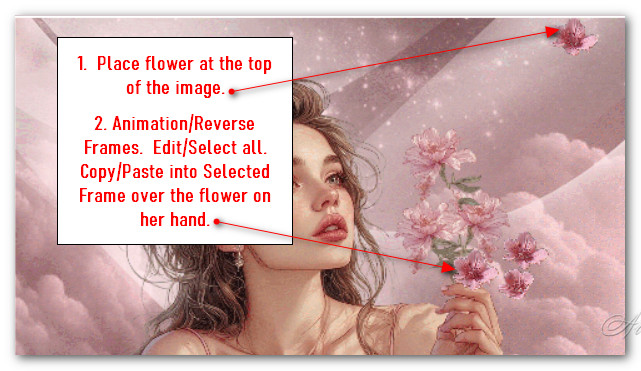
37. Undo the Reverse Frames. Edit/Select All. Copy. Back to the main image/Paste into Selected Frame. Place the flower over the flower on her hand. See where to place them in snapshot above.
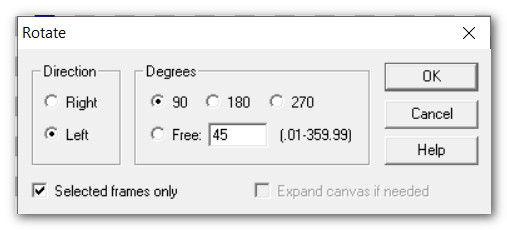
38. Continue to work on flower cluster. Edit/Select All. Animation/Rotate. Animation/Mirror. Animation/Flip. See setting below.
39. Edit/Select All.
40. Copy/Right click in first frame of main image. Place dark flower over the other dark flowers. Left click to set into place. The flowers will flutter from the flower cluster toward the right edge and beyond of main image.
41. Animation/Frame Properties. Change from between 10 and 20 for slower movement of flowers if you wish.
42. File/Save As. When the Save As box appears, give your file a name, name where to save it and leave the Save as type set to .gif. Save.
43. As you save, boxes will appear. Click Next, Next, Next and Finish. Your image is now saved where you directed.
44. I hope you enjoyed creating your own animations instead of pasting ready-made animations.
Thank you Pam for checking this tutorial for me. I appreciate all of your PSP work you help me with. May 1, 2026.
If you are going to use this tutorial for stationery, cards or place the tutorial/tag on another site, I would appreciate you contacting me for permission, giving Arasimages credit for the original tutorial and if possible, a link back to my site. Thank you.
Copyright © Arasimages All Rights Reserved