
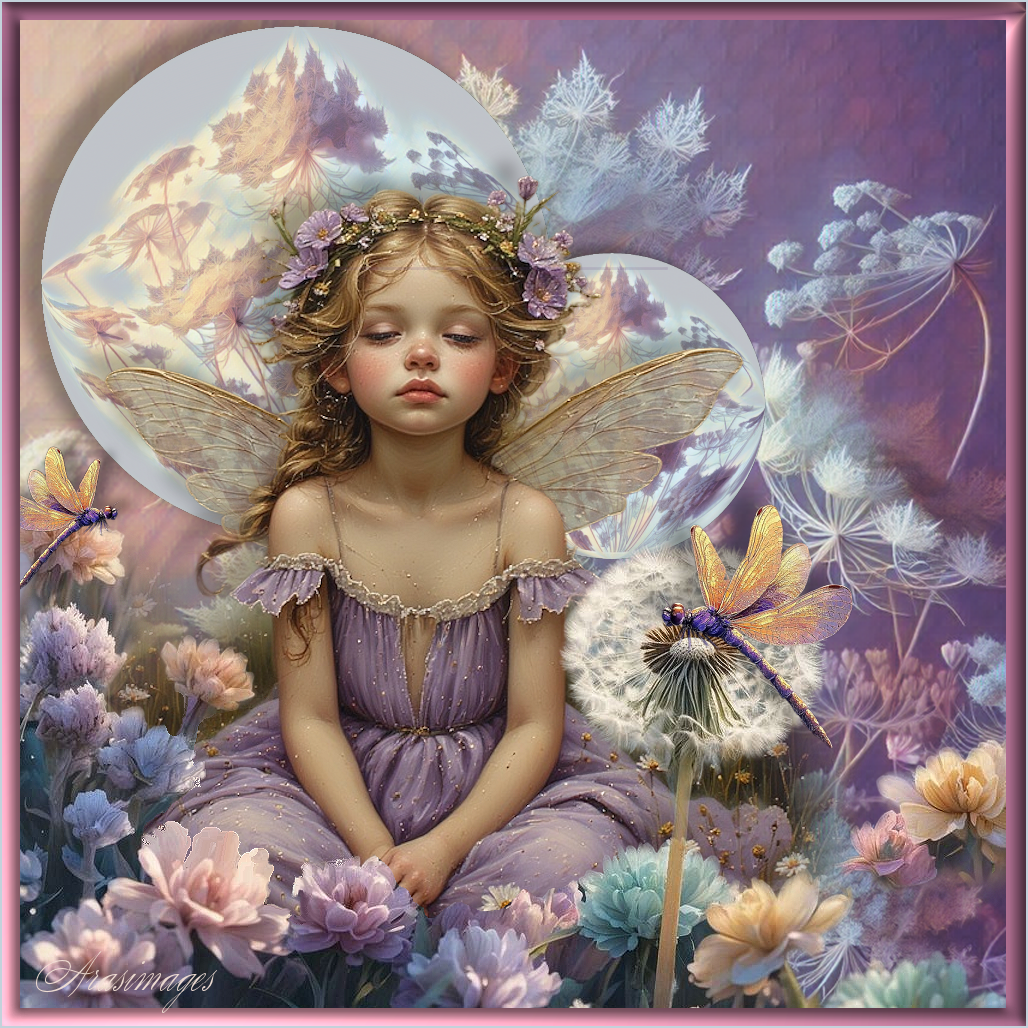
Purple Dreamer
For this tutorial you will need the materials in the zip file below.

For a French, Italian and Spanish translation click on the flags.


This tutorial was written using Paint Shop Pro 2020 Ultimate 32 bit. Plugins used in this tutorial are Filters Unlimited 2/Color Effects, Pic To Painting, Graphics Plus/Cross Shadow and effects of PSP itself. Unzip the Materials in a folder you make on your desktop called Purple Dreamer. Duplicate the tubes and use the duplicates to work with. Close out the originals to keep them from getting deleted. Save your work often! To work this tutorial, it is helpful if you have some working knowledge of Paint Shop Pro.
. The Fairy was AI generated and tubed by PamelaD and the flowers and Dragonfly were generated in AI and tubed by me. (There are hundreds of new free AI tubes in my PSP tubes/AI section; please feel free to use these any way you wish).
Use the genericfollow.png below to mark your place along the way.

1. In Materials Palette, set the Foreground to color #b4a2ec, Background color to #644976.
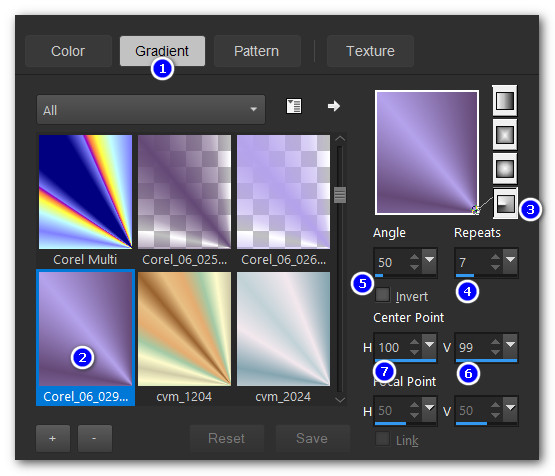
2. Using Foreground/Background colors, create a Gradient in Radial, Corel_06_029, Angle 50/Repeats 7, Invert unchecked, Center Point H100/V99/Focal Point both grayed out.
3. File/New. New Image 1024px by 1024px. Selections/Select All.
4. Open PurpleWhiteQueenAnnsLace.jpg. Copy/Paste into Selection. Deselect.
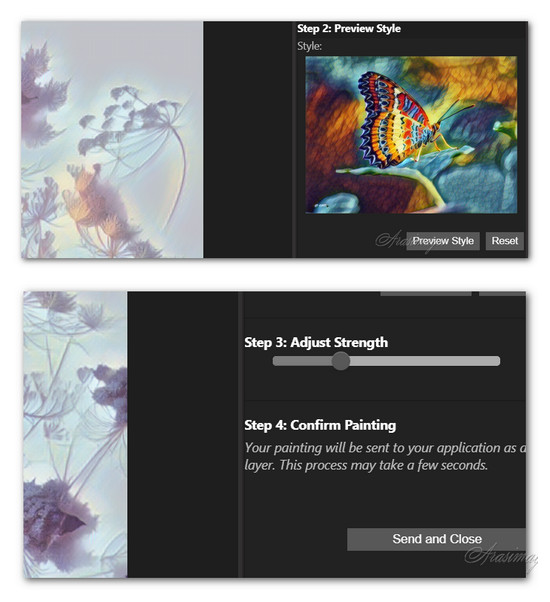
5. Effects/Pic To Painting. Choose Paint Style Slumber/click on it. Click on Preview Style. Click on Adjust Strength so dot is below S. Confirm Painting by clicking on Send and Close. See image below for settings.
6. Adjust/Sharpness/Sharpen.
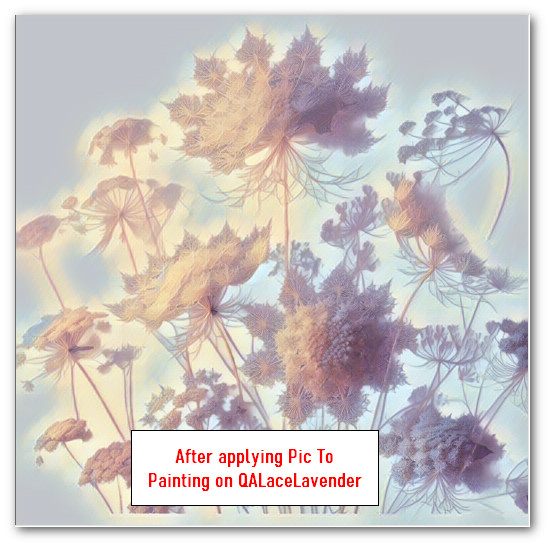
7. Open QALaceLavender.png. Copy/Paste as New Layer.
8. Use same settings as in Step 5 of Pic To Painting. Move the dot back and forth a bit until you get a nice blue in top left corner and a drop shadow of cream color.
9. Adjust/Sharpness/Sharpen.
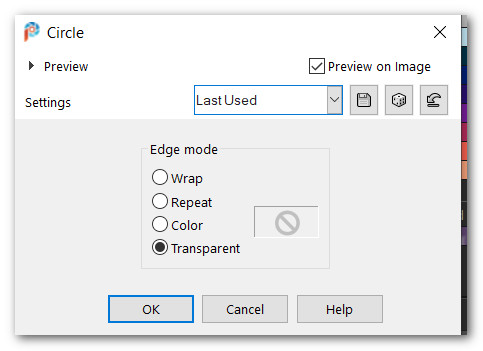
10. Effects/Geometric Effects/Circle.
11. Image/Resize/Resize by 50%/Resize all layers unchecked.
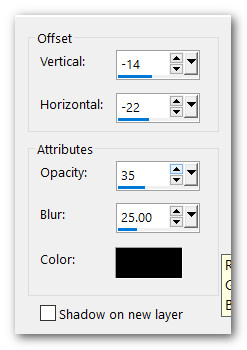
12. Effects/3D Effects/Drop Shadow. Vertical -14, Horizontal -22, Opacity 35, Blue 25, color #000000.
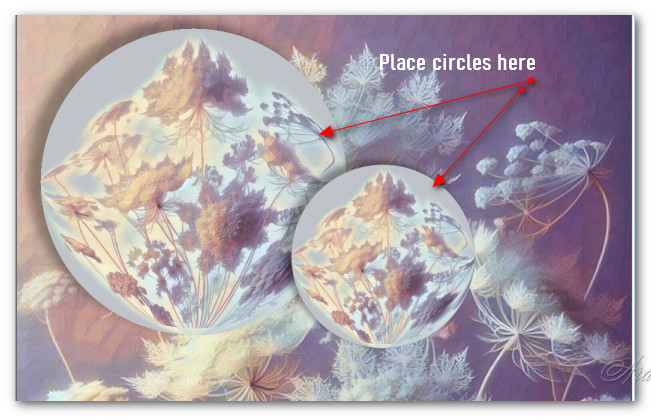
13. Place circle in upper left corner. Duplicate circle.
14. Image/Resize/Resize by 60%/Resize all layers unchecked.
15. Move duplicated circle to right of image as seen in image below.
16. Open LilacFairy.pspimage. Copy Misted Layer/Paste as New Layer.
17. Image/Resize/Resize by 120%/Resize all layers unchecked.
18. Adjust/Sharpness/Sharpen.
19. Effects/3D Effects/Drop Shadow. Vertical -14, Horizontal -22, Opacity 35, Blue 25, color #000000.
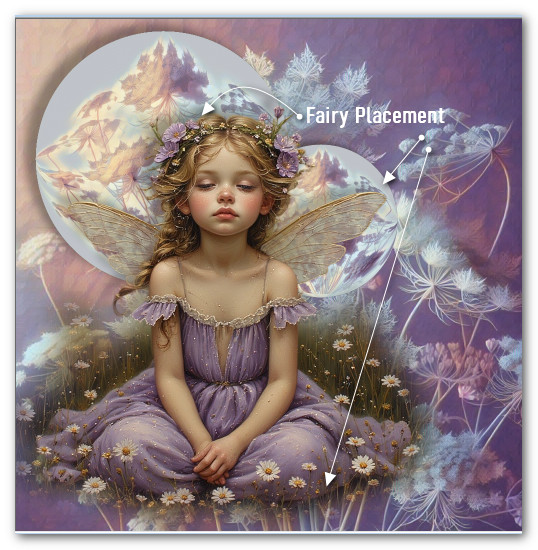
20. Move Fairy downward and to the left a little toward bottom left corner. See image for placement.
21. Open FrontFloral.png. Remove Watermark. Copy/Paste as New Layer.
22. Adjust/Sharpness/Sharpen.
23. Move flowers to the bottom border and beyond a bit. See below image for how far down to move flowers.
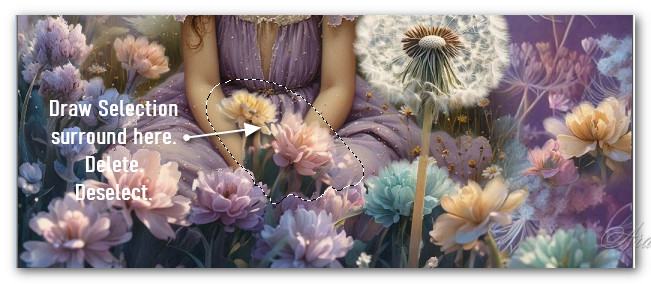
24. Using Selections/Point to Point/Add (Shift)/Feather 0, surround these flowers over her hands. Delete. Deselect. Image will show how far flowers were moved into bottom.
25. Open GoldenDragonfly1.pspimage. Copy/Paste as New Layer.
26. Image/Resize/Resize by 60%/Resize all layers unchecked.
27. Adjust/Sharpness/Sharpen.
28. Effects/3D Effects/Drop Shadow. Vertical -14, Horizontal -22, Opacity 35, Blue 25, color #000000.
29. Move Dragonfly to sit on top of dandelion fluff. Duplicate Dragonfly.
30. Image/Resize/Resize by 60%/Resize all layers unchecked.
31. Image/Mirror. Mirror Horizontal.
32. Adjust/Sharpness/Sharpen.
33. Move duplicated Dragonfly to sit on flower in middle of left side.
34. Hint: Save your file at this point in case you need to adjust layers later.
35. Using Selections tool set to Rectangle/Add (Shift)/Feather 0, draw approximately 20px inside of all borders forming a 20px border.
36. Selections/Invert. Layers/New Raster Layer.
37. Flood 20px with Gradient.
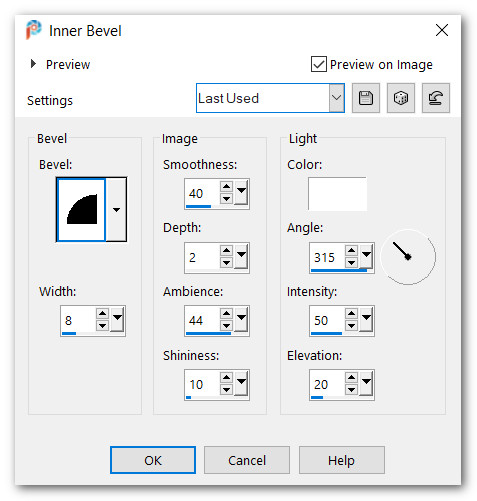
38. Effects/3D Effects/Inner Bevel.
39. Effects/Filters Unlimited 2/Color Effects/Swap Red/Blue. No numbers show.

40. Image/Flip. Flip Vertical.
41. Selections/Defloat. Deselect.
42. Layers/New Raster Layer. Place your watermark or name.
43. Image/Add Borders/Add 2px border. Symmetric checked. Color #b8cad4.
44. Save as .jpg or .png file.
Thank you Pam for checking this tutorial for me. I appreciate all of your PSP work you help me with. May 7, 2026.
If you are going to use this tutorial for stationery, cards or place the tutorial/tag on another site, I would appreciate you contacting me for permission, giving Arasimages credit for the original tutorial and if possible, a link back to my site. Thank you.
Copyright © Arasimages All Rights Reserved