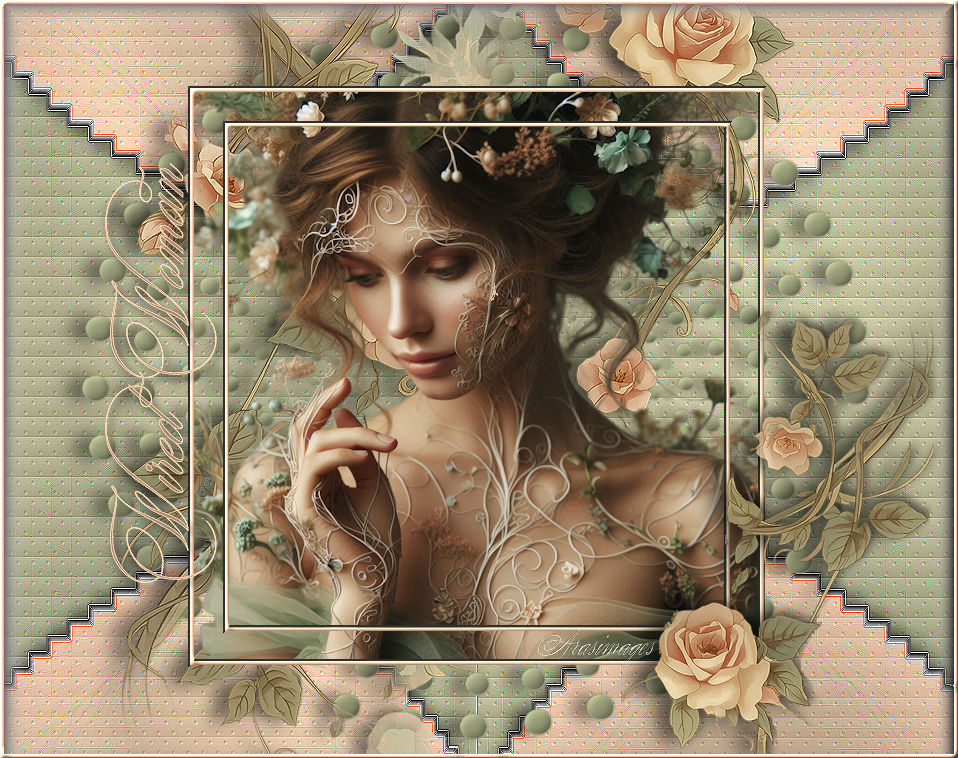
Delicately Wired
For this tutorial you will need the materials in the zip file below.

For a German, Italian and Spanish translation click on the flags.


This tutorial was written using PSP2020 Ultimate. To work this tutorial, it is assumed you have some working knowledge of Paint Shop Pro. Plugins used are PhotoshopII/Bailey/Spelen, Simple/Top Left Mirror and GraphicsPlus/Cross Shadow. Some of the effects are those of PSP itself. Place the Mask in your PSP Files/Mask folder. Install the Font desirable-brust-texture.ttf into your PSP fonts. I have used CTRL+D to deselect throughout this tutorial.
The images used are those I created and tubed in an AI generator.
Use the flower below to mark your place along the way.
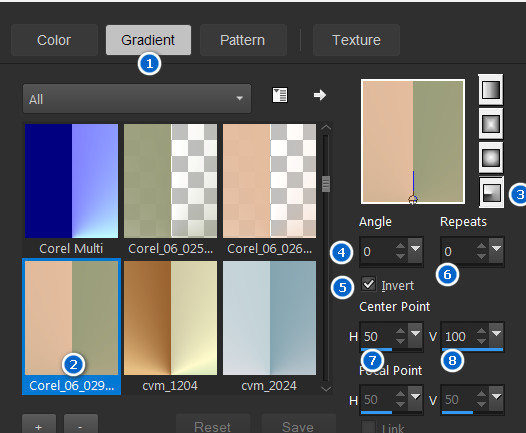
1. In materials Palette, set Foreground to color #e4bc9e, Background color #9a9e7b. Create a gradient using Corel-06-029, Style Radial, Angle/Repeats both 0, Invert checked, Center Point H50/V100, Focal Points H and V both null.
2. New/New Image 950px by 750px. Flood New Image with Gradient.
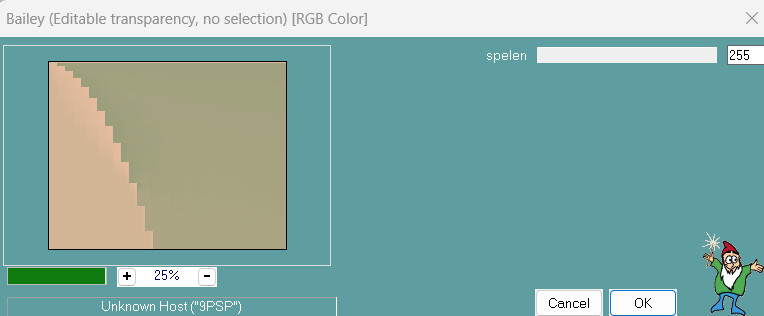
3. Effects/Photoshop II/Bailey/Spelen.
4. Effects/Simple/Top Left Mirror.
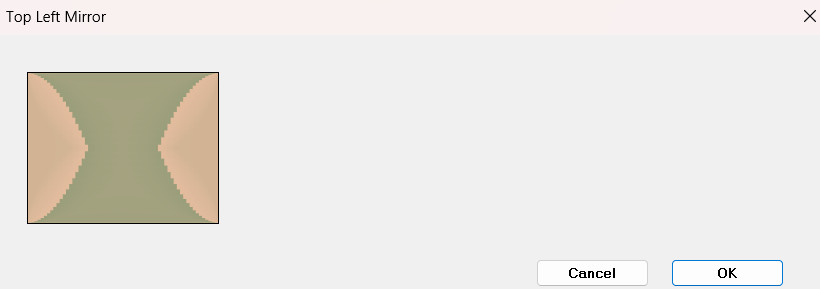
5. Effects/Edge Effects/Enhance.
6. Select Magic Wand from Selections. Click on left peach image to activate it.

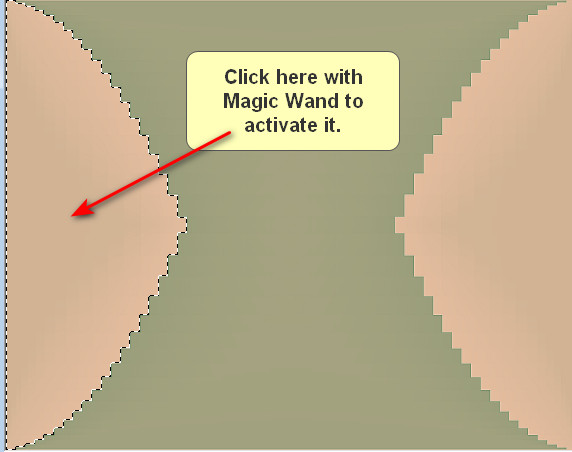
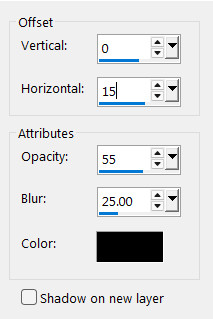
7. Effects/3D Effects/Drop Shadow. Vertical 0, Horizontal 15, Opacity 55, Blur 25, color #000000. CTRL+D.
8. Using Magic Wand, select peach image on right to activate it.
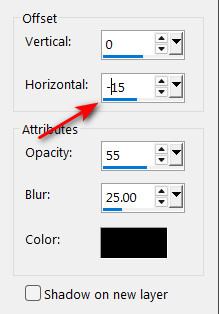
9. Effects/3D Effects/Drop Shadow. Vertical 0, Horizontal -15, Opacity 55, Blur 25, color #000000.
10. Using Magic Wand, hold down shift key and select peach image on left to activate it. Both peach images are now selected.
11. Effects/3D Effects/Chisel_Size 4. #9a9e7b Green color first.
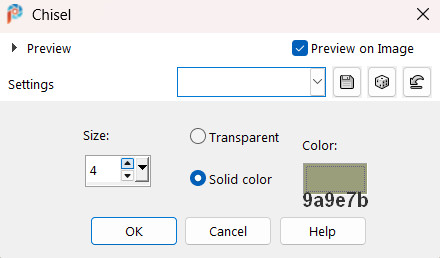
12. Repeat Step 11 above using size 6 and #ffffff color. CTRL+D.
13. Effects/Edge Effects/Enhance.
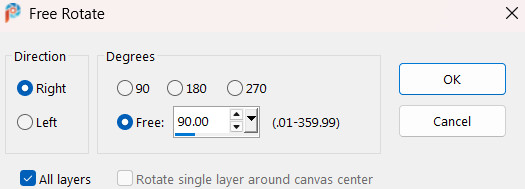
14. Image/Free Rotate/Rotate right by 90%/All layers checked.
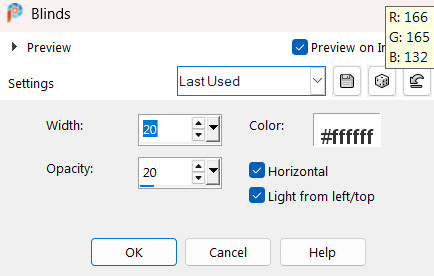
15. Effects/Texture Effects/Blinds.
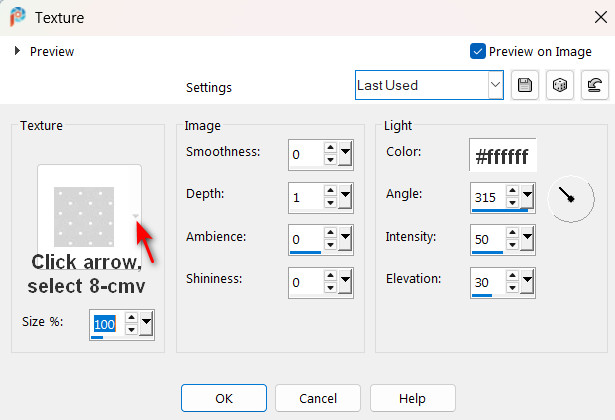
16. Effects/Texture Effects/Texture/Select 8-cmv.bmp.
17. Effects/Edge Effects/Enhance.
18. Image/Rotate Right.
19. Image/Free Rotate/Rotate right by 90%/All layers unchecked.
20. Using the Pick tool, move the image into the left border and left top. See image below how much to move into left border and top. Have its right side near or on the 475px at the top. You may want to use the node to make the image fit in left half of the transparent image.
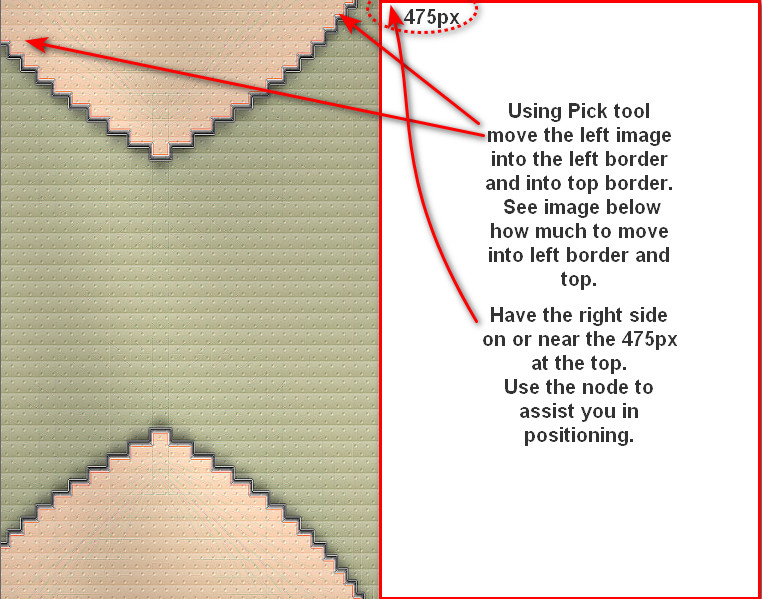
21. Duplicate. Image/Mirror. Mirror Horizontal. Using the Pick tool, adjust both sides so they meet in the middle. Some of the peach images will be pulled into the sides and bottom and top. Adjust until you are satisfied they are equal and together in the center.
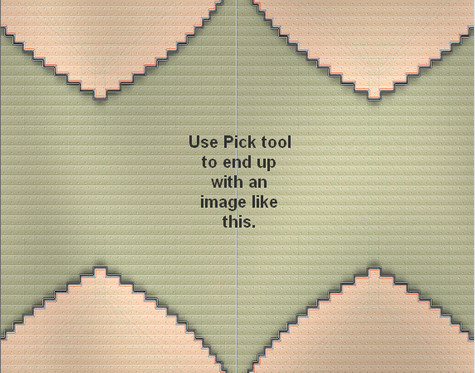
22. Merge/Merge Down.
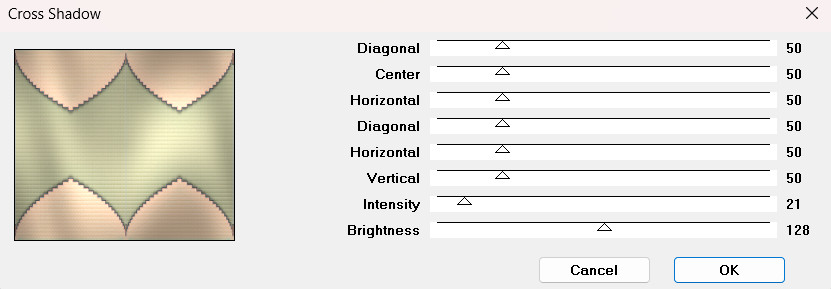
23. Effects/Graphics Plus/Cross Shadow.
24. Layers/New Raster Layer. Flood fill with #9a9e7b.
25. Layers/Load/Save Mask. Load Mask from Disk. Select Narah_Mask_0460. Load.
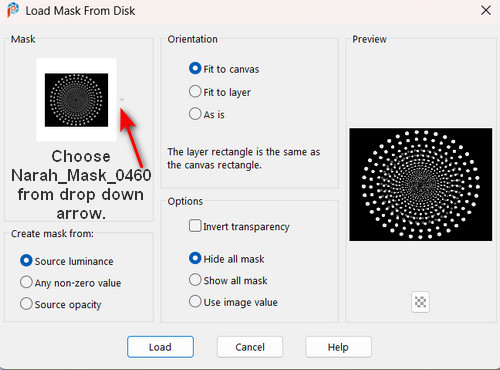
26. Merge/Merge Group.
27. Selections/Select All. Float/Defloat. (All dots are now activated).
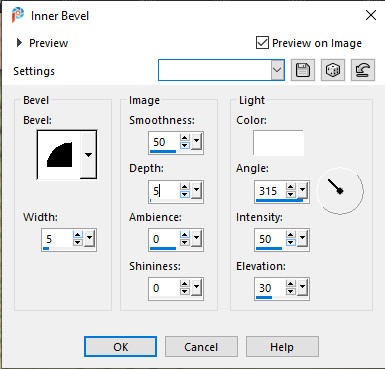
28. Effects/3D Effects/Inner Bevel.
29. Effects/3D Effects/Drop Shadow. Vertical 0, Horizontal -15, Opacity 55, Blur 25, color #000000.
30. CTRL+D. Adjust/Sharpness/Sharpen.
31. Open PeachClimbingRoses.pspimages. Copy layer Tube 2. Paste as New Layer.
32. Effects/3D Effects/Drop Shadow. Vertical 0, Horizontal -15, Opacity 55, Blur 25, color #000000.
33. Adjust/Sharpness/Sharpen.
34. Move flowers upward so right flower is into top border.
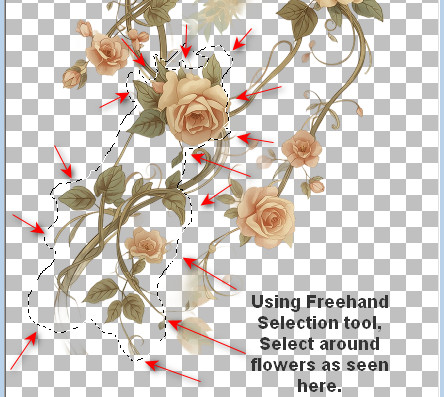
35. Highlight Layer of flowers. Using Magic Wand tool, Freehand Selection set to Freehand/Replace/Feather 0, select around flowers as seen in image below. Copy. CTRL+D.
36. Image/Paste as New Layer.
37. Image/Resize/Resize by 79%/Resize all layers unchecked.
38. Image/Mirror. Mirror Horizontal.
39. Image/Flip. Flip Vertical.
40. Effects/3D Effects/Drop Shadow. Vertical 0, Horizontal -15, Opacity 55, Blur 25, color #000000. View main image for placement.
41. Open WiredWoman.png. Copy/Paste as New Layer.
42. Image/Resize/Resize by 549px by 597px, Lock Aspect and Resize all layers unchecked. Center.
43. Layers/New Raster Layer.
44. Using the Selection tool, draw a rectangle around the WiredWoman image.
45. Set Match mode to RGB Value/Tolerance to 25/Blend Mode to Opacity 100. Flood fill with color #e4bc9e.
46. Selections/Modify/Contract by 4px. Delete. CTRL+D.
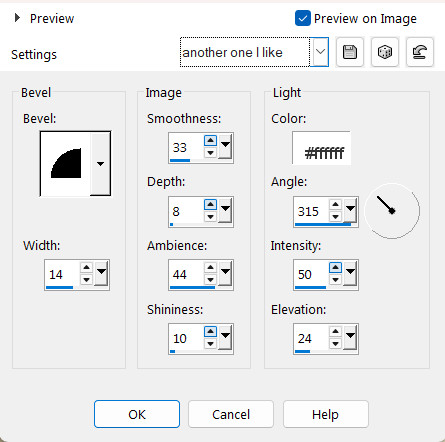
47. Using Magic Wand, select the 4px square. Use the settings below to select it.

48. Effects/3D Effects/Inner Bevel. CTRL+D.
49. Duplicate. Image/Resize/Resize by 88%/Resize all layers unchecked.
50. Merge/Merge down.
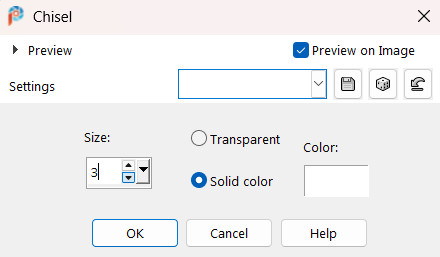
51. Effects/3D Effects/Chisel. Size 3/Solid color/Color #ffffff.
52. Move Raster 3 of flowers to top layer, bottom right side over the two 4px squares.
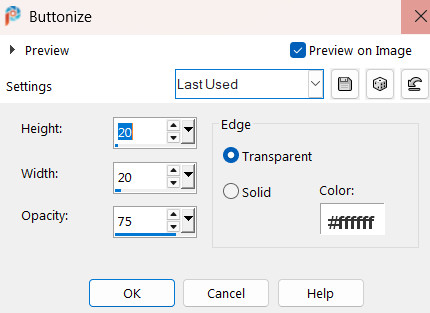
53. Effects/3D Effects/Buttonize.
54. Image/Add Borders/Add 4px border, Symmetric checked, color ##000000.
55. Activate with Magic Wand. Flood fill with #e4bc9e.
56. Effects/3D Effects/InnerBevel.
57. Effects/Edge Effects/Enhance. CTRL+D.
58. Select the Text tool from tool bar. Find the Font Desirable Brust Texture. Set the settings as seen below.
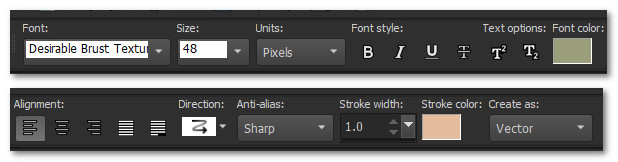
59. Using the chosen font, Kerning at -5, write out "Wired Woman". Convert to Raster Layer.
60. Using Color Changer Tool, recolor with #e4bc9e.
61. Effects/3D Effects/Drop Shadow. Vertical 4, Horizontal -5, Opacity 60 Blur 11, color #000000.
62. Adjust/Sharpness/Sharpen.
63. Image/Free Rotate/Rotate by 90% left, all layers unchecked.
64. Place words along left side of outer 4px square.
65. Objects/Align/Vertical Center. Merge/Merge Down.
66. Sign your name or leave watermark. Save as .jpg or .png file.
67. Thank you PamelaD for checking this tutorial for me and for helping me with the background. Thank you for being part of Arasimages for these many years.
If you are going to use this tutorial for stationery, cards or place the tutorial/tag on another site, I would appreciate you contacting me for permission, giving Arasimages credit for the original tutorial and if possible, a link back to my site. Thank you.
Copyright © Arasimages All Rights Reserved