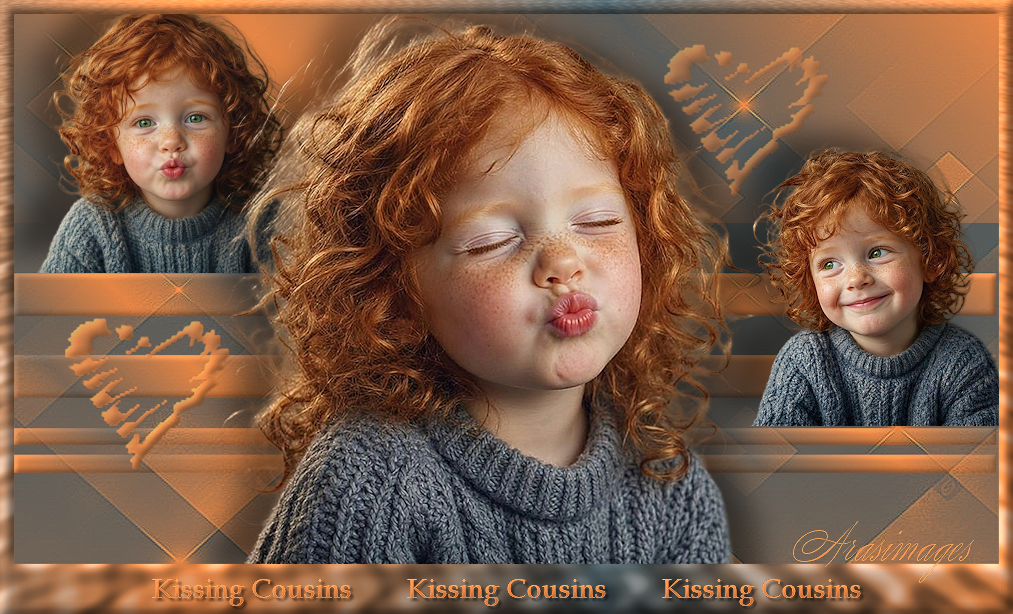
Kissing Cousins
For this tutorial you will need the materials in the zip file below.

This tutorial was written using PSP2020 Ultimate. To work this tutorial, it is assumed you have some working knowledge of Paint Shop Pro. Unzip materials in a folder you make on your desktop named Kissing Cousins. Save the original tubes and use copies for your work. Plugins used are Almathera/A Puddler and effects of PSP itself. Place Narah_Mask_0485.mask into your PSP Masks folder. Place the Selection meigvw2007.PspSelection into your Selections folder. Export the heart.PspBrush in your Custom Brush folder. Install the Font in your Font folder or open on desktop and minimize. Save your work often.
Hints I have found useful: (1). A fast way of selecting and deselecting the Pick tool. To select it simply press the K on the keyboard. To deselect press M. (2). Using the Pick tool's Positions X and Y with the correct numbers will place the image in an accurate place in your work.
The images used are those I created and tubed in an AI generator. I used Noreen's Creations prompt for a starter and changed it to make it my own. Thank you Noreen.
Use the genericfollow to mark your place along the way.

1. In materials Palette, set Foreground to color #e68646, Background color #45565d.
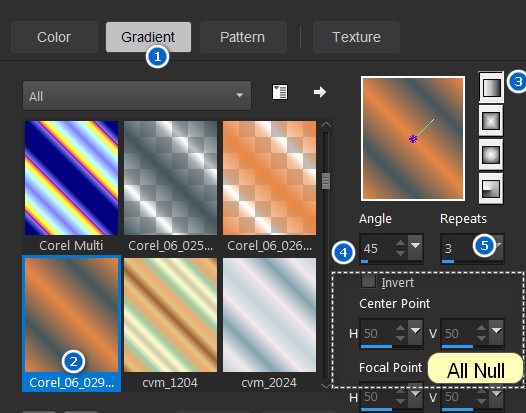
2. Create a Gradient using the foreground/background colors, Corel_06_029, Linear, Angle 45/Repeats 3. Invert and Center/Focal Points all Null.
3. File/New/New Image 985px by 550px. Flood fill with Gradient.
4. Layers/New Raster Layer. Flood fill with Background color #45565d.
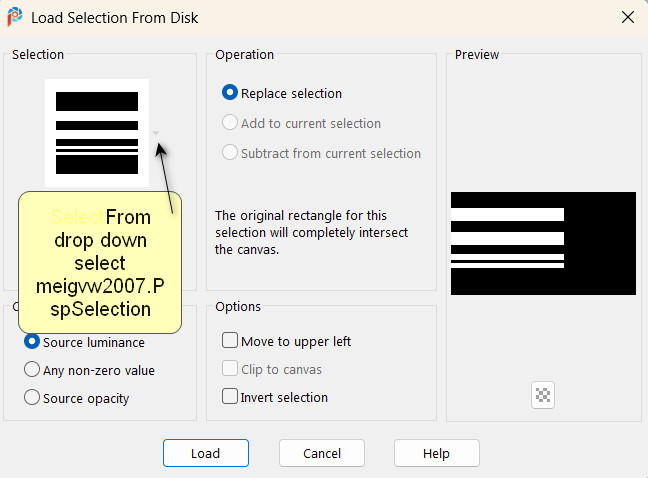
5. Selections/Load/Save Selection. Load Selection from Disk. From drop down arrow, chose meigvw2007.PspSelection. Load.
6. Flood selected part of Selection with Gradient.
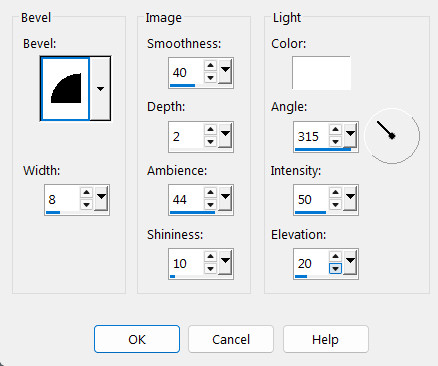
7. Effects/3D Effects/Inner Bevel.
8. Selections/Select None.
9. Image/Resize/Resize by 62%/Resize all layers unchecked.
10. Enable the Pick Tool, Position X: -1.00 Position Y: 209.00.
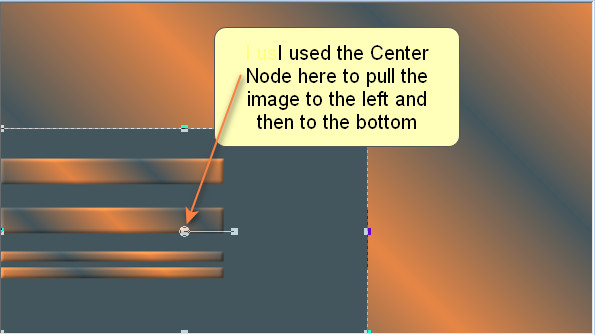
11. Duplicate the Selection layer. Enable the Pick Tool, Position X: 610.00/Position Y: 209.00.
12. Press M on keyboard to disable Pick tool to continue.
13. Layers/New Raster Layer. Flood fill with #e68646.
14. Layers/Load Save Mask. Load Mask from Disk. Select from drop down arrow Narah_mask_0485. Load.
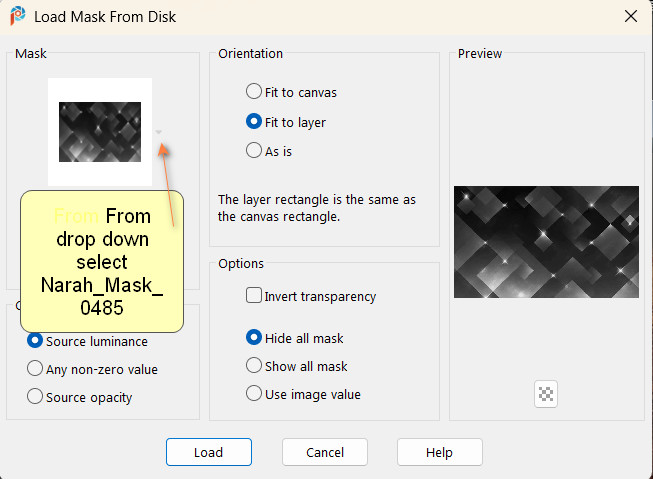
15. Merge/Merge Group.
16. Effects/Edge Effects/Enhance.
17. Open LilRedheadTwo-LoreenPromptVariant.png. Delete the watermark. Copy.
18. Paste as New Layer.
19. Image/Resize/Resize by 38%/Resize all layers unchecked.
20. Enable the Pick tool with the following settings to move the image accurately: Position X: 22.00/Position Y: -2.00.
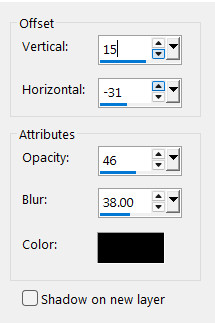
21. Effects/3D Effects/Drop Shadow. Vertical -15, Horizontal -31, Opacity 46, Blur 38, color #000000.
22. Open LilRedheadThree-LoreenVariant.png.
23. Select around the watermark and delete. Selections None.
24. Image/Resize/Resize by 84%/Resize all layers unchecked. Copy.
25. Paste as New Layer.
26. Enable the Pick tool with the following settings to move the image accurately: Position X: 195.00/Position Y: -3.00.
27. Effects/3D Effects/Drop Shadow. Vertical -15, Horizontal -31, Opacity 46, Blur 38, color #000000.
28. Effects/3D Effects/Drop Shadow. Vertical 15, Horizontal 31, Opacity 46, Blur 38, color #000000.
29. Adjust/Sharpness/Sharpen.
30. Open LilRedheadOne-LoreenPromptVariant.png.
31. Select around watermark and delete. Selections/Select None. Copy.
32. Paste as New Raster Layer.
33. Image/Resize/Resize by 42%/Resize all layers unchecked.
34. Enable the Pick tool with the following settings to move the image accurately: Position X 736.00/Position Y: 126.00.
35. Effects/3D Effects/Drop Shadow. Vertical -15, Horizontal -31, Opacity 46, Blur 38, color #000000.
36. Adjust/Sharpness/Sharpen.
37. Press M on keyboard to go back to Move tool to continue.
38. Image/Add Borders/Add 14px top and sides, 50px at bottom, color white, Symmetric unchecked.
39. Activate the white border with Magic Wand. Flood fill with original Gradient.
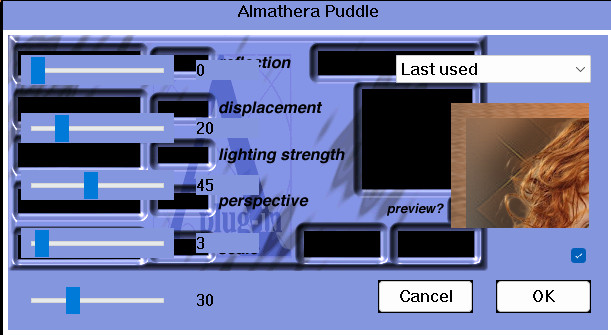
40. Effects/Almathera/A Puddle.
41. Effects/3D Effects/Inner Bevel.
42. Selections/Select None.
43. Change Foreground and Background in Materials Palette to #e68646.
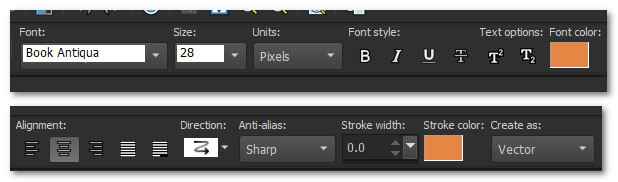
44. Select Text tool from tool bar, font Book Antiqua/Size 28, Stroke width 0.0, Kerning 0, type out text Kissing Cousins in bottom 50px border. Space 8 spaces. Type out Kissing Cousins again. Space 8. Repeat text one more time.
45. Convert to Raster Layer. Objects/Align/Horizontal Center.
46. Selections/Select All. Float/Defloat to select all of the text.
47. Apply Inner Bevel as in Step #41.
48. Selections/Select None.
49. Adjust/Sharpness/Sharpen.
50. Effects/3D Effects/Drop Shadow. Vertical 3, Horizontal 3, Opacity 50, Blur 3 color #000000.
51. From tool bar select the Paint Brush tool. Find agi_ob_heart.PspBrush. Have your settings as seen below.

52. Layers/New Raster Layer.
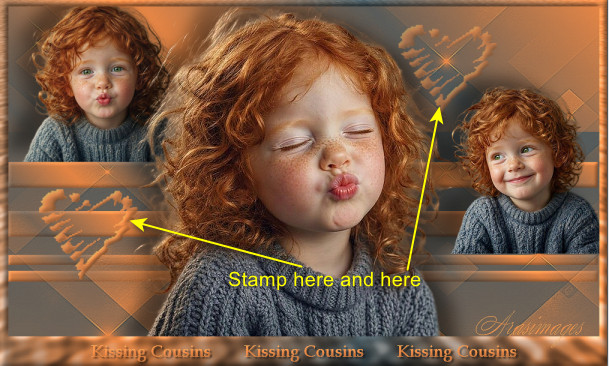
53. Stamp the heart twice in top right corner and again twice in bottom left side. See image below for placement.
54. Effects/3D Effects/Inner Bevel.
55. Adjust/Sharpness/Sharpen.
56. Merge/Merge Visible. Sign your name or leave a watermark if you wish. Save as .jpg or .png file.
57. Thank you PamelaD for checking this tutorial. Thank you for being part of Arasimages for these many years. November 11, 2026.
If you are going to use this tutorial for stationery, cards or place the tutorial/tag on another site, I would appreciate you contacting me for permission, giving Arasimages credit for the original tutorial and if possible, a link back to my site. Thank you.
Copyright © Arasimages All Rights Reserved